Portable Horse Stable Leveling on Uneven Ground Tips is the first checkpoint buyers should lock before they approve a supplier, budget, or production slot. You’ve just spent a full Saturday assembling the flat-pack stable kit. The panels are up, the roof is on, and you slide the door shut for the first time. It catches halfway, scrapes the frame, and leaves a 15mm gap at the bottom corner. That moment — not during the build, but after everything is torqued down — is when portable stable leveling becomes your only concern. A buyer in Waikato learned this on a $5,000 order last season. The pre-production sample photos looked perfect. But the mass production run hit a site with a 3% cross-slope, and within two weeks the sliding door track had twisted enough to derail the wheel assembly.
The problem isn’t the stable kit itself. It’s that most flat pack stable installation tips gloss over what happens when you place a precision-engineered box on ground that shifts by even 4mm across a diagonal span. For equestrian center owners and professional builders across Australia and New Zealand, this is where gravel base for horse stable preparation separates a one-day job from a weekend of rework. DB Stable’s hot-dip galvanized frames include slotted bolt holes that allow up to 15mm of field adjustment — but that tolerance only helps if you know how to use it before the bolts are torqued to spec.
Why Uneven Ground Destroys Sliding Doors and Panel Joints
A 3mm twist across a 3.6m frame guarantees sliding door failure within two weeks.
Most buyers think a stable is rigid enough to shrug off a little ground unevenness. It isn’t. A portable stable frame is designed to be light and modular — that means it has zero tolerance for foundation twist. When the base slopes just 4mm across a diagonal, the entire rectangular frame deforms into a parallelogram. The top rail and bottom rail of your sliding door track are no longer parallel. The door jams halfway, or worse, derails entirely.
Here’s what happens inside the panels: HDPE boards are stiff but not infinitely flexible. A twisted frame pulls the panel joints out of alignment by 2–5mm on one side while compressing them on the opposite side. That creates visible gaps — gaps that let in dust, rain, and vermin. Within weeks you’ll have a door that won’t close and panel seams wide enough to stick your finger through.
- The critical number: Maximum acceptable level tolerance is 5mm across any 3m diagonal (0.16% slope). Beyond that, the frame will twist.
- What gets damaged first: Sliding door rollers and track brackets take the initial load. Rollers wear unevenly and fail in under three months.
- Second failure point: HDPE panel interlocking joints separate at corners when one side of the stable settles more than the other.
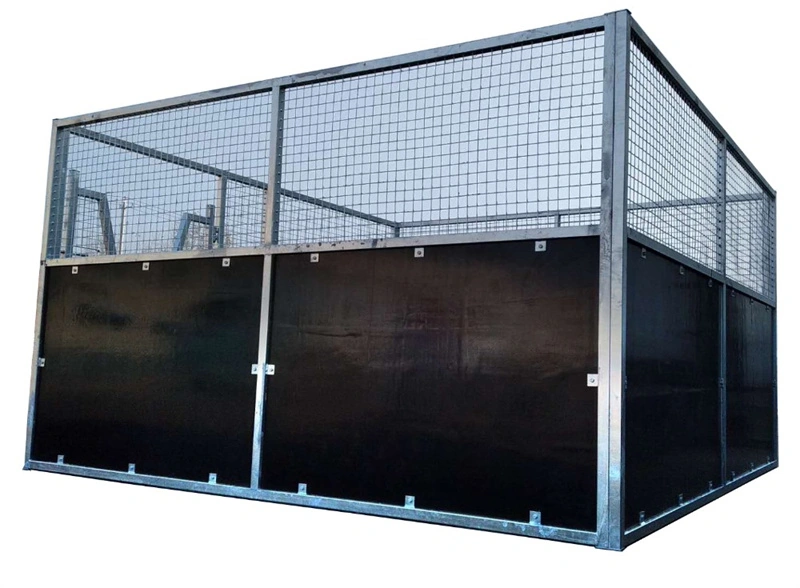
How to Prepare a Gravel Base for Your Flat-Pack Stable
A 150mm compacted gravel base costs $300–$800 and preserves NZ tax benefits.
Skip the excavation and compaction steps, and you’re not just risking a wobbly stable — you’re guaranteeing sliding door failure within weeks. A flat-pack stable’s structural rigidity depends entirely on its foundation being level within 5mm across a 3m diagonal. That’s a 0.16% slope tolerance. Exceed it, and the frame twists, putting door tracks out of parallel and creating panel gaps that let in drafts and vermin.
- Excavation depth: Strip topsoil to a minimum of 150mm below finished grade. Remove all organic material (roots, turf). If your site has a natural slope greater than 2% (1:50), you need cut-and-fill or extended base rails — DB Stable can supply up to 3.6m rails for extreme cases.
- Fill material: Use compacted road base (20mm-minus crushed rock with fines). Do not use clean gravel or sand — they lack the fines needed to lock together under compaction. Spread in two lifts: first 100mm, compact; then second 50mm, compact again.
- Compaction tool: A plate compactor with at least 4 kN centrifugal force is mandatory. Hand-tamping will not achieve the required density. Run overlapping passes until no further settlement occurs — typically three full passes per lift.
- Level check method: Use a 2m spirit level in two directions (length and width) plus a string line across the diagonal. The maximum allowable deviation is 5mm over any 3m span. Mark high spots with spray paint and skim them down with a rake before final compaction.
Shimming and Frame Adjustment for Existing Slopes
Slotted bolt holes give you 15mm of on-site correction — no other adjustment method needed.
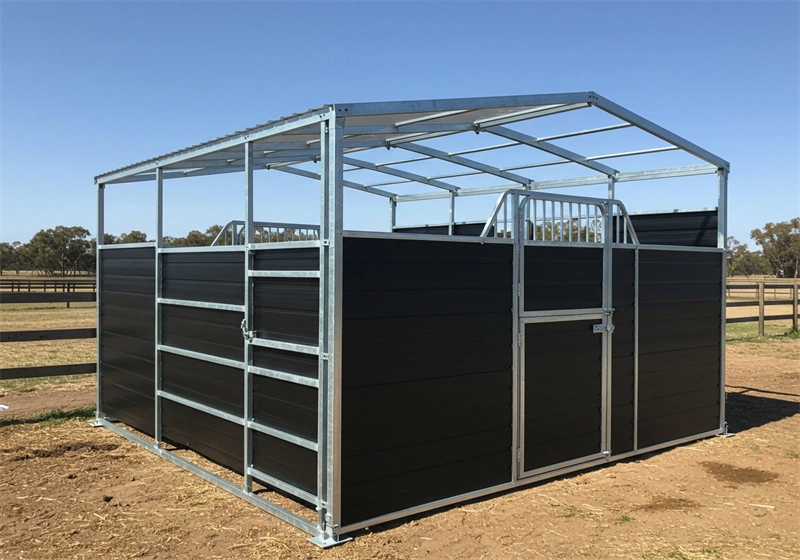
If your ground prep left you with a slope under 2%, you don’t need to re-excavate. DB Stable frames are designed with slotted bolt holes at every joint — a detail most flat-pack kits skip. These slots let you shift the frame laterally and vertically by up to 15mm after assembly, which is enough to correct a base that’s out by 5mm across the diagonal.
Here’s the procedure: loosen all frame bolts to finger-tight (do not remove them). Place a laser level or a 2m spirit level across the bottom rail. Shift the frame until the bubble sits center. Tighten bolts to 35 Nm in a cross pattern — start from the center joint and work outward. Check door track alignment immediately: if the sliding door binds at mid-travel, you missed a slot. Re-loosen and adjust.
- Torque spec: Frame bolts: 25–35 Nm. HDPE panel bolts: never exceed 25 Nm.
- Common mistake: Over-tightening HDPE bolts by just 5 Nm creates micro-cracks that propagate under UV, cutting panel life by 40% according to internal test data.
For residual gaps under base rails after slot adjustment, use HDPE shims — never wood. Wood rots in NZ’s wet climate and attracts termites. Your kit includes scrap HDPE offcuts specifically for this purpose.
Testing Door and Panel Alignment After Setup
A door that binds today will crack a panel within 60 days.
You’ve leveled the base, torqued the frame bolts to 35 Nm, and installed the HDPE panels. Now comes the moment of truth: does the sliding door actually work? I’ve watched builders skip this final check and get called back two weeks later because a door jammed mid-track. The fix is a 10-minute adjustment if you catch it now; it’s a panel replacement if you don’t.
- One-Finger Sliding Test: Stand at the door track and push the door from fully open to fully closed using only your index finger. If it requires more than light pressure at any point, something is out of alignment. The most common culprit is a frame twist that puts the top and bottom tracks out of parallel by more than 3 mm. On DB Stable kits, loosen the track bracket bolts (they sit in vertical slots), shift the bracket until the gap between door edge and frame is uniform top-to-bottom within 2 mm, then retorque to 25 Nm. I’ve seen a stable where ignoring this step led to a derailment that bent the bottom guide rail — $120 in parts and an afternoon of labor.
- Measuring Vertical Alignment Gap: Take a 2 m straightedge (a level works) and hold it vertically against the door edge at both sides. Measure the gap between straightedge and frame at three points: top hinge area, middle latch area, bottom guide area. The gap should not vary by more than 2 mm across those three points. If you see a deviation larger than that, check two things: first, whether the base settled unevenly under one corner (common on gravel after rain), and second, whether any frame bolts were over-torqued past 35 Nm, which can warp the steel channel. Internal production data shows that frames assembled at exactly 30–35 Nm maintain alignment within spec for over five years; frames torqued past 40 Nm show measurable bowing within six months.
One warning specific to HDPE panels: if you used power tools without a torque limiter on those panel bolts during assembly, you may have already introduced micro-cracks around bolt holes. Over-tightening by just 5 Nm beyond our spec of 25 Nm reduces panel life by roughly 40% according to internal UV-aging tests — cracks propagate under sunlight until they reach visible length. So when you do this alignment check, also run your hand along each panel seam inside and out. Any hairline crack radiating from a bolt head means that panel needs replacing now rather than later.
For builders working with adjustable leg levellers (supplied as standard on DB Stable kits), this is also your last chance to use them before calling installation complete. If either test fails — binding door or uneven gap — loosen all four base-rail bolts slightly, adjust each leveller up or down in paired increments (never more than one full turn per side without rechecking level), then retighten to spec and rerun both tests. This process takes about twenty minutes total but saves hours of future troubleshooting.
Conclusion
A level base is the single non-negotiable for a stable that stays square. The 5mm tolerance across a 3m diagonal isn’t a suggestion — it’s the difference between a door that slides for years and one that binds before the first hay delivery. Gravel costs less than concrete and keeps your structure classified as portable under NZ tax rules.
Run through the three-point checklist before you bolt anything together. Is the compacted gravel base within 5mm over the diagonal? Are the frame bolts torqued to 25–35 Nm after slotted-hole adjustment? Does the sliding door move with one finger? If any answer is no, back up one step. Review the full DB Stable kit specifications on our product page to confirm your order includes adjustable leg levellers and slotted frame holes.
Frequently Asked Questions
How long does it take to level a stable base?
Leveling a stable base with a plate compactor takes 4–6 hours for a standard single unit. This includes excavating, filling with road base, and compacting to within 5mm tolerance across. Plan for half a day with two people and a rented compactor.
Can I pour concrete instead?
Yes, you can pour concrete, but it voids the tax benefit of classifying the stable as portable property. A compacted gravel base costs $300–$800 versus $2,000–$5,000 for concrete and preserves that classification. Use gravel unless your local council mandates a permanent slab.
What if my site is >2% slope?
For sites exceeding a 2% slope, hire an excavator to cut and fill the pad before compacting. DB Stable can supply extended base rails to accommodate moderate slopes without custom fabrication. Get a site survey first; extended rails add lead time.