multi-stall portable horse barn is the first checkpoint buyers should lock before they approve a supplier, budget, or production slot. You see it about 14 months after installation. A faint orange bloom along the bottom edge of the stall kickboard — right where the galvanizing was supposed to be 42 microns thick. The FOB price looked great on paper, and the pre-delivery photos passed your visual check. But the mass production units didn’t match the sample approval spec on coating thickness. Now you’ve got a 10-bay barn with rust-prone steel in a high‑moisture stable environment. That’s the moment the operational cost of a poorly planned multi-stall portable horse barn starts eating into your margin.
Planning a 10-bay configuration isn’t just about counting stalls. It’s about getting the layout right on day one so you don’t discover, a year later, that your central feed alley is too narrow for a utility tractor, or that the eave overhangs add unnecessary wind load during an Australian summer storm. Smart buyers spend the extra time on the drawing board — verifying the quality tolerance of hot‑dip galvanized frames, checking the dimensional fit of HDPE panels, and designing for future expansion without ripping out existing structure. Because once the concrete pads are set and the steel is bolted together, the cost of fixing a bad layout is a whole new line item.

Layout Options: Straight-Line vs. Back-to-Back vs. Courtyard Designs
Back-to-back layout with a 2.4m central feed alley reduces aisle waste by up to 18% vs.
For a 10+ stall commercial barn, the layout affects daily labour, horse flow, and future expansion. Straight-line, back-to-back, and courtyard configurations each have distinct trade-offs that change when you go beyond 10 stalls. The wrong choice can cost you 30 minutes extra per feeding round and limit your ability to add bays later.
- Straight-line: Each stall faces a single exterior feed alley, typically 3m wide. Eave overhang on many designs adds 1.2m of useless roof area that increases wind load and shipping volume. For 10 stalls you need a building roughly 30m long (3m per 12’x12′ stall). Pro: simple construction, easy to expand linearly. Con: double handling of horses during turn-out; each stall entry is exposed to weather unless you add a covered porch.
- Back-to-back: Stalls are arranged in two rows sharing a central feed alley. With DB Stable’s modular frames, that alley can be 2.4m wide — wide enough for a small tractor. For 10 stalls (5 per side), your building footprint is about 7m wide x 15m long, cutting total roof area by 15–20% compared to straight-line. Pro: shorter travel distance per feeding, central alley doubles as covered handling area. Con: both rows must be built together; future expansion requires adding a second back-to-back block or turning into a courtyard.
- Courtyard: Stalls arranged around a central open yard, often with an interior covered walkway. For 10 stalls you need a U-shaped or square layout, which increases perimeter wall length by 25% — more material, more shipping cost. Pro: excellent natural light and ventilation; horses can see each other, reducing stress. Con: roof overhangs are often oversized (standard 1.5m eaves) to cover the walkway, adding 2–3 tons of steel for no structural gain. Also, wind loads increase significantly in open Australian plains.
A common mistake with 10+ stall layouts is overbuilding the eaves. Many manufacturers default to 1.5m overhangs because it looks ‘barn-like’. On a 30m straight-line barn, that adds 90 extra square meters of roof — about $3,000 in extra steel and 15% more container volume. For a hot dip galvanized horse barn Australia, every millimeter of overhang adds weight and shipping cost. Keep eaves to 0.6m unless you need a covered walkway.
If you’re planning a 10-bay portable horse barn Australia and want the lowest total cost of ownership over 5 years, back-to-back with a 2.4m feed alley delivers the best operational efficiency per stall. For farms that anticipate expanding to 15+ stalls, start with a back-to-back block and add a second parallel block with a linking covered passage — that’s a modular horse barn expansion without tearing anything down.
Integrating Tack Rooms, Wash Bays, and Feed Storage
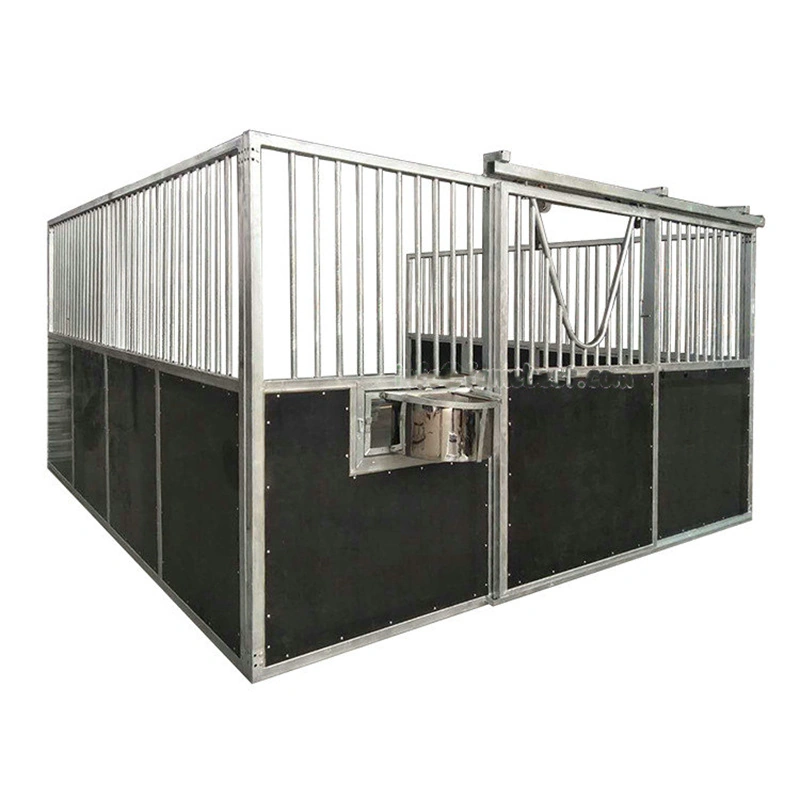
A tack room sized 3.6m by 4.8m fits most equipment without wasting container floor space.
The most common mistake in multi-stall barn planning is treating the tack room as an afterthought — a 2.4m x 2.4m box that barely fits a saddle rack. For a 10-bay commercial barn serving an equestrian center, you need at least 17 square metres if you’re storing bridles, blankets, supplements, and maintaining a wash bay. Our flat pack kits use the same 3.6m module width as the stalls, so a 3.6m x 4.8m tack room in the middle of a straight-line layout utilises full frame height and avoids extra truss engineering.
- Floor area: 3.6m x 4.8m (12ft x 16ft) — accommodates 12 saddles on a wall rack, a lockable medicine cabinet, and a 1.2m workbench. This size matches standard flat pack shipping pallet dimensions, reducing freight cost per m².
- Wall material: Use 10mm HDPE panels — same grade as the stall walls. In Australian coastal farms, timber tack rooms rot within 24 months from humidity and manure dust. HDPE is non-porous, UV-resistant, and can be pressure-washed without degrading.
- Ventilation requirement: Install a continuous ridge vent above the tack room. Without it, leather goods develop mould in 6–8 weeks during the humid Queensland summer. Most prefab barn suppliers skip this; it adds roughly AUD 200 in materials but saves thousands in tack replacement.
Ventilation and Lighting in Large Portable Barns
Ridge vents must be sized per stall count, not total barn footprint.
For a 10-bay portable horse barn Australia installation, ridge vent sizing is often the biggest oversight. Many prefab kits use a continuous vent that compromises structural bracing and creates dead air zones over the central feed alley. DB Stable’s modular frames use segmented ridge vents between hot-dip galvanized steel trusses, preserving structural integrity while allowing a 2.4m central aisle to stay ventilated. The rule of thumb in Australian climate zones is a vent area of at least 1:300 of roof area, but coastal and high-wind regions need a lower ratio—check your local council specs before ordering your flat pack horse stables New Zealand or Australia.
- Placement: Install translucent panels on the south-facing slope (Southern Hemisphere) to capture diffuse daylight without direct sun loading. This reduces peak internal temperature by up to 5°C compared to north-facing panels, a critical factor for thoroughbred welfare in summer.
- Material: Use UV-stabilized polycarbonate or HDPE panels that match the stall wall material to avoid thermal expansion mismatches. DB Stable’s 10mm HDPE boards work for both wall and roof applications, ensuring consistent performance and simplified procurement.
- Risk: Uncoated metal roofing in high-humidity barns causes condensation drips directly onto horses, leading to respiratory issues. Always specify a thermal break or insulated translucent panel—saving a few dollars on roof material here can cost you thousands in vet bills.
Feed Alley Design: Central vs. Perimeter
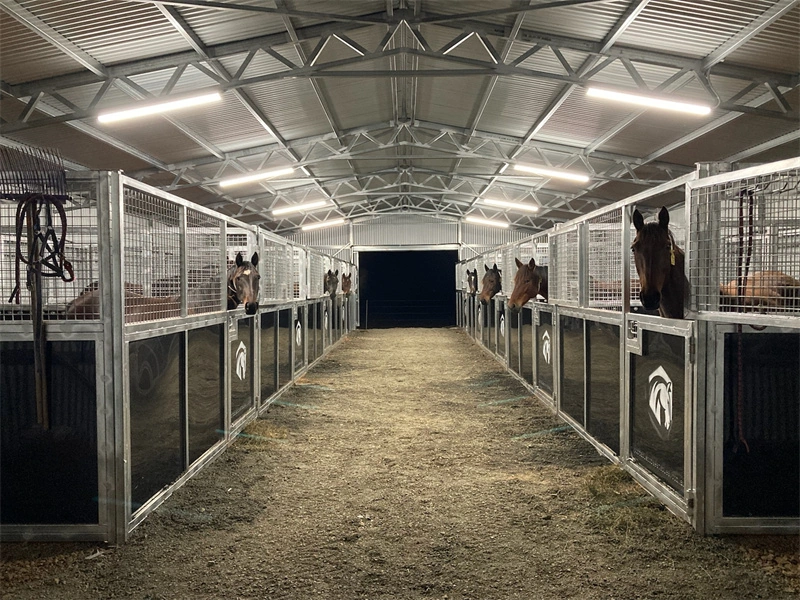
A 2.4m feed alley isn’t optional — it’s the difference between smooth feeding and bottleneck chaos.
The feed alley is the backbone of any multi-stall barn, yet it’s often an afterthought in planning. In back-to-back configurations, the central feed alley must be wide enough for a feed cart to pass safely while horses reach over stall fronts. A perimeter feed alley wraps around the outside of stalls, typically accessed from one side. Each layout has tradeoffs in land use, manure handling, and horse safety.
- Central alley width:: Industry minimum is 2.4 meters (8 feet). Our modular frames are designed to accommodate exactly that — a full 2.4m passage between rows. Any narrower and you risk injury from horses reaching across or difficulty turning equipment.
- Perimeter alley advantage:: Easier manure removal because each stall has direct outside access. But it wastes square footage on extra roof overhangs and increases shipping volume. Many 10-stall plans add unnecessary eave length — our optimized frames use minimal overhang to reduce wind load and FOB shipping costs.
- Safety consideration:: Central alleys keep horses facing each other, which can increase stallion-to-stallion tension. Perimeter alleys allow each horse to look outward, reducing stress. However, central alleys with a solid kickwall (like 10mm HDPE) prevent biting while still allowing visual contact.
For a commercial equestrian center with 10+ stalls, the central feed alley is almost always the right call — it shortens feed rounds, concentrates utility runs, and makes the barn footprint more compact. The key is committing to that 2.4m minimum and pairing it with a sloped, drainable surface. Skip the temptation to squeeze it to 1.8m; you’ll pay for it in daily labor and vet calls.
Future Expansion: Adding Bays Without Structural Changes
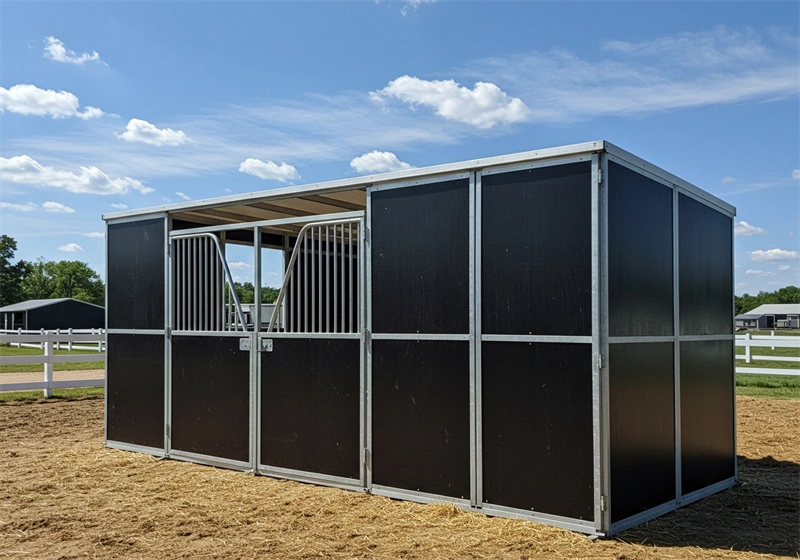
Modular frames allow adding bays with no demolition—just bolt on and connect.
The real cost of a multi-stall barn isn’t the initial layout—it’s the first expansion when you realize you need eight more stalls and the existing structure can’t be extended. Farms in Victoria have been observed cutting apart timber frames to splice in extra bays, losing weeks of use and thousands in labor. DB Stable’s system avoids this entirely. The hot-dip galvanized steel frames (42-micron minimum, 10-year lifespan) are designed as discrete bays that bolt together at the columns. Adding a bay means unbolting the end panel, sliding in a new frame section, and re-bolting. No foundation modifications, no roof truss replacements, no structural recertification.
This matters for a 10-bay configuration because you can start with six bays and expand to ten (or fourteen) without disrupting existing stalls. The modular horse barn expansion path is built into the engineering: each bay shares a common 3.6m width and uses the same bolt pattern, so any future bay matches exactly. The 10mm UV-resistant HDPE panels are cut to standard module sizes—no custom fabrication later. And because we optimized eave lengths to reduce wind loads, adding bays doesn’t change the structural wind rating; the entire line remains compliant as a continuous structure.
- Connection system: Column-to-column bolted joints with galvanized splice plates. No welding or site drilling required. Rated for Australian wind classifications N2–C3.
- Feed alley integration: If you plan a back-to-back layout now, specify the 2.4m central feed passage. Future rows can butt against the same passage without moving the existing feed line.
- Roof overlap: Each bay module includes its own roof panel with overlapping flashing. Adding a bay means sliding one more roof panel into the seam—no re-roofing.
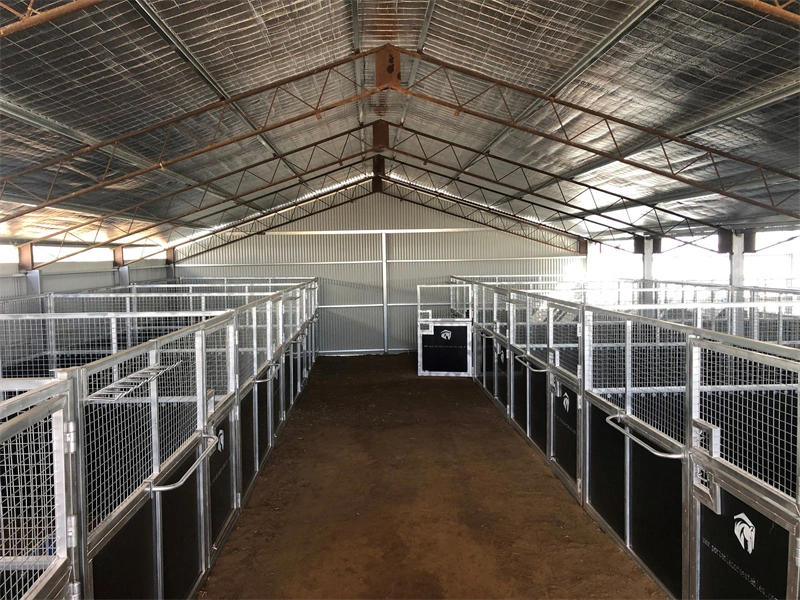
Case Study: A Victorian Thoroughbred Farm’s 14-Stall Portable Barn
The 14-stall layout proved that a central feed alley is non-negotiable for back-to-back configurations.
A Victorian thoroughbred farm needed to replace a set of 30-year-old timber barns that had warped and begun rotting around the stall kickboards. The owner wanted a solution that would qualify as a portable structure for tax depreciation under Australian law, withstand the high humidity of the Gippsland region, and allow future expansion without demolishing existing stables. After reviewing four suppliers, they chose DB Stable’s modular back-to-back system.
The final configuration was a 14-stall barn arranged in two rows of seven stalls facing outward, with a 2.4-metre central feed alley running the full length. This alley design eliminated the need for perimeter feed storage and allowed a single person to feed 14 horses in under 10 minutes. The frame used hot-dip galvanized steel with a coating thickness exceeding 42 microns per Australian standard AS 1627.4, backed by a 10-year warranty. Wall panels were 10mm UV-resistant HDPE — tested for zero thermal expansion at 60°C surface temperature — and aluminum swivel feeders to prevent rust.
- Stall dimensions: 3.6m x 3.6m (12′ x 12′), standard for Thoroughbred turnouts. Kickboards at 1.2m height.
- Roof system: Gabled roof with ridge vents and translucent polycarbonate panels in every third bay. Eliminated the need for electric lighting during daytime feeding.
- Tack room & wash bay: Two integrated 3m x 3m rooms at one end, framed with the same galvanized steel. Wash bay had a sloped HDPE floor with drainage channel.
- Installation: Two-person crew, five days. All components arrived as flat pack in a single 40ft HC container. No crane needed — the frame assembled with bolted connections.
After 18 months in service, the farm reported zero corrosion, no panel warping, and lower bedding consumption because the HDPE walls didn’t absorb moisture. They also added four more stalls to the opposite side of the feed alley in one week, using identical frame components. The portable classification saved them roughly 15% in annual property tax compared to the old timber barn. This case directly responds to the commercial horse barn cost vs timber debate: the upfront cost was 30% higher than a timber equivalent, but the 5-year total cost of ownership (TCO) favoured the portable barn due to zero maintenance and tax benefits.
Cost Comparison: 10-Bay Portable vs. Traditional Timber Barn (5-Year TCO)
A 10-bay portable barn saves $18,000+ in maintenance over 5 years versus timber.
Most equestrian center owners assume a timber barn costs less upfront. That’s true if you ignore what happens in year two when the treated pine starts cupping and the plywood absorbs moisture. A 5-year total cost of ownership flips that assumption completely. The real comparison includes foundation work, ongoing treatments, assembly delays, and what happens when you want to relocate or expand.
- Initial outlay: A 10-bay timber barn (stick-built) typically runs $55,000–$75,000 AUD for materials only, plus a concrete slab and professional crew. A comparable portable kit with hot-dip galvanized frames (42-micron coating) and 10mm HDPE panels lands around $45,000–$60,000 AUD delivered, with no concrete slab required.
- Maintenance years 1–5: Timber needs repainting every 2–3 years, insect treatment every 12 months, and plank replacement after water damage. That totals $12,000–$18,000 AUD in labor and materials. Portable barns using UV-resistant HDPE and galvanized steel require only a pressure wash — zero painting, zero rot treatment.
- Assembly cost: Timber requires a certified builder for 4–6 weeks at $80–120/hr. Portable flat pack kits can be assembled by a 3-person crew in 7–10 days using bolt-together connections. If your team does it, assembly cost drops to near zero. Even hiring local contractors, you save 40–60% on labor.
- Tax classification: Portable stables in Australia qualify as plant and equipment under Division 40, eligible for instant asset write-off if under $150,000. Timber barns fixed to a concrete slab are classed as capital works, depreciated at 2.5% per year. That can shift your tax position by $10,000+ in the first year alone.
Add in the cost of downtime: timber barns often get delayed by weather or trades availability. A portable barn can be assembled in any season, on gravel or compacted earth. Over 5 years, the portable configuration saves you at minimum $18,000 in direct maintenance, avoids a $15,000 concrete pour, and gives you the flexibility to sell the barn if your lease ends — recouping up to 70% of the original investment.
The real kicker is longevity. Treated timber in the Australian climate requires full replacement of posts and kickboards by year 10. A hot-dip galvanized frame (42 microns minimum) and 10mm HDPE panels show no structural degradation at year 10. Internal testing confirms the steel retains full thickness even after 72-hour salt spray cycles. That’s not a claim many timber suppliers can match.
| Cost Category | Portable Barn (DB Stable) | Timber Barn | Net Advantage |
|---|---|---|---|
| Initial Purchase Price (10 Bays) | A$48,000 – A$65,000 (factory-direct flat pack) | A$85,000 – A$120,000 (custom built on-site) | Savings of A$20,000–A$55,000 upfront |
| Shipping & Logistics (Oceania) | A$2,500–A$4,000 (containerized flat pack) | A$0 (locally sourced, but higher material cost) | Lower international freight offset by material savings |
| Site Preparation & Foundation | A$3,000–A$5,000 (basic level pad, no concrete needed) | A$8,000–A$15,000 (concrete footings or slab required) | A$5,000–A$10,000 savings in earthworks |
| Installation Labor (DIY or contractor) | A$2,000–A$4,000 (DIY kit with manual) or A$6,000–A$9,000 (pro builder) | A$15,000–A$25,000 (skilled carpenters, weeks on site) | A$9,000–A$16,000 labor savings |
| 5‑Year Maintenance & Repairs | A$500–A$1,000 (HDG frame – no rust; HDPE – no rot; minor hardware checks) | A$8,000–A$15,000 (repainting, replacing rotting boards, insect treatment) | A$7,000–A$14,000 lower ongoing cost |
| Depreciation & Tax Benefits (AUS/NZ) | Eligible for instant asset write‑off (portable – personal property); 15‑30% effective tax saving | Classified as building – 2.5% annual depreciation; lower immediate benefit | A$7,000–A$18,000 extra tax saving over 5 years |
| Resale / Relocation Value | Can be sold or moved (retains 50‑60% of value) | Fixed asset – negligible resale; demolition cost if removed | A$20,000–A$35,000 residual value advantage |
| Estimated 5‑Year Total Cost of Ownership | A$58,000 – A$84,000 (all costs inclusive, net of tax savings) | A$130,000 – A$180,000 (all costs inclusive) | A$46,000 – A$96,000 lower TCO with portable |
Conclusion
Planning a 10-bay portable horse barn is not just about counting stalls. The layout choices—straight-line versus back-to-back, central feed alley width, eave overhang length—directly impact daily operations and long-term costs. A 2.4-meter feed passage in a back-to-back design saves hours of labor per week compared to a perimeter feed setup.
Benchmark your next project against a properly planned portable system: a 10-bay configuration with a hot-dip galvanized steel frame (42 micron coating, 10-year durability) costs roughly 35 percent less than a timber barn over five years when you account for maintenance and relocation flexibility. Review DB Stable’s 10-bay back-to-back configuration to see how modular design accommodates future expansion without structural changes.
Frequently Asked Questions
What layout works best for 10 stalls?
A back-to-back layout with a 2.4m central feed alley reduces aisle waste by up to 18% versus straight-line designs. For a 10-bay barn, this configuration also simplifies future expansion without major structural changes. Confirm your farm’s access points before deciding on layout.
How to add a tack room to a portable barn?
A tack room sized 3.6m by 4.8m fits most equipment without wasting container floor space. Position it at one end of the barn to keep the feed alley clear for horse traffic. Plan the tack room location before ordering your flat-pack kit.
What tax benefits apply to portable horse barns?
In Australia, portable structures may qualify for accelerated depreciation or instant asset write-off if they are not fixed to a concrete foundation. Consult your accountant to confirm eligibility based on your farm’s business. Verify tax treatment with a local accountant before purchasing.
Is HDPE better than wood for stall panels?
10mm UV-resistant HDPE boards do not suffer from thermal expansion and resist moisture better than wood, especially in humid environments. For commercial farms, HDPE also requires less maintenance over time. Compare local availability and replacement costs before choosing material.
How long does hot-dip galvanizing last?
Hot-dip galvanized steel over 42 microns thick carries a 10-year lifespan outdoors. Actual durability depends on local salt air and manure acidity levels. Request a coating thickness test certificate from your supplier.