diy stable kit assembly time is the first checkpoint buyers should lock before they approve a supplier, budget, or production slot. The buyer’s checklist looked solid: FOB pricing locked, sample approval signed off, quality tolerance agreed at 2mm. Then the $50K order landed on site and the door panels didn’t align. The pre-production sample was perfect, but the mass production run had shifted the bolt hole pattern by 3mm. That’s when the real DIY stable kit assembly time clock starts ticking — not the 2 hours the brochure promised, but the 4 to 6 hours a two-person team actually spends fighting misaligned frames and re-drilling holes.
Most stable builders can quote a single stable install in their sleep. But the gap between a kit that goes together in half a day and one that eats a full shift comes down to things nobody checks on paper: whether the frame panels are pre-welded or bolt-together, whether the hardware pack is color-coded or a bag of identical zinc-plated fasteners, and whether the foundation was actually leveled before the truck arrived. Skip those details, and the labor time for a DIY stable kit in Australia can balloon by 30 percent on a 12-stable project. That’s not a delay — that’s a margin hit.
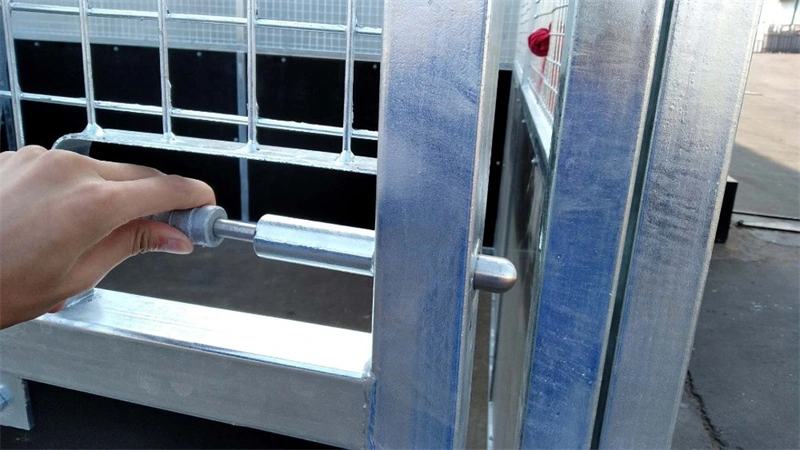
Why Assembly Time Matters for Your Bottom Line
Every hour of assembly time is a direct cost against your project margin.
A professional stable builder in Australia charges between AUD 65 and AUD 95 per hour. If a cheap DIY kit takes 8 hours to assemble instead of the advertised 4, that’s not just an inconvenience — it’s AUD 260–380 of extra labor cost per stable. Multiply that across a 12-stable project and you’re looking at over AUD 4,500 in unplanned labor. That’s money that comes straight out of your margin.
The hidden cost of idle labor
When a kit arrives with misaligned bolt holes or missing fasteners, your crew isn’t building stables — they’re waiting for parts or drilling new holes on-site. A study of prefab stable installations in Queensland found that cheap kits with poor tolerance matching added an average of 1.8 hours of on-site fabrication per stable. At AUD 80/hour blended crew rate, that’s AUD 144 per stable in pure waste.
- Labor waste scenario: Two-person crew on a quadruple block install: budgeted at 16 hours but actual time hits 22 hours due to door alignment issues and re-drilling holes. Extra labor cost: AUD 480.
- Opportunity cost: Every day your crew spends fixing a poorly designed kit is a day they could be starting the next paying project. One lost day per month costs roughly AUD 1,200–1,600 in billable hours over a year.
How pre-welded frames change the math
DB Stable uses pre-welded frame panels that eliminate roughly 40% of the bolt connections found in full bolt-together kits. Internal assembly data shows this reduces total installation time by 25–30% compared to conventional flat-pack models. For a single stable with roof, that means completing the job in under 4 hours instead of pushing past the lunch break into overtime rates.
Pre-welded frames also remove the most common delay trigger: mismatched hole patterns between frame sections. When panels arrive already welded into correct geometry, there is zero guesswork during assembly. The crew simply bolts pre-aligned sections together and moves to the next unit.
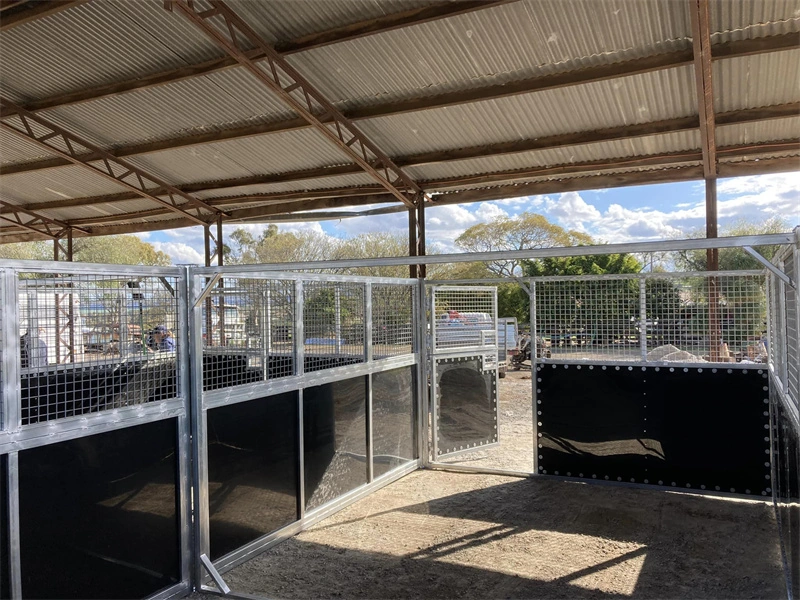
Average Assembly Times by Kit Type
A single stable with roof takes 4–6 hours for a two-person team — not the 2 hours some kit sellers claim.
That gap between marketing and reality costs you money. If you quote a client a 2-hour install and your crew lands on site, only to spend 6 hours wrestling door alignment and foundation leveling, you just burned 4 billable hours. On a multi-stable project, those hours compound fast.
Single Stable with Roof: 4–6 Hours
This is the baseline configuration. A flat pack horse stable assembly time of 4–6 hours assumes the concrete slab is level within 10mm across the footprint and the panels are labeled correctly. The first hour goes to layout and hardware sorting. The next two cover frame assembly and panel mounting. The last hour is door installation, roof attachment, and final hardware torque checks.
Door alignment eats up about 45 minutes of that total. Cheap kits often arrive with pre-drilled holes that don’t match the hinge plates, forcing your team to re-drill on site. That’s lost time you can’t recover.
Back-to-Back Double: 8–12 Hours
Doubling the configuration doesn’t simply double the time — shared walls reduce some repetition, but roof integration and center post alignment add complexity. Expect a full day for two experienced builders working steadily.
Quadruple Block: 16–24 Hours
| Kit Type | Team Size | Estimated Assembly Time | Key Time Drivers | DB Stable Advantage |
|---|---|---|---|---|
| Single Stable with Roof | 2-person team | 4–6 hours | Door alignment, foundation leveling | Pre-welded frames reduce bolt count by 40% |
| Back-to-Back Double | 2-person team | 8–12 hours | Hardware sorting, panel alignment | Color-coded packs save 30 minutes |
| Quadruple Block | 2-person team | 16–24 hours | Site prep, multiple door installations | Labeled panels ensure tolerance matching |
| 12-Stable Install (Case Study) | 2-person team | 3 days (approx. 72 hours) | Sequential assembly, foundation work | 5-year design team eliminates on-site fabrication |
Key Time Drivers
Foundation prep alone can add 2 hours if skipped — and that’s before the first panel goes up.
Foundation Leveling and Base Preparation
Most builders rush the ground prep. A 10mm slope across a 3.6m stable panel throws door alignment off by more than the hinges can compensate. That means shimming, re-drilling, or pulling panels apart after they’re bolted together. On a single stable, proper leveling takes 45–60 minutes with a laser level and compacted gravel base. Skip it, and you add at least an hour of rework later.
For back-to-back doubles or quadruple blocks, the math compounds. A 12m x 12m pad needs fall less than 15mm across the entire footprint. That’s not a shovel-and-eye job — that’s a string line, laser level, and plate compactor. The site prep time for horse stable kit installations in Australia often runs longer because sandy or clay soils shift under load unless properly compacted.
Hardware Sorting – Why a Parts Checklist Saves 30 Minutes
A typical single stable kit ships with six different bolt sizes, four washer types, and two nut grades. Dumping them all in one pile forces your team to stop every few minutes to match fasteners against the manual. That scavenger hunt costs 20–30 minutes per stable — time you’re paying for at $50–$80 per hour per person.
A pre-printed parts checklist lets one person sort hardware into labeled bins while another starts panel layout. The total sorting time drops to under ten minutes. Cheap stable kits often skip this entirely — bags arrive mixed with no labels, which is a major cause of cheap stable kit missing bolts time waste that stalls an entire crew.
Door Assembly and Alignment – The Trickiest 45 Minutes
The sliding door on a prefab stable is where most assembly errors concentrate. The track must sit dead-level across its full width — a 3mm twist at one end causes the door to drag or jam on its runner. Aligning the hangers, fitting the guide rail at the bottom, and setting the latch plate takes roughly 45 minutes for an experienced team.
Door alignment time DIY stable builders report as the single biggest frustration point because it exposes any tolerance stacking from earlier steps. If the frame panels shifted during bolt-up by even 2mm, the door opening becomes slightly out-of-square — and no amount of track adjustment fixes that without loosening half the structure.
Common Time Wasters in Cheap Kits
Misaligned holes and missing bolts can add 2+ hours to a single stable install.
Misaligned bolt holes and on-site fabrication
A cheap kit arrives with panels that were punched on a worn-out die. The hole centers are off by 3-5mm. You line up the frame, and the bolts won’t thread. Now you’re on your knees with a round file or a drill, reaming out each hole. On a single stable, that adds 30-45 minutes. On a quadruple block, you’re looking at two to three hours of corrective work.
Some builders grab an angle grinder and slot the hole. That works in the moment, but it strips the galvanized coating off the exposed steel edge. In coastal Australian conditions, those uncoated spots start rusting within six months. The buyer blames the installer, not the kit supplier.
Missing or incorrect fasteners
The second time sink is even more predictable: incomplete hardware packs. A budget kit ships with M10 bolts for the main frame but includes M8 nuts mixed into the bag. Or it provides 40 bolts when the manual says you need 52. The crew stops work, calls the supplier, waits for email photos to confirm what’s missing, then either sends someone to the local hardware store or waits days for replacements.
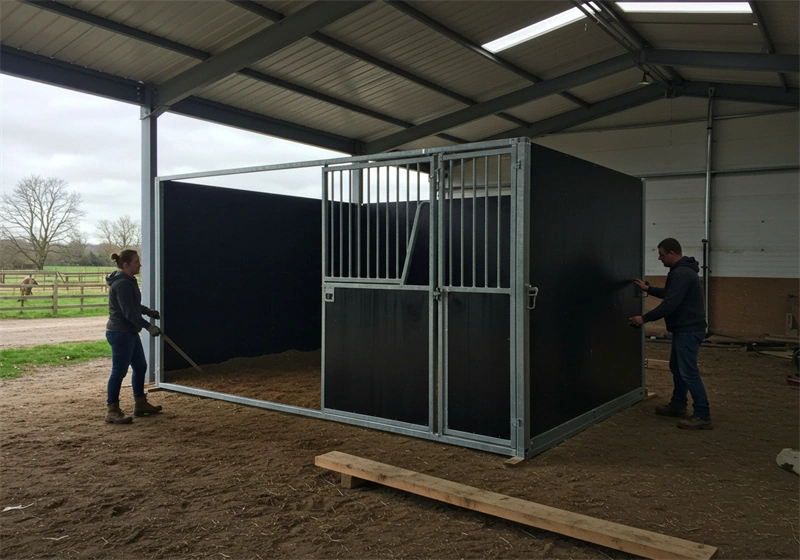
How DB Stable Kits Reduce Assembly Time
Pre-welded frame panels cut bolt count by 40% and reduce total assembly time by 25–30%.
Most cheap stable kits arrive as a pile of loose steel bars. Every single connection point requires a bolt, a nut, two washers, and the labor to align and tighten it. On a standard single stable, that adds up to roughly 180 separate bolt connections. A two-person crew spends about 45 minutes just threading and torquing those joints.
Pre-welded frames eliminate 40% of bolt connections
DB Stable kits ship with the main structural panels already welded at the factory. The door frame, the roof trusses, and the corner posts come as single-piece assemblies. Instead of bolting each bar individually, you align four pre-welded panels and secure them at key junction points. That drops the total bolt count from around 180 down to roughly 108 per single stable.
The time saving is not theoretical. Internal production data shows that pre-welded frames shave about 35 minutes off assembly for a single unit compared to full bolt-together models. For a back-to-back double configuration, that saving doubles because you eliminate twice as many loose connections.
Color-coded hardware packs and labeled panels
Another hidden time drain in cheap kits is hardware sorting. Every stud finder or professional stable builder has spent at least 20 minutes on-site sorting through unlabeled bags of bolts trying to match thread pitch and length. DB Stable labels every panel with a sticker matching its position in the exploded diagram.
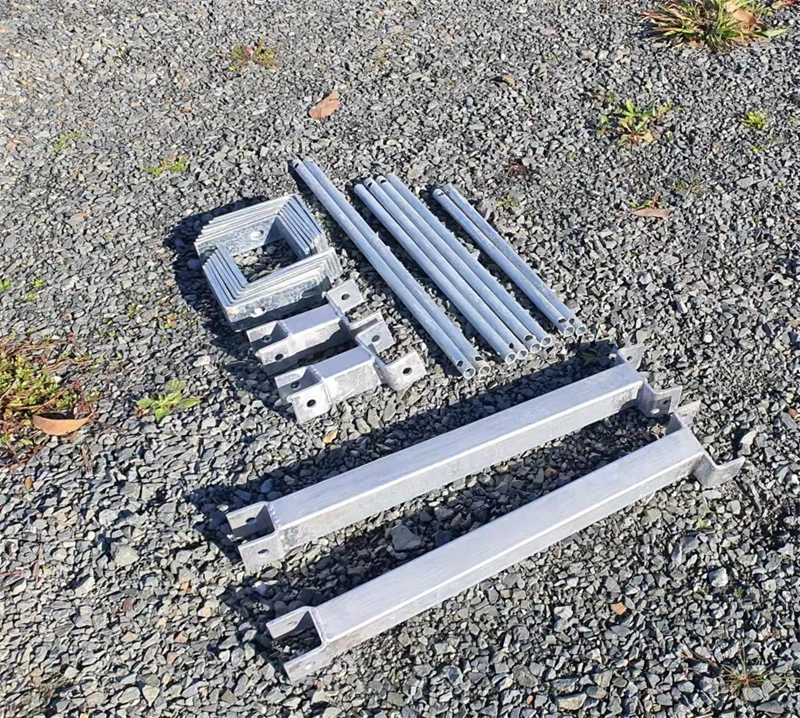
Real-World Case: 12-Stable Install in 3 Days
A 12-stable install completed in 3 days, not the promised 1.5 — the gap was site prep and hardware sorting.
A contractor in Victoria took on a 12-stable flat-pack project for a new equestrian center. The supplier quoted 1.5 days for a two-person crew. Real-world assembly took three full days. The difference cost the contractor $2,400 in unplanned labor and pushed back the barn roofing schedule by a week.
Where the time actually went
- Foundation prep: The site had a 4-inch grade across the stable footprint. Leveling consumed half of day one — about 4 hours that weren’t in the supplier’s estimate.
- Hardware sorting: The kit arrived with all bolts and brackets in one unlabeled bag. Sorting and matching consumed another hour per stable block — 12 hours total across the project.
- Door alignment: Six of the twelve doors needed shimming because bolt holes on the frame panels were off by roughly 2mm. Each door adjustment added about 20 minutes.
What pre-welded frames would have changed
Conclusion
A 4-hour assembly claim on a spec sheet rarely survives contact with a real site. Door alignment, foundation prep, and hardware sorting add 30–60 minutes each, turning a single stable into a 6-hour job and a quadruple block into a full two-day project. The difference between a kit that delivers on its time promise and one that doesn’t comes down to engineering decisions made before the parts were packed.
- Single stable install averages 4–6 hours for a 2-person team.
- Pre-welded frames cut bolt count by 40% and save 25–30% total time.
- Foundation leveling is the most underestimated time driver.
- Color-coded hardware and labeled panels eliminate 30 minutes of sorting.
Before you commit to a bulk order, run a simple test: ask the supplier for the exact assembly time breakdown for a single stable with roof, including site prep and door alignment. Then compare that against the pre-welded frame option from DB Stable, where the frame panels arrive ready to bolt rather than requiring full assembly. Review the back-to-back portable stable configuration on the product page to see how the design team’s tolerance matching translates into a faster install for your crew.
Frequently Asked Questions
How long does it take to assemble a DIY stable kit?
A single stable with roof takes 4–6 hours for a two-person team. Back-to-back doubles run 8–12 hours, and quadruple blocks take 16–24 hours. Always budget extra time for foundation prep.
What slows down assembly the most?
Foundation leveling and base preparation are the biggest time sinks, often adding 2 hours before the first panel goes up. Door alignment is another common bottleneck that can take 45 minutes alone. Pre-level your site to avoid costly delays.
Do cheap kits take longer to assemble?
Yes, cheap kits often have misaligned bolt holes and missing fasteners, forcing on-site fabrication that adds hours. Premium kits with pre-welded frames and color-coded hardware eliminate 40% of bolt connections and save significant time. Inspect a sample kit before bulk ordering.
How does DB Stable reduce assembly time?
DB Stable uses pre-welded frames that cut bolt connections by 40% and includes color-coded hardware packs with labeled panels. Their 5-year design team ensures tolerance matching so panels fit without adjustment. Request a sample kit to verify fit before committing.
Can one person assemble a DIY stable kit?
A single stable with roof is designed for a two-person team, so one person will struggle with panel alignment and heavy lifting. For safety and speed, always plan for at least two. Hire a second person or a contractor for the job.