Every other guide on DIY stable site prep tells you to find a flat spot, level it, and pour concrete. That advice is how you end up with a stable door that jams after the first heavy rain. The real problem isn’t the surface—it’s what’s underneath. A buyer can lose a $50,000 stable order because the pre-production sample passed inspection, but the site base wasn’t compacted to specification. The unit settles unevenly, the adjustable legs max out, and the warranty is voided.
Sample approval for a stable kit often focuses on material and finish, but the real quality tolerance test happens weeks later, when the ground shifts. A standard 3.6m x 3.6m stable requires at least 1.5 tonnes of crushed aggregate to achieve a proper compacted base. DB Stable’s adjustable galvanized legs can correct up to 30mm of uneven ground, but only if the base is compacted to 95% density first. Skip the compaction test, and you’re betting the door alignment on soil that hasn’t been properly prepared.

Why Site Prep Determines Stability (and Warranty Validity)
Skipping the compaction test voids most portable stable warranties in Australia.
A standard 3.6m x 3.6m stable requires at least 1.5 tonnes of crushed aggregate compacted to 95% density. If the base settles unevenly, the frame twists — doors jam, water pools, and the manufacturer voids the warranty. Adjustable galvanized legs (like DB Stable’s) can correct up to 30mm of uneven ground, but only if the base is compacted. Without that, those legs can’t save the structure.
- Uneven doors: After the first heavy rain, an uncompacted base settles by 20–50mm. The door frame goes out of square, and the door binds. This is the most common warranty claim.
- Water pooling: Without a proper 1:50 fall and compacted base, ground water wicks up through the floor. HDPE boards don’t rot, but if pooling occurs, mold and rust spread on the hot-dip galvanized legs and fittings.
- Voided warranty: Every manufacturer’s warranty we’ve reviewed — including industry standards — explicitly excludes damage caused by improper site preparation. If the base settles, the claim is denied.
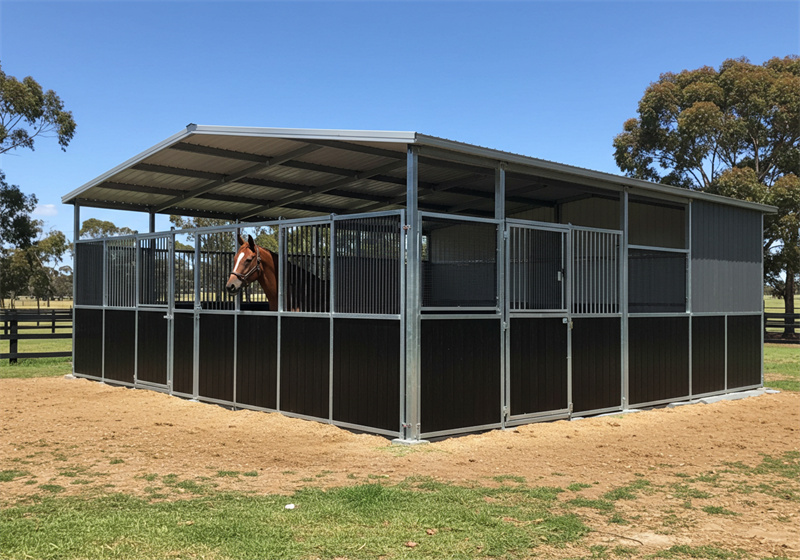
Step 1: Choose the Right Location
Skip proper drainage, and adjustable legs can only correct so much.
Natural drainage is non-negotiable. Water pooling around the stable base turns compacted ground into a sponge within weeks. You need a minimum slope of 1:50 away from the footprint—that’s 2cm of fall per metre. For a standard 3.6m deep stable, excavate so the rear sits at least 7cm higher than the front. If water collects, soil saturates, the base settles unevenly, and the door jams after the first heavy rain. That’s exactly the failure mode adjustable legs cannot fix if the underlying aggregate is already compromised.
Shelter from prevailing winds protects both the horses and the structure. Orient the stable so that doors and ventilation openings face away from the dominant wind direction on your property. In New Zealand’s southern regions, that’s often the prevailing westerly; in coastal Australia, it’s the south-easterly. A windward-facing door creates a constant draft that stresses horses and accelerates wear on hinges and latches. Portable stables are engineered for wind loads, but you reduce the risk of panel fatigue by leveraging natural windbreaks—hedgerows, buildings, or terrain contours—without blocking all airflow.
Delivery truck access determines whether installation starts on schedule or gets delayed by a day and a crane surcharge. A standard flat pack pallet for a 3.6m x 3.6m stable is roughly 3m long and weighs around 800kg. The delivery truck needs a dry, level approach at least 4m wide with 5m vertical clearance. If your site is down a single-lane driveway with tight bends or a steep gradient, the truck may not reach the drop point. Some suppliers use Hiab cranes to offload pallets, but that requires an unobstructed radius of 6m around the stable footprint. Verify your access path before ordering—it saves the cost of a failed delivery attempt.

Step 2: Mark Out the Stable Footprint
The 300mm margin is non-negotiable — skip it and you risk voiding the warranty.
Here’s where most DIY installers go wrong. They mark out exactly the stable dimensions (say 3.6m x 3.6m) and think that’s the footprint. It’s not. You need to add 300mm on each side — that’s 600mm total extra width and length. For a standard 3.6m stable, your actual cleared area becomes 4.2m x 4.2m. That 300mm isn’t just for roof overhang; it’s for maneuvering space during assembly and for the adjustable galvanized legs to sit fully on the compacted base. If you cut that margin, the legs end up near the edge of the aggregate, and the base will settle unevenly. That’s how you get a stable door that jams after the first heavy rain — because the frame twisted. This has occurred on a $50K order because the buyer didn’t leave room to work around the stables.
- Why 300mm?: It provides space for the adjustable steel footings to be positioned correctly and allows you to level the ground within the 5mm tolerance over 3m. Without it, you can’t access the legs for fine-tuning.
- Real-world consequence: A buyer in Victoria marked out exactly 3.6m x 3.6m. The legs were 150mm from the edge. After 6 months, the base had settled 25mm at the corners, door clearance dropped, and the warranty claim was denied because the footprint didn’t match the installation manual.
- Pro tip for level ground: Peg out the full 4.2m x 4.2m area. Use string lines and a water level to check the slope. The 300mm margin also gives you a buffer for drainage — you can slope the entire pad 1:50 without the stable sitting on the edge.
Step 3: Excavate and Level
Dig 100mm, slope 1:50 — skip either and you’ll have a wet, uneven stable floor.
Start by stripping the top 100mm of topsoil. This organic layer compresses over time and rots, creating voids under your base. A standard 3.6m x 3.6m stable footprint — plus 300mm overhang each side — means you’re excavating roughly 4.2m x 4.2m. That’s 1.76 cubic metres of soil to remove. If you leave it, expect the floor to settle unevenly within the first wet season, jamming doors and pooling water.
After excavation, the critical step is grading the subgrade to a 1:50 fall (2% slope). For a 3.6m deep stable, that means a 72mm drop from back to front. That slope channels rain and washdown water toward the stable entrance or a drainage trench. Run a laser level or water level across the full width — a 5mm tolerance over 3 metres is the maximum acceptable. Many DIYers dig a flat pad and then wonder why water sits inside after the first storm. Stable doors that warp or jam are almost always traced back to a flat, ungraded base.
- Depth standard: 100mm below existing grade after topsoil removal. Measure from the highest point of the footprint to ensure consistent depth across the slope.
- Slope calculation: 1:50 fall = 20mm drop per metre. For a 3.6m stable, cut 72mm lower at the front. Use a straightedge and spirit level to verify every 1.2m.
- Direction of fall: Slope must lead water away from the stable entrance or toward an existing drainage point. Never slope toward the back wall — that traps moisture against the HDPE panels and base framing.
- Compaction check: Before aggregate, the subgrade itself must be compacted to at least 85% density. A simple proof roll with a vibrating plate compactor will reveal soft spots. If you see 10mm+ depressions after a pass, you need more compaction or deeper excavation.

Step 4: Build a Compacted Base
Skip the compaction test and your stable door jams after the first heavy rain.
This is where most DIY stable kits fail — not because the panels are weak, but because the ground underneath moves. A standard 3.6m x 3.6m stable requires at least 1.5 tonnes of crushed aggregate to achieve the proper depth and compaction. Without it, you get settlement, water pooling, and doors that bind. The base is the only thing between your stable and a $5,000 fix two years down the line.
- Material: Use 40mm minus crushed aggregate — not sand, not gravel, not recycled brick. The angular edges lock together under compaction, creating a rigid platform that resists lateral movement. Round gravel rolls and shifts. Sand washes out. 40mm minus is the Australian standard for stable base preparation.
- Depth: Minimum 150mm for a standard stable. If you expect heavy traffic — a stallion, daily washing, or a mud-prone paddock — go to 200mm. That extra 50mm costs roughly 0.3 tonnes more aggregate per 3.6m x 3.6m stable, but it prevents the 50mm of settlement that would otherwise happen in the first wet season.
- Compaction: Compact to 95% standard Proctor density. A plate compactor (minimum 100kg) is mandatory. Run it in overlapping passes until the plate bounces — that’s how you know it’s tight. Most DIYers do one pass and call it done. The result: a 10mm dip under the front wall after three months. DB Stable’s adjustable galvanized legs can fix up to 30mm of uneven ground, but only if the base is compacted. If the base is still settling, the legs just tilt.
- Compaction Test: You can’t eyeball compaction. Use a simple sand-cone test or a nuclear density gauge (hire one from a local equipment supplier). The cost is about $150 for a day hire. The cost of redoing a stable base is $2,000. Run the test. If the density reads below 93%, add more water, re-compact, and test again. 95% is the target. 90% is a door-jam guarantee.
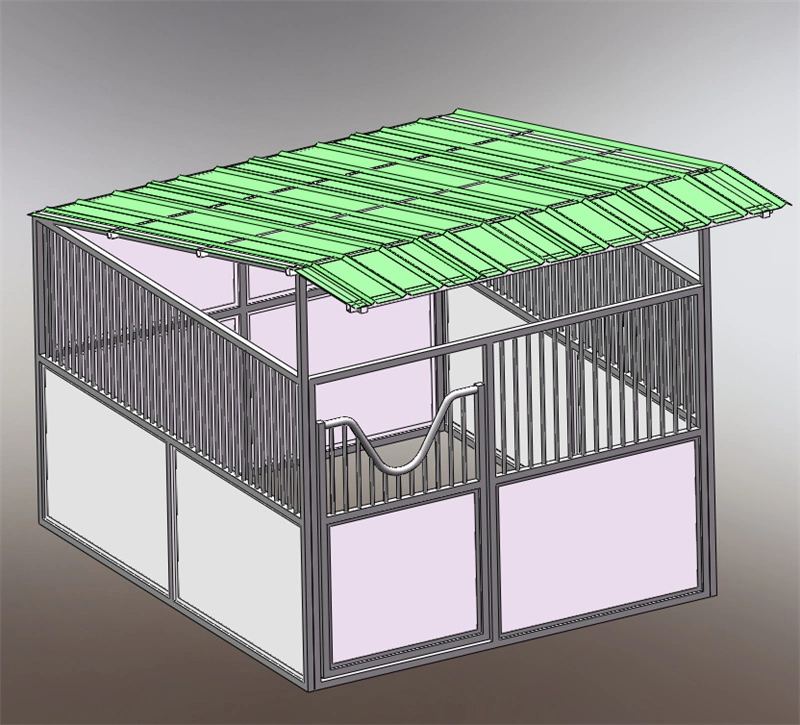
Step 5: Install a Weed Mat and Vapor Barrier
Skip the vapor barrier and you’ll have moisture wicking up through your aggregate, rotting the floor within 18 months.
Weed mat and vapor barrier are two separate layers, but they are often installed together. The vapor barrier (typically 200-micron black polyethylene) goes down first, directly on the leveled and compacted sub-base. Its job is to stop ground moisture from migrating upward into the crushed aggregate and the stable floor. The weed mat (a heavy-duty geotextile fabric, minimum 200gsm) goes on top of the vapor barrier, preventing weed growth from pushing through the aggregate. In Australia, where high rainfall and humidity accelerate biological growth, this layer is not optional. Many commercial horse owners skip it to save $150, then end up with a stable floor that smells of damp and attracts termites within two years.
- Vapor Barrier Spec: Use 200-micron black polyethylene, minimum. Overlap seams by 300mm and tape with UV-resistant tape. This prevents moisture wicking even in high water table areas.
- Weed Mat Spec: Heavy-duty geotextile with 200gsm minimum. Cut to extend 150mm beyond the stable footprint on all sides. This stops grass and rhizomes from growing through the aggregate base.
- Installation Order: Vapor barrier first, then weed mat. Do not reverse. The vapor barrier must be in direct contact with the sub-base. If you place weed mat underneath, it will eventually allow moisture to pass through.
- Tie to Base Compaction: These layers are only effective if the base is compacted to 95% density. If the base settles unevenly, the vapor barrier will tear and the weed mat will shift. DB Stable’s adjustable legs can correct up to 30mm of unevenness, but only if the base is compacted properly. A torn vapor barrier negates that advantage.
Step 6: Place Leveling Pads or Concrete Pavers
Adjustable galvanized footings make concrete slabs obsolete for portable stables — here’s why.
For a portable or DIY stable kit, pouring a concrete slab is a costly mistake. Once you pour concrete, your ‘portable’ stable becomes permanent. Adjustable steel footings — like the hot-dip galvanized legs on DB Stable kits — allow you to level the structure on a compacted aggregate base, preserving full portability. These footings can correct up to 30mm of ground unevenness, which covers almost all typical site variations after proper compaction.
- Adjustment range: Up to 30mm — sufficient to handle minor settlement without shimming. If your compacted base shifts more than that, the door will jam regardless of footing type.
- Portability: Entire stable can be disassembled and moved in a day. No demolition, no slab removal costs, no lost deposit on the lease.
- Base requirement: Footings rest on compacted 40mm minus aggregate at 95% density. If you skip the compaction test, even 30mm of adjustment won’t save you from a crooked door after the first heavy rain.
- Tax advantage (AUS/NZ only): Portable stables with adjustable footings qualify for depreciation as movable plant and equipment under ATO guidelines. A concrete slab is a capital improvement — no accelerated write-off.
Step 7: Final Level Check
A 5mm deviation over 3m will jam your stable door.
This is the step that separates a professional install from a call-back. You need the finished surface flat to within 5mm over any 3m length. That’s tighter than most concrete slabs. Use a laser level or a water level — a 1.8m spirit level alone won’t catch the twist across the full footprint.
- Tolerance: Maximum 5mm deviation over 3m in any direction. Check diagonals as well as edges.
- Tool: Laser level is preferred for speed. Water level works if you’re off-grid but requires two people and patience.
- Consequence: A 7mm deviation at the door track will cause the sliding door to bind after the first heavy dew. You’ll be back with a grinder, not a warranty claim.
Conclusion
Site prep is the single variable that determines whether your stable kit lasts a decade or starts sagging in year two. A compacted base at 95% density and a 5mm level tolerance over 3 meters — those numbers aren’t suggestions. They’re the difference between a door that slides freely and one that binds after the first wet season.
Frequently Asked Questions
What site prep mistakes void the warranty?
Skipping the compaction test and failing to provide a level base with proper drainage will void most portable stable warranties in Australia. The warranty requires a compacted aggregate base, not sand. Always verify warranty conditions with your supplier before pouring or compacting.
What base material is best for a DIY stable kit?
Use 40mm minus crushed aggregate compacted to 95% density for a stable base. Minimum depth is 150mm for standard use and 200mm for heavy traffic zones. Avoid sand or round gravel—angular aggregate locks together for stability.
How much slope do I need for drainage?
A 1:50 slope (20mm per meter) is required to prevent water pooling under the stable. This fall is critical even with adjustable steel footings, as too much slope can cause door. Check final slope with a laser level before installing the stable.
Do I need concrete for a portable stable base?
No, portable stables like DB Stable’s use adjustable steel footings that sit on compacted aggregate, avoiding concrete entirely. This keeps the structure tax-deductible as portable equipment and simplifies relocation. Stick with compacted aggregate to preserve portability and warranty.
Why is a compaction test critical for site prep?
A compaction test confirms the base reaches 95% density, which prevents uneven settling that jams doors and voids the warranty. Without it, your adjustable legs can only compensate for so. Hire a local contractor with a nuclear density gauge for the test.