
Building a DIY horse stable from a kit isn’t just about following instructions—it’s about mastering the art of proper foundation prep, smart tool selection, and understanding when to leave bolts loose for perfect alignment. This comprehensive guide walks you through every critical step, from navigating Australian council regulations and choosing between road base versus concrete foundations, to executing the four-phase construction process that transforms a weekend project into a professional-grade equine facility built to withstand harsh Australian conditions.
Your DIY Stable Build
- Plan the Foundation First: Your success hinges on proper site preparation, including drainage and council checks, long before you lift a tool. A level, square base is non-negotiable.
- The Right Tools and Safety Gear Are Essential: An impact driver, quality gloves, and steel-toed boots are not optional extras. They are critical for an efficient and safe build.
- Follow the “Leave it Loose” Rule: Do not fully tighten bolts until all panels and rafters are in place. This allows for small adjustments and ensures the structure settles correctly.
- Build for Australian Conditions: Plan for extreme heat and heavy rain from the start with smart ventilation, appropriate flooring, and robust weatherproofing.
![]()
The Foundation – Planning Your Australian Stable Setup for a Flawless Build
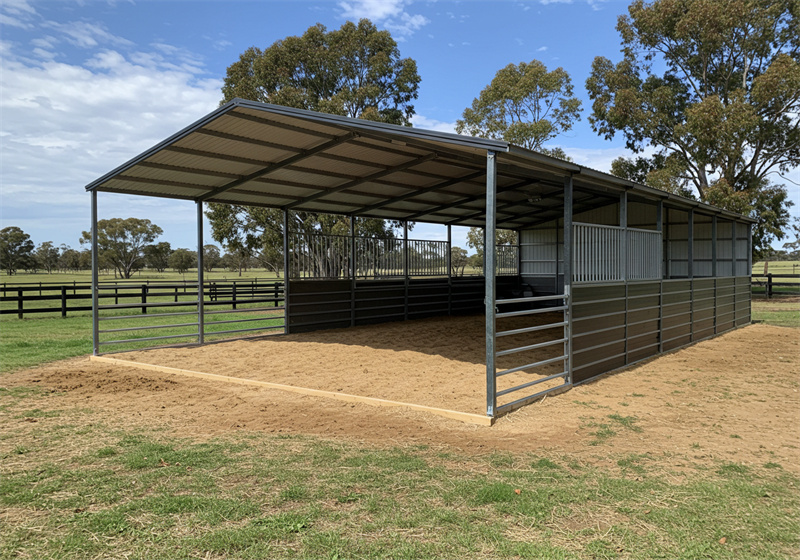
Poor planning kills more DIY horse stable projects than bad weather ever will—get your council approvals sorted, pick the right spot that shields horses from afternoon heat, and nail that perfectly level, square foundation because everything else builds on this foundation work.
Most headaches with a DIY horse stable kit come from rushing the groundwork. This section covers the essential prep work that sets your project up for success. Spend extra time here, and you’ll breeze through the actual construction.
Is Your Property Ready? Navigating Australian Council Rules & Site Selection
Before you get excited about construction, check with your local council. Some smaller, portable structures might slip by without formal planning permission, but rules change dramatically between different shires. Better to ask upfront than deal with a shutdown notice halfway through your build. When picking your spot, think like a horse. Choose an area that catches gentle morning sun but stays shaded during those brutal afternoon hours. Factor in prevailing winds to cut down on winter drafts, and always go for higher ground—you want water flowing away from your structure, not pooling around it. Don’t forget practical access for horse floats and feed deliveries either.
Mastering Your Site Prep: Beyond Just a Level Patch of Dirt
You’ve got two main foundation options: compacted road base or a concrete slab. For most DIY builders across Australia, road base wins hands down. It drains beautifully—crucial for keeping hooves healthy during wet seasons—and forgives minor installation mistakes. Concrete slabs cost a fortune, require professional pours, and lock you into a permanent setup better suited for commercial operations. To prep your road base foundation, excavate the area, lay geotextile fabric if you’re dealing with clay or sandy soil, then build up compacted layers of road base until you’ve got a rock-solid pad that’s perfectly level and square. You can verify this using simple string lines and the tried-and-true 3-4-5 measurement method.
The ‘Unboxing’ Ritual: Your Kit Inventory & Tool Muster
That massive shrink-wrapped pallet holds serious potential, but resist the urge to dive straight into building. Your first job involves a complete parts inventory. Spread out every panel, bracket, and bag of bolts, checking each item against the packing slip. This prevents you from discovering missing pieces when you’re halfway through assembly. Organize everything into logical groups for smooth workflow. Here’s a pro tip most guides skip: inspect everything for shipping damage like bent corners or stripped bolt threads. Fixing small issues now beats wrestling with damaged parts when you’re balancing a panel in the air.
| Foundation Type | Best For | Australian Climate Notes | Approx. DIY Cost/Effort |
|---|---|---|---|
| Compacted Road Base | Budget-conscious DIYers, portability, most soil types. | Excellent drainage for QLD/NSW wet seasons. Less heat retention in summer. | Low to Moderate. Requires labour for levelling and compacting. |
| Concrete Slab | Permanent structures, high-traffic wash bays, absolute levelness. | Poor drainage without proper grading. Can be hot. Needs good airflow. | High. Often requires professional pour for a good finish. |
| Ground Anchors (No Base) | Temporary shelters, very level ground, budget builds. | Only suitable for well-draining, firm soil. Not ideal for muddy areas. | Very Low. Minimal site prep needed, but less stable long-term. |
Portable Horse Stables Tailored for Durability and Safety
Choose DB Stable’s robust, easy-to-assemble horse stables crafted with premium HDPE and galvanized steel. Built to meet ISO and EN safety standards, our portable solutions offer customizable layouts and reliable features for every equestrian setting worldwide.
Assembling Your A-Team – The Essential Horse Stable Installation Tool & Safety Checklist
You can’t build a proper stable with a basic drill and a prayer—you need impact drivers for efficient bolt work, steel-toed boots for heavy panel drops, and enough extension cords to reach your build site without running a generator all weekend.
A missing tool or inadequate safety gear can tank your entire weekend project. We go beyond simple lists to explain why each piece of equipment matters for your horse stable kit installation.
What’s in the Professional’s Toolbox?
Your kit demands more than just a basic cordless drill. The absolute essentials include an impact driver for powering through tough bolts, a complete socket set with extensions for tight spots, a reliable spirit level, sturdy step ladders, and solid sawhorses for staging materials. Items that transform your build from frustrating to smooth include ratcheting spanners for cramped corners, quality clamps for holding panels steady, and a rubber mallet for gentle persuasion when parts resist alignment. Don’t forget to assess your power situation early—will you need a generator to reach the build site, or can heavy-duty extension cords handle the job?
Your Personal Protective Equipment (PPE) is Not Optional
Building a stable means wrestling with heavy steel panels and working overhead—treat this project with serious respect. Every person on site needs steel-toed boots to protect from dropped panels, quality work gloves to shield hands from sharp edges, and safety glasses for flying debris. When roof work begins, invest in a stable ladder or temporary scaffold setup. Balancing on wobbly chairs or ute trays invites disaster. Since you’re working under the Australian sun, plan your heat strategy. Stock up on water, sunscreen, and broad-brimmed hats for what will likely be a long, hot day of construction.
The Main Event – Your Step-by-Step DIY Horse Stable Kit Installation
Building your stable breaks down into four logical phases: square the base and anchor the frame, raise walls while keeping bolts loose, conquer the roof assembly on the ground before lifting, then do the final fit-out and systematic bolt tightening that locks everything together perfectly.
This is where your careful planning pays massive dividends. By following a clear sequence, you transform a complex project into manageable chunks that build confidence with each completed phase.
Phase 1: Squaring the Base & Erecting the Frame
Start by laying out the bottom rails or base frame onto your prepared foundation. This step determines whether your entire structure will be square and true. Use the 3-4-5 method religiously: measure exactly 3 meters along one rail and 4 meters along the adjoining rail. The diagonal distance between those two points must hit exactly 5 meters. Keep adjusting until the measurement is perfect. Once you’ve achieved a perfectly square frame, anchor it to your foundation using dyna-bolts for concrete or heavy-duty ground anchors for road base installations.
Phase 2: Raising the Walls & Panels
Lifting wall panels requires two people—no exceptions. One person steadies the panel upright while the other secures it with bolts. Here’s the game-changing insight that separates amateur builds from professional results: never fully tighten any bolts during this phase. This “leave it loose” rule allows easy alignment of subsequent panels and prevents stress from building up in corners. The real payoff comes later when this built-in flexibility lets the entire frame settle evenly during final tightening, preventing long-term warping and twisted doorframes.
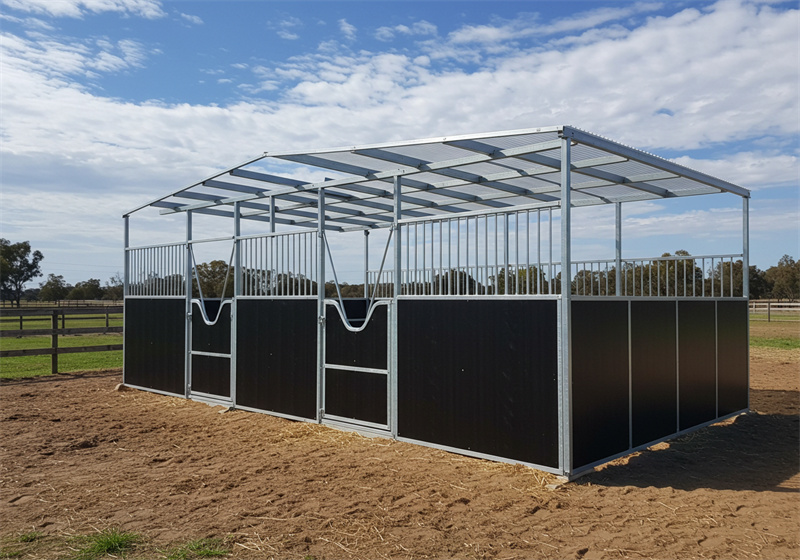
Phase 3: Conquering the Roof – Rafters, Purlins, and Sheeting
Smart builders assemble roof trusses on the ground first. Lifting a completed truss beats trying to piece together components while balancing on a ladder. With your team, carefully lift and secure the roof structure to the wall frames. When installing roof sheeting, start from the side opposite your prevailing wind direction. Overlap each sheet according to manufacturer specs and follow the specified screw pattern religiously—each screw needs proper weatherproof sealing. Finish by installing ridge capping and flashing to create a leak-proof, professional-looking roof.
Phase 4: The Final Fit-Out – Doors, Gates, and Windows
With your main structure complete, you can hang stable doors and gates with confidence. Take time to ensure smooth, even swings and secure latch engagement. Install any windows or optional mesh panels according to your kit specifications. Your final critical task involves the systematic “torque-down”—go back through every single bolt in the entire structure and tighten them fully. Work methodically from one corner to the other to distribute tension evenly across the entire portable horse stable frame.
Troubleshooting Common Hurdles & Quick Fixes
When bolt holes don’t line up, it’s usually because you tightened too early—loosen everything around the problem area, use a rubber mallet for gentle persuasion, and remember that a slightly elongated hole beats a twisted frame every time.
Even perfect planning hits unexpected snags. Knowing how to solve common problems quickly keeps your project moving forward instead of grinding to a halt.
| Problem | Likely Cause | The Quick Fix |
|---|---|---|
| “Bolt holes don’t line up.” | A non-square base, or bolts have been tightened too early. | Loosen all surrounding bolts to create play. Use a rubber mallet or pry bar to gently “persuade” the panel into place. As a last resort, you can slightly elongate a hole with a drill. |
| “A panel is not plumb/level.” | The foundation is slightly out of level. | Use metal or plastic shims under the bottom rail of the low side. Check with a spirit level before tightening the anchor bolts. |
| “There’s a gap in my roof sheets.” | Sheets were not overlapped correctly or the frame is not square. | Unscrew the last sheet and re-seat it, ensuring the overlap is consistent. Check the squareness of the roof frame diagonals. |
This Hole Doesn’t Align! What to Do When Parts Resist
When bolt holes miss alignment by a few millimeters, trapped tension somewhere in the frame usually causes the problem. This perfectly illustrates why the “leave it loose” rule matters so much. Loosen bolts on the problem panel and adjacent ones to create working room. Use a pry bar for leverage or a rubber mallet to coax the panel into proper alignment. Avoid steel hammers at all costs—they’ll damage the protective coating and leave ugly dents.
Battling the Elements: Wind, Rain, and Unlevel Ground
Wind becomes your worst enemy during construction. Never attempt lifting large panels or roof sheets on windy days. If unexpected gusts kick up, use clamps or ropes to temporarily brace panels to the frame so they can’t act like giant sails. Surprise showers require quick thinking—keep waterproof tarps handy to protect tools and work areas. When your base sits slightly out of level, packers or shims under the bottom rail can achieve perfectly plumb walls before you anchor everything down permanently.
Portable Horse Stables Tailored for Durability and Safety
Choose DB Stable’s robust, easy-to-assemble horse stables crafted with premium HDPE and galvanized steel. Built to meet ISO and EN safety standards, our portable solutions offer customizable layouts and reliable features for every equestrian setting worldwide.
Beyond the Build – Australian-Proofing & Professional Customisations
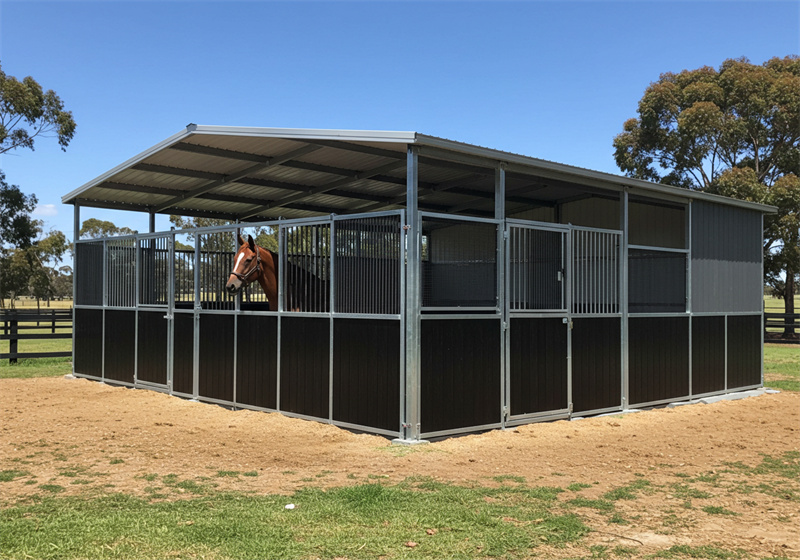
A basic kit gets you walls and a roof, but turning it into a superior equine facility means adding roof-mounted whirlybirds for heat management, choosing between rubber matting or grid systems for optimal flooring, and planning modular expansions like tack rooms from day one.
Your stable structure is complete, but it’s far from finished. These strategic additions transform a basic shelter into a comfortable, functional equine facility that handles Australian conditions with ease.
How to Win the War on Heat: Aussie-Specific Ventilation Solutions
Hot stables create health hazards for horses. Effective ventilation becomes absolutely critical. Installing roof-mounted whirlybirds provides one of the best methods for drawing hot air up and out of the stable. Combine this with good eave ventilation to create constant, passive airflow that works even when there’s no breeze. When selecting your initial kit, prioritize panels with mesh tops over solid walls—this simple feature promotes cross-breezes that make huge differences during scorching summer afternoons.
What’s the Best Flooring for Your Horse Stable?
After establishing your compacted road base foundation, several flooring options can enhance comfort and functionality. High-quality rubber matting delivers excellent insulation and cushioning while remaining easy to clean, though installation requires handling heavy materials. Stable grid systems offer another excellent choice—these plastic grids stabilize underlying ground, improve drainage dramatically, and accept sand or gravel fill to create firm yet permeable surfaces that promote optimal hoof health.
Smart Upgrades: From Tie-Up Rails to a Fully-Fitted Tack Room
Focus on daily usability improvements that streamline your routine. Install heavy-duty tie-up rails, secure feed bins, and automatic waterers to eliminate daily hassles. The beauty of modular horse stable designs lies in their expansion potential. You can easily add matching tack rooms, covered wash bays, or additional stalls as your needs evolve. Inside your stable, simple DIY additions like saddle racks fashioned from plumbing pipe or bridle hooks mounted on timber boards create highly organized, functional spaces that rival professional facilities.
The Exit Hall
You’ve transformed empty ground into a fully constructed stable that will serve your horses for decades. You didn’t just follow instructions—you mustered the principles of solid construction, proper site planning, and equine safety considerations. By investing your own sweat equity, you’ve not only saved thousands on labor costs but built a structure you understand completely—a safe, durable home for your horses that handles harsh Australian weather conditions. Step back and admire your accomplishment; you’ve earned every bit of satisfaction.
Now that you have the complete blueprint for success, your next step involves bringing this vision to life. Equip yourself with the right horse stable kit in Australia and build with the confidence that comes from thorough preparation and proven techniques.
FAQ (The Curator’s Q&A)
Q1: How long does a DIY horse stable kit installation actually take?
A: For a standard single stable (around 4x4m), two people with moderate DIY skills should plan for a full weekend. Day one typically covers final site prep and frame erection, with day two handling roofing and finishing touches. Never rush the process—safety and accuracy matter far more than speed.
Q2: Do I absolutely need a concrete slab?
A: Absolutely not. A properly prepared and compacted road base foundation works excellently and costs much less than concrete. It drains better too, which benefits your horse’s hoof health significantly. Concrete slabs suit permanent, high-traffic commercial operations but overkill for most private stable applications.
Q3: What are the biggest safety risks during a DIY install?
A: Three main dangers dominate: 1) Working at heights during roof installation—always use proper ladders or scaffolding platforms. 2) Lifting heavy panels—never attempt this solo, always work with a partner. 3) Heat exhaustion and sunburn—seriously dangerous risks during long construction days under intense Australian sun.
Q4: Can I really do this with just two people?
A: Yes, quality kits from reputable manufacturers design their systems for two-person assembly. One person stabilizes panels or components while the other handles fastening. Solo attempts create unsafe conditions and make the work exponentially more difficult.
Q5: What’s the most common mistake first-time builders make?
A: Rushing foundation preparation ruins more builds than any other factor. An unlevel or non-square base creates problems throughout every subsequent construction phase, from misaligned bolt holes to permanently twisted final structures. Invest extra time perfecting your base—it prevents hours of frustration later.
Q6: How much should I budget for a DIY horse stable kit?
A: Costs vary significantly, but quality Australian-made 4x4m steel kits typically start around $4,500-$5,500 for basic structures. Factor additional costs for foundation materials like road base delivery, potential equipment rental, and optional extras including flooring or ventilation systems. Always request detailed quotes before committing to any purchase.