A reliable stable assembly guide for a flat-pack kit has to start long before the first bolt turns—it needs to address the landed cost, the customs paperwork, and the customer’s confidence that every bracket is in the crate. For an Oceania distributor stocking DIY stable kits, the daily concern isn’t whether the panels will bolt together; it’s whether a missing fastener or a UV-brittle board will trigger a warranty dispute that kills a repeat order.
The engineering decisions that remove that fear are remarkably simple. Pre-sorting hardware into stage-specific pouches eliminates the universal missing-parts headache that plagues bulk-bagged kits from most factories. And keeping roof panels fully unassembled reduces volumetric freight by 30%—a saving passed straight through to your per-unit landed cost. These aren’t premium add-ons. They’re the difference between a customer who assembles the stable in a single Saturday and one who calls you mid-build, furious.
Base Prep & Squaring
A 10 mm error in base squaring compounds into panel misalignment that horses exploit. For a distributor, that misalignment triggers a warranty claim faster than rust.
Substrate choice: compacted road base versus concrete slab
Two substrates dominate Australian and New Zealand installations. Each carries distinct commercial implications for your downstream customer and, by extension, your return rate.
- Compacted road base (75–100 mm depth): Lower upfront material cost. Requires a plate compactor and correct moisture content during compaction. In high-rainfall zones like coastal Queensland or New Zealand’s North Island, road base demands French drains or a 1–2% fall to prevent base washout under the bottom rails. Failure to manage water ingress softens the substrate unevenly, creating differential settlement that twists the galvanized frame.
- Reinforced concrete slab (100 mm minimum thickness, 25 MPa): Higher initial spend but eliminates settlement risk. Mandatory for installations on reactive clay soils common in Melbourne’s western suburbs and parts of inland New South Wales. The slab must extend 150 mm beyond the stable footprint on all four sides to provide a mounting surface for M12 dyna-bolts.
From a warranty perspective, we flag one pattern repeatedly: road base installations where the end user skipped edge restraint. Without a treated pine sleeper or concrete haunch around the perimeter, the compacted material spreads laterally under load. The bottom rail loses bearing, the structure racks, and the importer fields an angry call. Spec the edge restraint in your installation guide and you eliminate the single most common substrate failure.
The 3-4-5 triangle method and why it is non-negotiable
Builders have used this Pythagoras-derived squaring technique for centuries because it works. For a standard 5 m × 4 m stable, the reference triangle is 3 m along one axis, 4 m along the perpendicular, and 5 m across the diagonal. Peg those three points, run string lines, and you have a perfect 90-degree corner. Measure both diagonals of the full rectangle — they must match within 5 mm.
The consequence of bypassing this step is not cosmetic. A racked base forces the 10 mm HDPE wall boards into a parallelogram shape. The tongue-and-groove joints bind during assembly, leaving 6–10 mm gaps that widen under thermal cycling. A 40°C day in western Sydney produces enough expansion in the steel frame that those gaps open further. A horse pressing against a misaligned wall concentrates force on a single bolt hole instead of distributing it across the frame. That bolt eventually shears or the hole elongates, producing a loose panel that cannot be re-tightened without replacing the bottom rail.
Anchoring the bottom rails: dyna-bolts versus ground anchors
Anchorage selection depends entirely on substrate. The bottom rails of a DB Standard Stable Kit are pre-punched with matched hole centres to accept either system.
- Concrete slab anchoring: M12 × 100 mm dyna-bolts, minimum embedment depth 60 mm. Torque to 40 Nm. Each bolt provides pull-out resistance exceeding 15 kN in 25 MPa concrete, which is more than ten times the lateral load a 600 kg horse generates leaning against a wall panel. Use four bolts per bottom rail on a 5 m span.
- Compacted base anchoring: Screw-in ground anchors with a minimum 600 mm length and a stated pull-out resistance above 500 kg in compacted clay or gravel. The anchor head must sit flush with the bottom rail channel to avoid creating a pressure point on the HDPE board above. Avoid expanding clay anchors — they loosen in dry soil and fail completely when the ground cracks.
The structural risk of under-anchoring is progressive. A loose bottom rail allows the entire frame to rack under wind load or horse impact. Once racking begins, the 42-micron galvanized coating on the bolt holes starts to abrade as the components fret against each other. That microscopic coating damage exposes the base steel to moisture trapped in the HDPE-to-steel interface — a corrosion hotspot that standard zinc electroplate fasteners from generic suppliers cannot survive. Our pre-sorted fastener packs use hot-dip galvanized bolts matched to the frame coating, so the protection at the joint equals the protection on the tube face. Most failing stables we see in post-mortem inspections rot at the anchor points first.
Wall Panel Assembly
If you tighten every bolt as you go on wall panels, you will lock in misalignment. Keep the entire frame loose until the second squaring check is done.
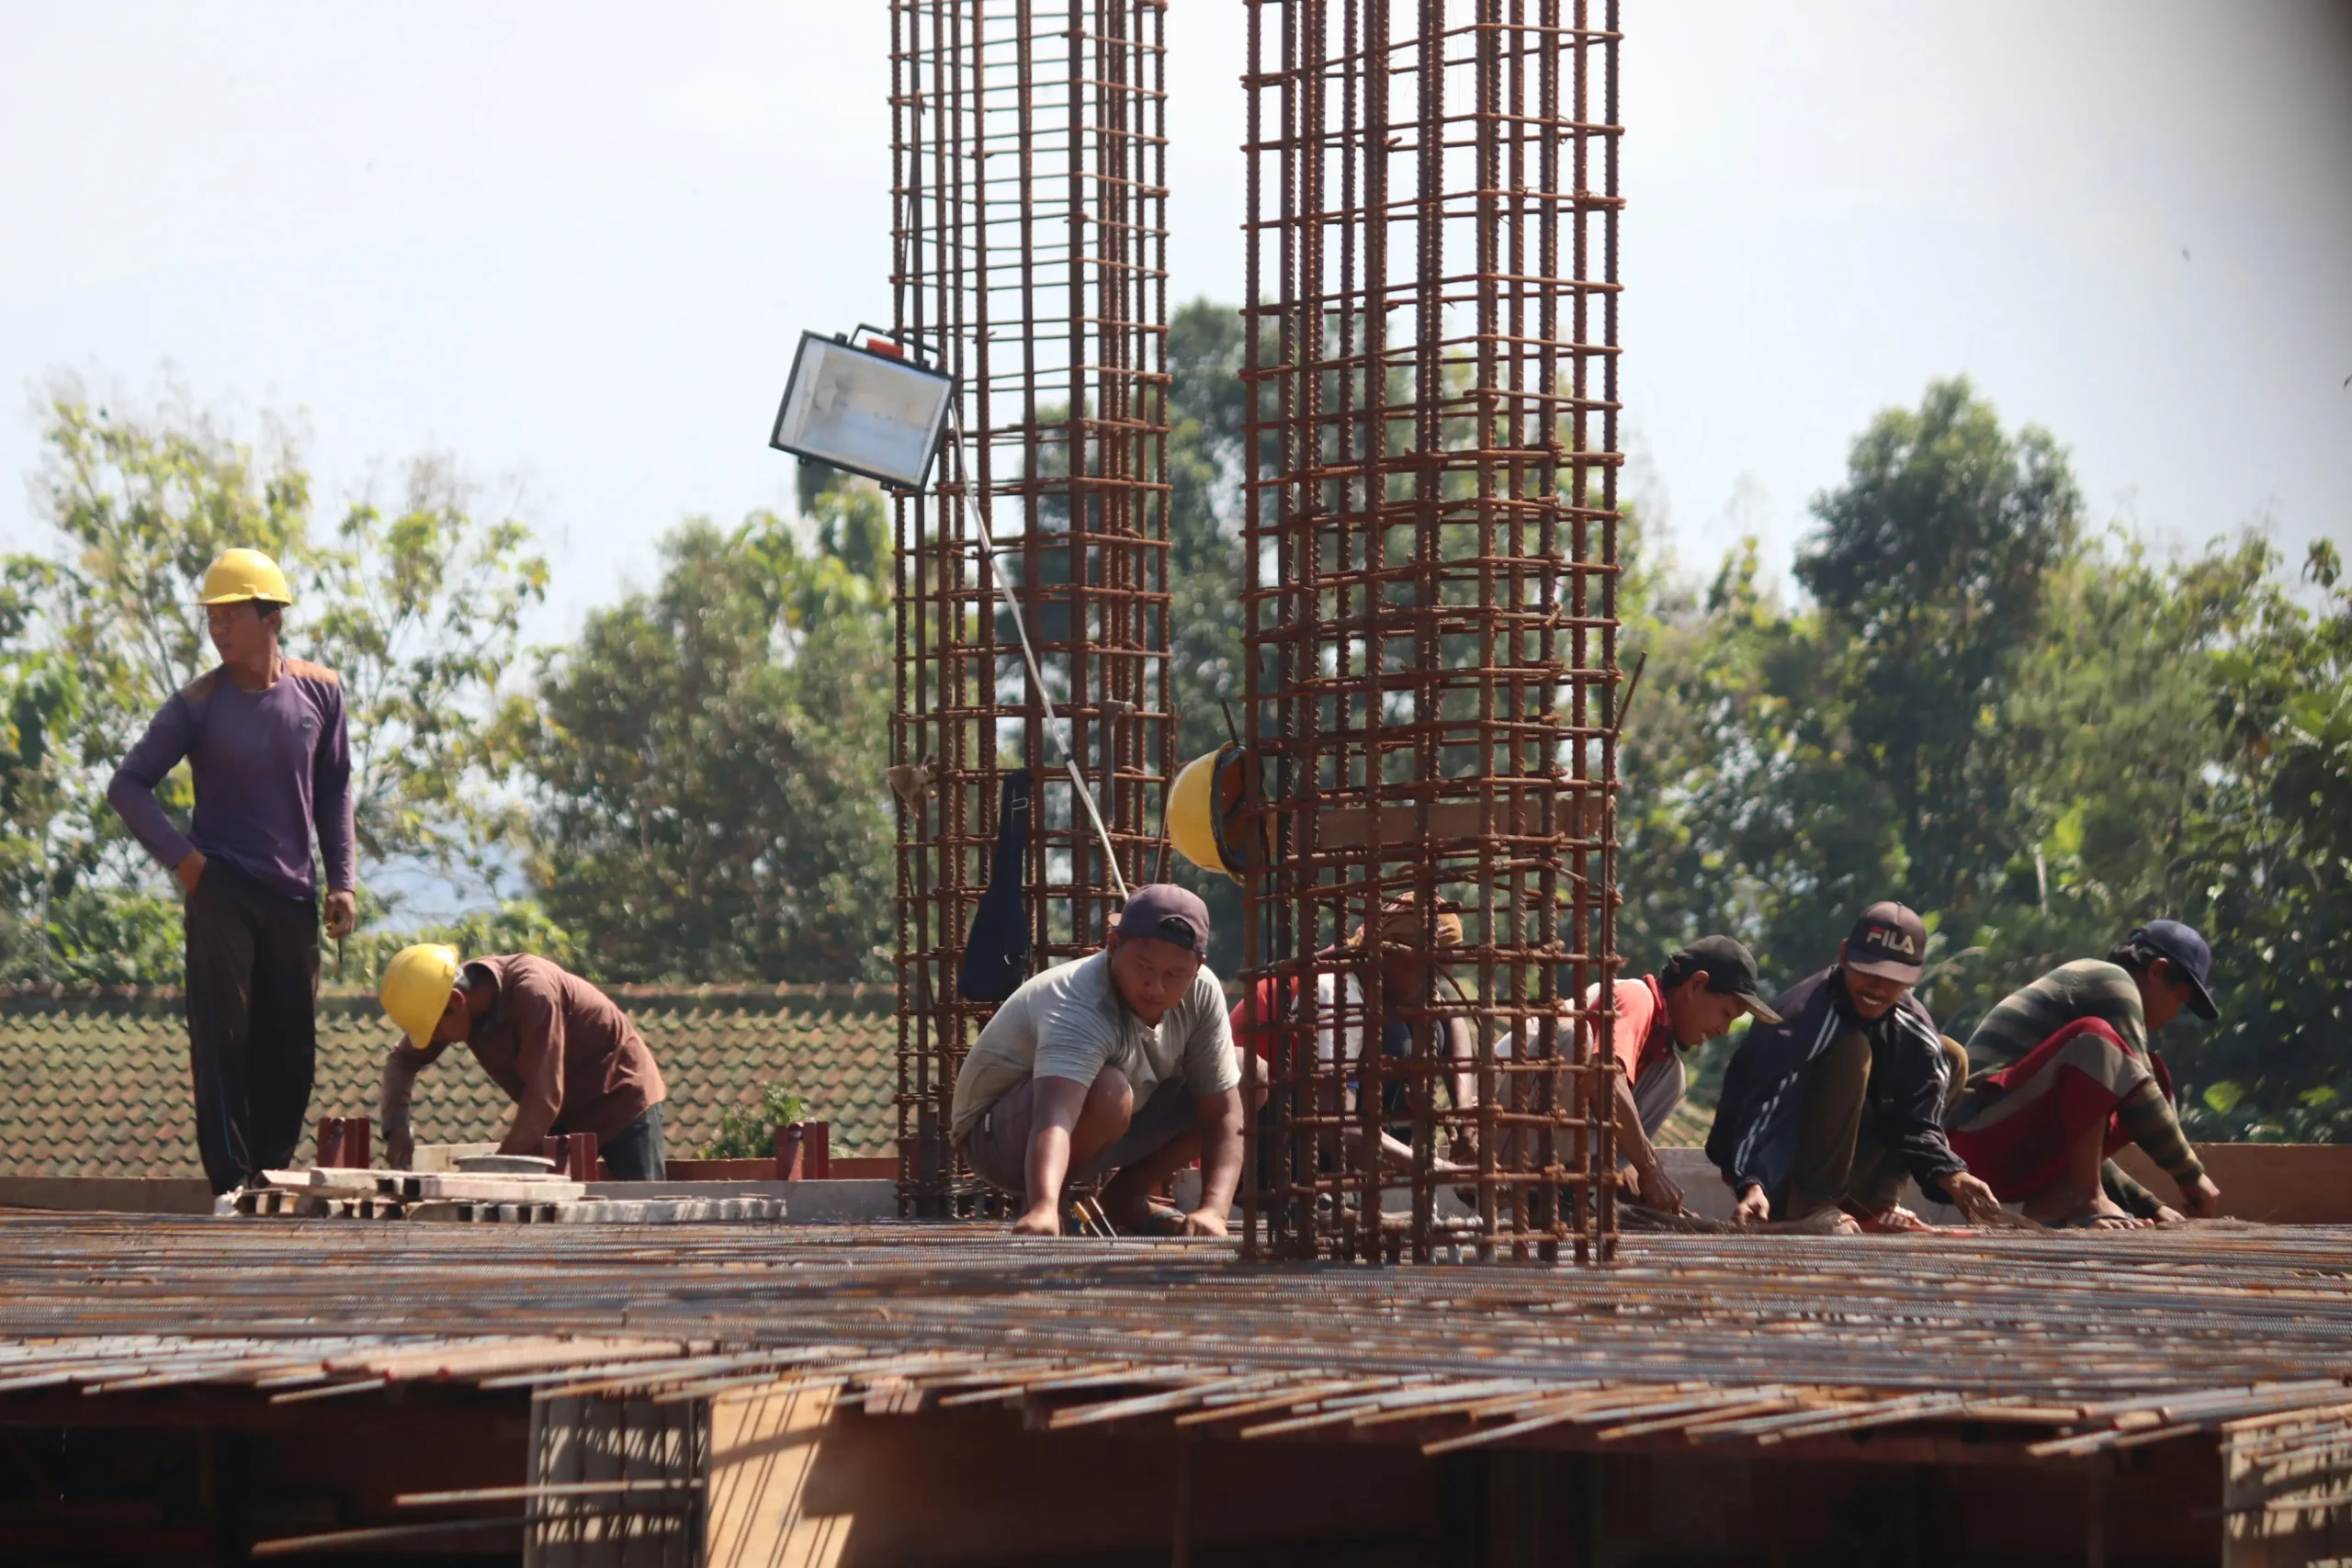
Panel Weight and Safe Handling
The pre-fabricated steel wall panels in a standard 5m x 4m kit are not lightweight flats. Each panel, constructed from the 42-micron hot-dip galvanized frame with 10mm HDPE boards already fitted, weighs between 40 and 80 kg. This is deliberate. The mass comes from structural steel sections and UV-stabilised board thickness that resists warping under Australian heat, not from unnecessary packaging.
Do not attempt to lift and position these panels alone. A 2-person crew is the minimum. Better yet, a 3-person team allows one worker to align bolt holes while two handle the weight. For the distributor, this is worth communicating to your retail customers upfront. When your customers know to plan for help, the assembly stays within the 6–8 hour window, not a frustrating multi-day ordeal.
The Loose Bolt Strategy
The single most common error during wall panel assembly is torquing fasteners immediately. The logic seems sound: secure one panel, move to the next. In practice, a perfectly square frame only emerges by leaving every structural connection finger-tight until the full circuit of walls is standing. This includes the M12 dyna-bolts securing the base plates to a concrete slab, or the ground anchors if you’re on a compacted gravel pad.
Once the back wall, both side walls, and the front wall with door openings are all vertical and connected, you perform the second squaring pass. Measure both diagonals across the structure. A 5m x 4m stable will measure a 6.4m diagonal when square — not 5m as a generic 3-4-5 rule would suggest on smaller layouts. Adjust the frame at the corner connections until those diagonal measurements match within 10mm. Only then do you tighten every structural bolt to the specified 40–45 Nm torque. This prevents the frame from gradually walking out of square under repeated horse impact against the walls.
Assembly Sequence: Back Wall First
The sequence matters. Start with the back wall panel. This is the longest unbroken panel, and it sets the baseline for the entire structure. Stand it on the prepared base, hold it vertical with temporary bracing, and loosely bolt the base plates down.
Next, erect one side wall. Then the second side wall. These panels will feel awkward until they tie into each other at the rear corners. The front wall — which includes the 1.2m-wide door opening — goes up last. The front panel often has the most flex because of the door cut-out, so connecting it to both side walls stabilises the entire structure instantly. This sequence avoids the scenario where a side wall stands isolated, catches wind, and twists a corner bracket before the frame is triangulated.
For the importer, this assembly order reduces the chance of a customer stripping bolt threads or bending a corner gusset by forcing panels into alignment. Fewer damaged parts means fewer warranty replacement requests eating into your margin.
Feeder Installation Point
There is an installation step that most generic assembly guides miss, and it ties directly into the wall panel phase. Once the wall panels are squared and the bolts are torqued, the optimal moment to mount the optional rust-free aluminium swivel feeder is now — before the roof sheets go on.
The aluminium feeder body bolts through pre-punched holes in the HDPE wall boards and the steel frame upright. Doing this with full overhead light and walk-around space, before the roof confines the work area, makes aligning the swivel mechanism trivial. The feeder bracket sits at a height where the top of the feed tray allows a horse to eat with its head at a natural downward angle. For a standard 9–11 ft stable wall height, the feeder typically mounts with the tray floor at roughly 1.0–1.2m above the finished floor. Adjustable bolt slots in the aluminium bracket give 50mm of vertical play for fine-tuning.
From a components perspective, this aluminium feeder is not a generic steel bowl painted silver. The material is a solid aluminium casting that will not rust when exposed to wet feed, salt licks, or the persistent humidity common in coastal Queensland and northern NZ yards. For a distributor selling into these regions, that material distinction is the difference between a feeder that still looks new at year 5 and one that becomes a rust-stained warranty claim.
Roof Truss & Sheet Attachment
The roof is the first thing your customer’s horse looks at, and the first thing the Australian sun tries to destroy. Assemble it wrong, and you’re not dealing with a leak—you’re dealing with a warranty claim that erases your margin on three future sales.
Ground-Level Truss Assembly: Build Flat, Lift Once
Assembling roof trusses in the air is how you get twisted frames and frustrated installers. The correct sequence is to build each truss flat on the ground, check the geometry, then lift the completed assembly onto the wall frames. Our 5m x 4m standard kit uses a truss design that two people can carry and position without a crane—no special lifting equipment required. Bolt every connection to 40–45 Nm before you lift. A loose truss joint shifts under wind load and transfers stress directly into the roofing sheets, which is where competitor kits start developing hairline cracks around screw holes within the first 18 months.
Purlin Placement and Sheet Attachment Sequence
Once the trusses are secured to the wall frames, lock in the purlins before touching a single roofing sheet. Purlins are the horizontal members that bridge the trusses—they create the screw-down surface and prevent the sheets from sagging between supports. If you see a DIY horse stable kit assembly instructions Australia guide that skips purlin alignment checks, close the tab. Misaligned purlins force roofing sheets into a subtle wave pattern that traps debris and accelerates UV degradation along the high points.
When screwing down roofing sheets, the fastener type matters more than most distributors realise. Every screw must carry a neoprene washer—not EPDM, not generic rubber. Neoprene maintains its compression seal across a wider temperature range, which matters when a Colorbond roof in western NSW cycles between 8°C overnight and 48°C by 2pm. The washer compresses to form a watertight barrier around the screw shank. Skip this spec, and you’re inviting capillary water ingress that rots timber purlins or corrodes steel ones from the inside out.
The screw pattern follows the sheet manufacturer’s guide, but the non-negotiable rule is to drive each screw perpendicular to the sheet surface. Angled screws crush one side of the washer and leave the opposite side unsealed. Your installer’s impact driver should be set to a depth-sensitive clutch, not hammer mode. Over-driving buries the washer into the sheet coating and initiates galvanic corrosion at the penetration point—a failure mode that takes 2–3 years to surface, long after your customer has written their online review.
Locking in the 5° Roof Pitch: Why It’s Non-Negotiable
A 5° minimum pitch is the threshold where water stops pooling and starts moving. Flatter than 5°, and you’re relying on the sheet profile’s capillary grooves alone—which works in a lab, not in a paddock where dust, leaf litter, and bird droppings clog those channels within a single dry season. Australian rainfall patterns compound this: long dry spells deposit debris, then sudden storm cells dump 40mm in an hour. A 5° pitch gives you enough velocity to self-clean the roof surface during heavy rain. Steeper pitches work too, but they increase the frontal wind load and add unnecessary steel weight to the frame—which drives up your per-unit freight cost for no functional gain.
The pitch is set by the truss geometry, not by shimming or adjusting after the fact. Our trusses are jig-welded in-factory to hold the 5° angle precisely, so the installer doesn’t need a laser level to verify slope. If you’re evaluating a flat pack stable kit installation video guide and the presenter is measuring pitch with a phone app after the roof is on, that kit’s engineering tolerances are too loose for repeatable B2B deployment. Your end customers shouldn’t need to be roofers.
The 3-Foot Clearance Rule: Headroom, Heat, and Horse Welfare
Minimum 3 feet—0.9 metres—of clear air between the horse’s ear tips and the underside of the roof structure. That’s not a guideline; it’s the difference between a stable and a hazard. A 16.2-hand Thoroughbred standing at rest has an ear height of roughly 2.1–2.3 metres. Add 0.9 metres of clearance, and your minimum interior roof height lands at 3.0–3.2 metres, which corresponds to a wall height of 9–11 feet depending on truss depth. Our standard kit’s 9-foot wall with a 5° pitched roof delivers 3.1 metres at the low side and 3.4 metres at the high side—comfortably above the threshold for any horse under 17 hands.
Clearance isn’t just about the horse not hitting its head. The air column above the animal is the primary thermal buffer. In a stable with insufficient headroom, radiant heat from the roofing sheets transfers directly onto the horse’s neck and poll. That’s stress you can’t see—elevated cortisol, reduced feed intake, slower recovery after work. When your customer is an equestrian centre owner managing performance horses, they notice the second-order effects: a horse that’s flat in training, a vet bill that didn’t exist last season. The best height for a horse stable 9 10 11 feet question isn’t about preference; it’s about thermal performance and animal welfare compliance under the Australian Animal Welfare Standards and Guidelines for Horses.
This is where the interaction between wall height and roof pitch becomes a hard engineering constraint. A 4-foot clearance would be better thermally, but it pushes the wall height past 11 feet and requires longer steel columns, heavier bracing, and a larger wind profile—all of which increase the kit weight and your containerised freight cost by 8–12%. We’ve settled on the 9–11 foot range with a 5° pitch because it hits the intersection of welfare compliance, structural efficiency, and landed cost. Before you subtract anything from that equation, understand exactly which risk you’re taking on.
Material Reality Check: 10mm HDPE Boards vs. Thinner Competitor Panels
Most UV resistant stable materials for Australian weather claims fall apart when you measure the actual board thickness. The market standard from budget suppliers is 6–8mm HDPE, often sourced from recycled stock with inconsistent UV stabiliser dispersion. Those boards buckle visibly at 38–40°C—not because HDPE is inherently unstable, but because thin sections have lower buckling resistance and recycled polymers contain molecular-chain degradation that amplifies thermal movement. The result is a wavy wall or roof panel that your customer photographs and posts to a local equestrian Facebook group, tagged with your business name.
Our 10mm HDPE boards use virgin polymer with UV stabilisers compounded at the resin stage, not sprayed on as a surface coating. Accelerated weathering tests—run on production-line samples, not hand-picked lab coupons—show no measurable buckling or colour shift after 2,000 hours of QUV exposure, which simulates roughly 10 years of Australian inland sun. At 40°C ambient, the board surface can reach 65°C, and a 6mm panel under those conditions expands 2–3mm more per linear metre than a 10mm panel of the same compound. That differential shows up as a gap at the corner joints or a pop at the screw holes—failure points that generate the “ill-fitting parts” complaints your import business cannot afford.
The thickness also changes how the roof performs under load. A 10mm HDPE sheet spanning 600mm purlin centres deflects less than half as much as an 8mm sheet under the same wind uplift pressure. Less deflection means less cyclic stress on the neoprene washers, which means fewer leaks over the 10-year service life. When you’re calculating the lifetime cost of a stable kit—not just the FOB price—the material spec difference between 8mm and 10mm HDPE is worth roughly 3–4 warranty callouts per 100 kits. At $200–400 per callout in labour and parts, that’s real money that stays in your margin.
Fast-Track Assembly via Pre-Sorted Hardware
The single biggest assembly bottleneck in hot dip galvanized stable frame assembly isn’t the heavy lifting—it’s the 45 minutes spent sorting through a single mixed bag of bolts to find the eight M10x30s you need for the next step. Most Chinese stable kit suppliers ship bulk hardware as a cost-saving measure, but they’re exporting a labour problem to your customer. Our kits ship with stage-specific, labelled pouches: “Truss Connections,” “Purlin Attachment,” “Sheet Fastening.” The bags are heat-sealed with inventory check marks from the packing line. If a pouch is sealed, every fastener inside is accounted for. This isn’t a premium feature—it’s the only way to guarantee zero missing parts at the assembly site, and it’s the single biggest driver of positive assembly reviews from our distributors’ end customers in Australia and New Zealand. The missing parts in Chinese stable kits prevention strategy isn’t a QC prayer; it’s a packaging process redesign.
Hardware & Safety Checks
Torque Specifications: The 40 Nm Threshold
Loose bolts on a horse stable aren’t a maintenance issue — they’re a liability. A 600 kg horse leaning against a stall front generates lateral force that will back out under-torqued fasteners within weeks. The fix is simple but non-negotiable.
Every structural bolt on the DB Standard Stable Kit — M12 grade 8.8 zinc-plated hardware connecting the hot-dip galvanized frame members — requires 40–45 N·m of torque. Use a calibrated impact driver with a torque-limiting socket, not a ratchet wrench. Guessing torque by feel produces a variance of ±30%, which is exactly how wall panels develop that telltale rattle six months after install.
The pre-sorted fastener pouches in DB Stable kits include only the exact bolt count per assembly stage — no spares. If you finish a stage with leftover bolts, you missed something.
Edge Deburring: Where Cheap Kits Cut Corners
Hot-dip galvanizing leaves a zinc drip at the base of vertical posts and along weld joints. On price-sensitive kits where the factory skips post-galvanizing finishing, these drips solidify into razor-sharp burrs at exactly the height a horse’s shoulder or flank contacts the frame.
Before any horse enters the completed stable, run a gloved hand along every interior edge of the 42-micron galvanized frame. Pay particular attention to door frame corners, bottom rail junctions, and the interior lip of aluminium window frames. File down any zinc buildup with a medium-grit metal file, then apply a cold-galvanizing spray to any exposed steel. The 10mm HDPE kickboard panels ship with radiused edges from the factory, but the lower mounting channel that holds them deserves the same inspection.
This step takes 20 minutes. Skipping it will generate a customer complaint that costs you far more in reputation damage than the labour ever would.
Safety Hardware Installation: Latches, Protectors, and Kickboards
- Stall gate latches: Install the rust-free aluminium swivel feeder and gate latch mechanisms at 1.2 m height on the stall front. The latch receiver plate must align flush — any gap exceeding 3 mm means the gate frame isn’t square. Recheck the diagonal before forcing alignment, because an off-square gate will bind every time temperature swings shift the footing.
- Corner protectors: Bolt the included rounded-edge galvanized corner guards to all interior 90° intersections. A startled horse will pivot into a corner with enormous force. Bare steel corners cause lacerations; these protectors distribute impact across the HDPE surface.
- UV-stable kickboard panels: The 10mm HDPE boards are engineered for Australian conditions — they maintain structural integrity at 40°C without thermal expansion buckling. Secure them to the interior frame using the supplied stainless steel fasteners at 300 mm spacing, top and bottom.
Mandatory PPE and Roof Work Safety
Flat-pack kits minimise working at height, but installing the Onduline or Colorbond roof panels on a 5m x 4m stable still puts your crew at 2.7–3.3 m above ground. This isn’t optional territory for safety protocols.
Minimum PPE requirement across the entire assembly process:
- Steel-capped boots: A dropped M12 bolt from roof height hits with enough force to fracture metatarsals through soft-toe footwear.
- Cut-resistant work gloves: The galvanized panel edges and roofing sheet profiles will slice through standard cotton gloves within the first hour.
- ANSI Z87.1 eye protection: Drilling into steel purlins throws hot metal chips. Every person on site wears eye protection, not just the one holding the drill.
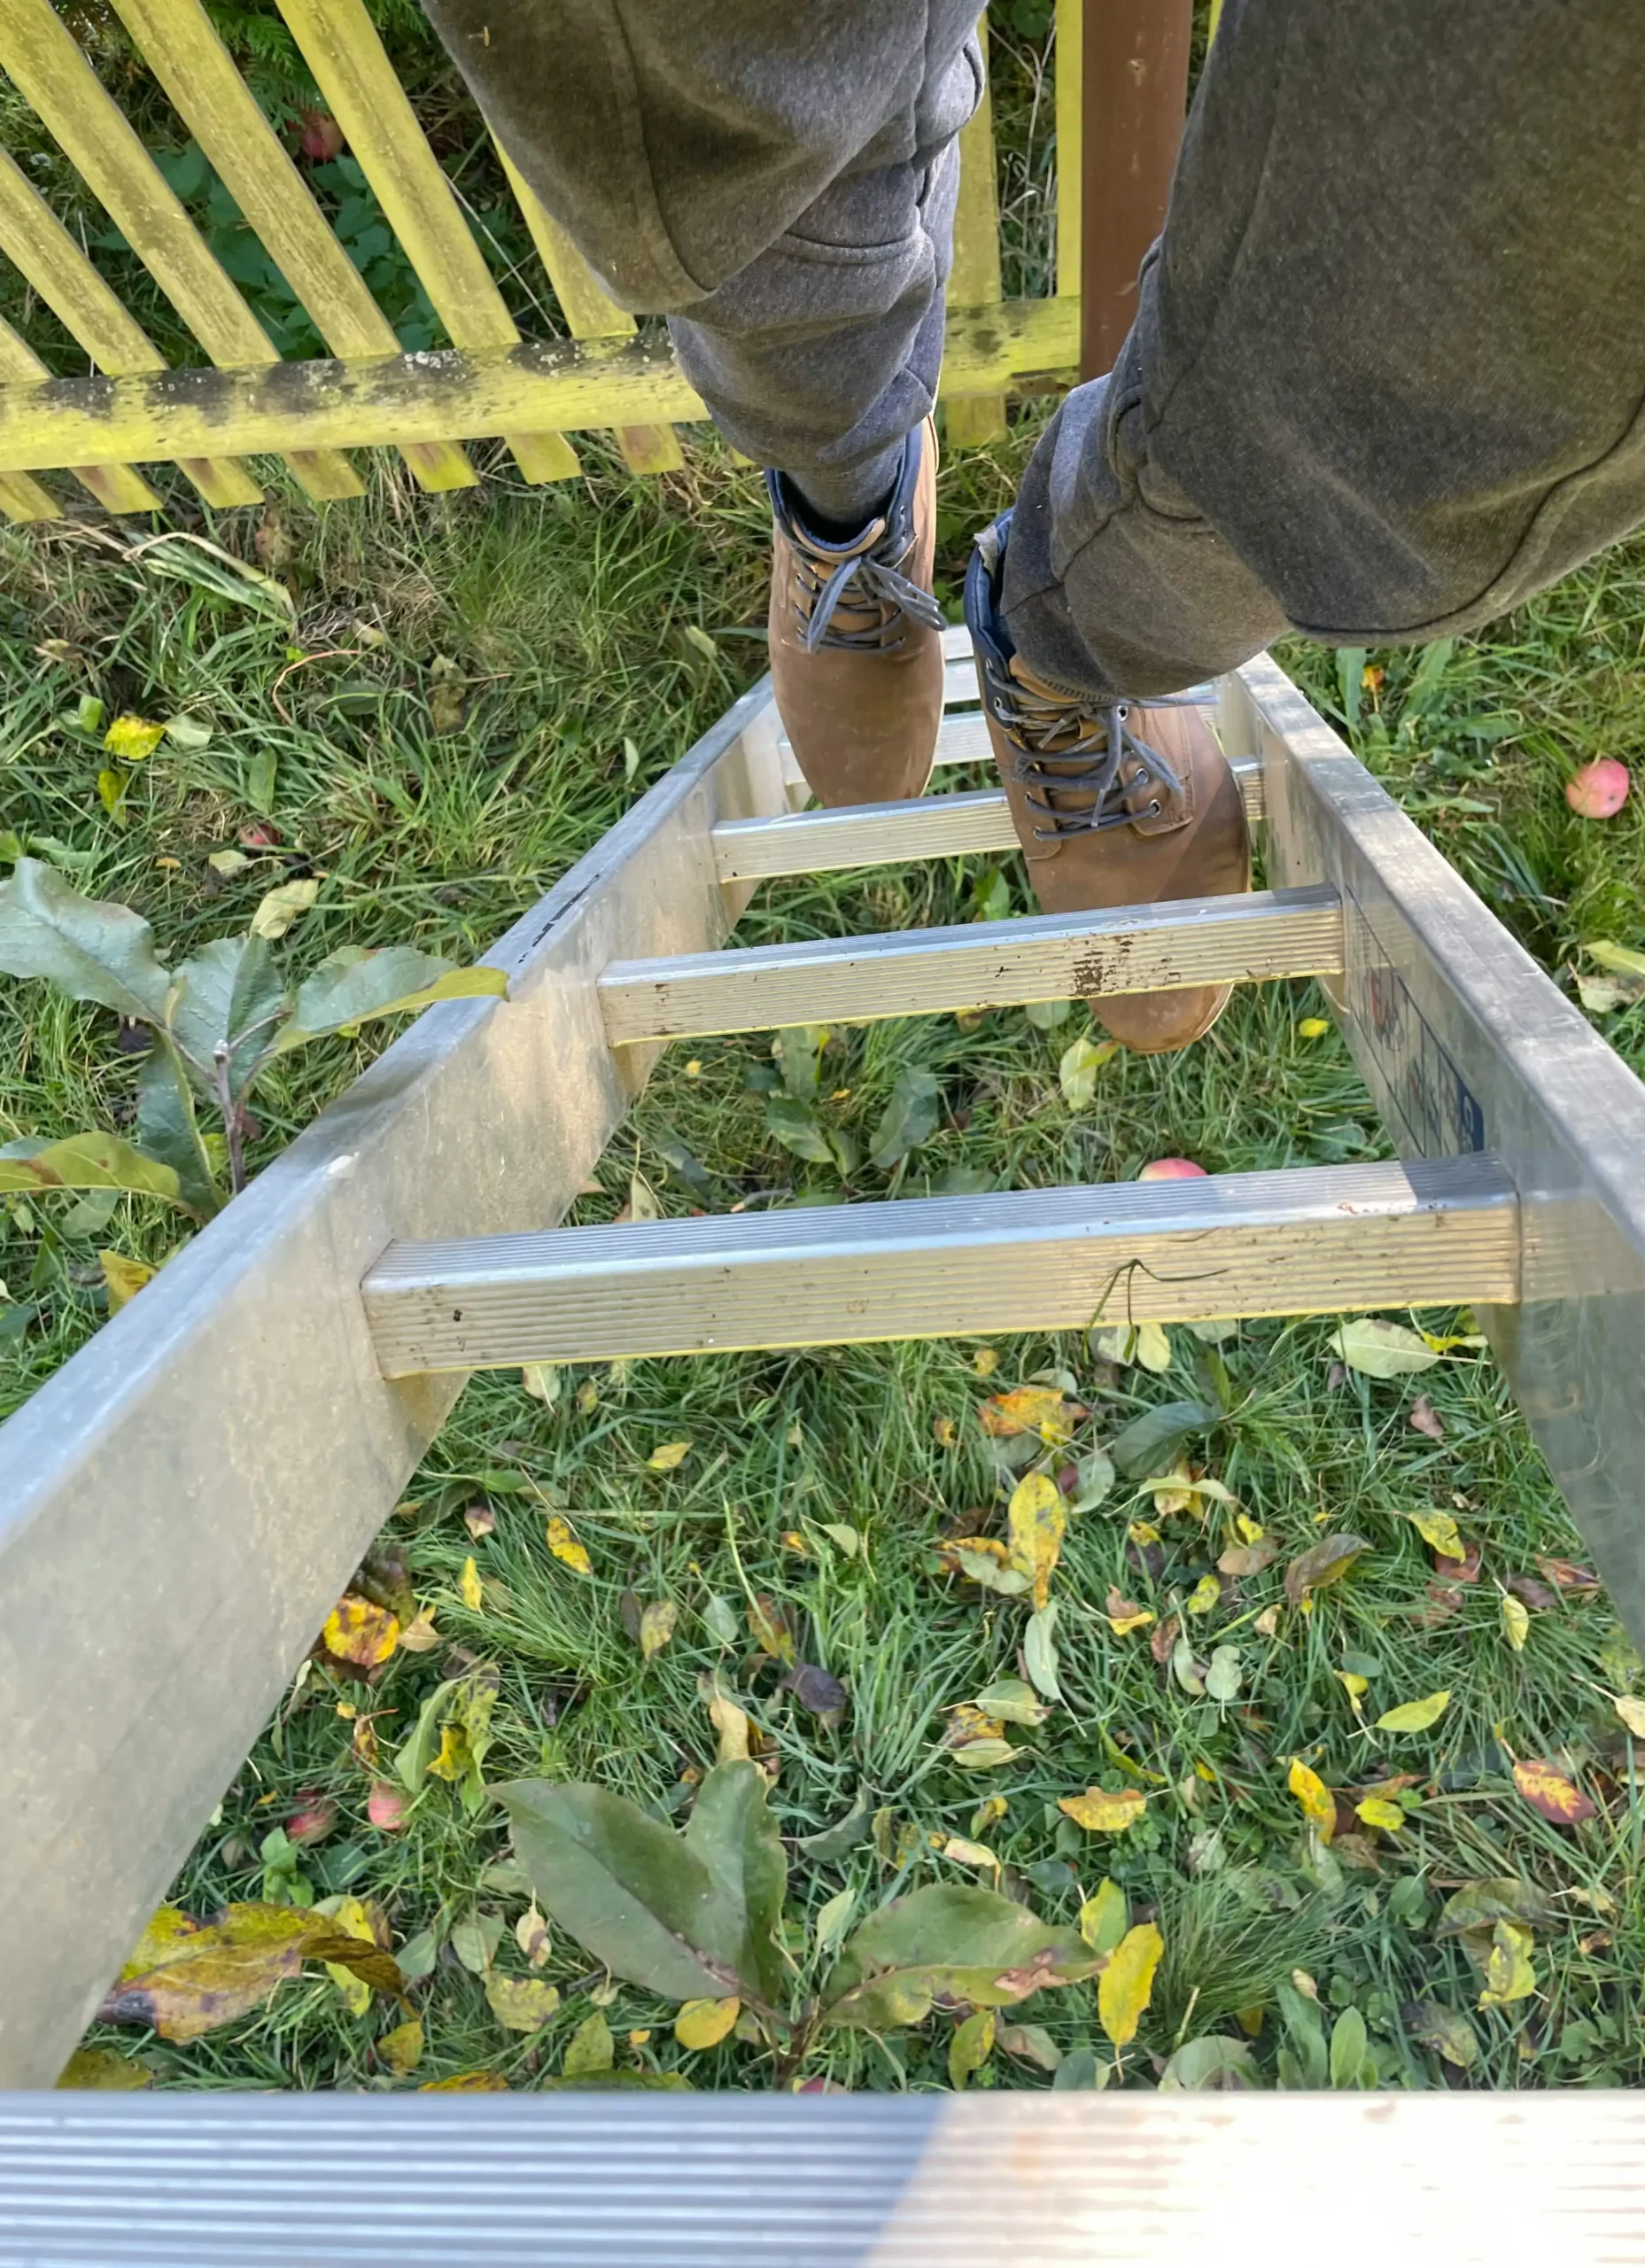
- Stable ladder with stabiliser bar: Do not use an extension ladder leaned against the frame. The roof purlin isn’t load-rated as a ladder support, and a slipping ladder will take out partially secured wall panels on the way down.
For distributors, embed these PPE requirements in the assembly manual you hand to your retail customers. A customer who injures themselves during assembly because “the instructions didn’t say to wear boots” becomes your legal problem, not the factory’s — unless your supplier’s documentation is ironclad. Ours is.
Oceania Import & Freight Tips
The biggest threat to your margin isn’t the factory price—it’s the customs warehouse charge accruing while a broker unpicks incorrect commodity codes.
Container Optimization: Why Flat-Pack Geometry Matters
The economic logic is straightforward. A 40ft high-cube container has a fixed volume. If you ship fully welded or semi-assembled panels, the air gap between the roof pitch and the wall frames becomes dead freight you pay for but cannot sell. Our engineering team designed the DB Standard Stable Kit specifically to nest. Wall panels stack flat against HDPE boards, and roof sheets remain completely unassembled. The result is a consistent load density of 12 to 14 complete stable kits per container, depending on the mix of single stalls and back-to-back configurations.
Competitors who pre-assemble roof trusses or weld frame corners pass that volumetric inefficiency to you as a hidden surcharge. By keeping every component flat, we reduce per-unit ocean freight by approximately 30% compared to typical semi-knocked-down stable shipments. For a distributor bringing in a full container mix, that delta often exceeds the factory gate price negotiation itself.
HS Code Classification: Avoid the 5% Australian Customs Penalty
A common mistake among first-time importers is classifying prefabricated stables under a generic “steel structure” or “agricultural equipment” tariff heading. Australian Border Force applies a rigorous material-and-function test. Misclassification triggers a minimum 5% additional duty assessment during post-clearance audit, plus potential GST adjustments and late payment interest. For a container shipment with a declared value of AUD 45,000, that single error wipes out AUD 2,250 in unplanned cost.
The correct approach uses a split classification strategy where applicable. The galvanized steel frame components typically fall under Chapter 7308 (structures and parts of structures of iron or steel), while the 10mm HDPE wall boards and aluminum window frames may justify separate sub-headings under plastics and aluminum articles respectively. You need a customs broker who understands that a portable, bolted structure intended for livestock housing is functionally distinct from a permanent shed. The shipping documents we supply—including a detailed packing list broken down by material composition and a manufacturer’s statement of use—are formatted specifically to support this classification argument.
Documentation That Keeps the Shipment Moving
Australian and New Zealand quarantine inspection (DAFF Biosecurity and MPI respectively) will hold any container with timber components or organic residue. Our crates use heat-treated, ISPM 15 stamped timber bases and completely finished steel and HDPE components that carry no soil contamination risk. The commercial invoice clearly states the hot-dip galvanized coating thickness (42 microns) and board material (virgin HDPE, UV-stabilized), which helps border officials quickly verify the technical description against the tariff code.
Beyond the standard bill of lading, you should insist on three documents from any supplier before the container departs: a metal content certificate (verifying the galvanized coating), a non-wood packaging declaration for the HDPE parts, and a pre-shipment packing list organized by assembly stage. If your current supplier cannot provide these in clean, bilingual format, the container clearance risk sits entirely with you.
Conclusion
The economics of a flat-pack stable aren’t in the sale price—they’re in the absence of after-sale costs. A kit with pre-sorted fasteners and a square base eliminates the top two reasons clients call for replacements. That’s the margin you keep.
When you’re ready to spec the next shipment, browse the flat-pack kit page for dimensioned drawings, coating certificates, and container load plans. No guesswork, just the numbers you need to protect your rep.
Frequently Asked Questions
How to build a stable step by step?
Assemble a flat-pack steel stable in 6–8 hours with 2–3 people by first preparing a square concrete slab or compacted base, then erecting wall panels with bolts kept loose, squaring a second time using the 3-4-5 triangle rule, tightening structural fasteners to 40–45 Nm, and finally attaching roof trusses and sheets. Every DB Stable kit ships with pre-sorted, stage-labelled fastener pouches so no hardware is missing mid-build. Always double-check diagonal measurements before tightening structure bolts.
How much does it cost to build your own stable?
Total cost varies with stable size, materials, and local labour rates, but choosing a flat-pack DIY kit can save up to 20% on installation labour and reduce ocean freight by 30% compared to pre-assembled units. The biggest financial advantage for importers is avoiding the hidden cost of warranty returns and replacement parts that plague cheap timber kits. Request an FOB price from the factory to compare true landed costs.
What is the best height for a stable?
A stable height of 9 to 11 feet (2.7–3.3 metres) is ideal to ensure proper ventilation, adequate head clearance, and injury prevention. Internal ceilings lower than 8 feet trap heat and restrict airflow, while anything significantly taller adds unnecessary material expense without equine benefit. For standard flat-pack designs, 10 feet is a practical, cost-effective sweet spot.
What is the cheapest way to build a horse stable?
The cheapest approach over time is to self-assemble a flat-pack, hot-dip galvanized steel stable kit, which slashes labour and freight costs and avoids the 3–4-year replacement cycle of timber stables under Australian UV. Upfront savings on a timber kit quickly erode when warping, rust, and brittle plastic trigger returns and customer complaints. Compare cost per year of use, not just the sticker price.
How many horses can you put on 1 acre?
Generally, 1 acre of well-managed pasture can support 1 to 2 horses if you rotate paddocks and supplement with hay. In drier regions like much of Australia, unimproved land may sustain only 1 horse per acre without risking overgrazing and soil damage. Check local council regulations for the minimum land area per horse.