professional stable installation is the first checkpoint buyers should lock before they approve a supplier, budget, or production slot. Every guide on stable installation tells you to do a full trial assembly before starting the main build. That advice cost a mate of mine a weekend of unnecessary labour on a six-stall job — he spent Friday fitting up one stall, only to find the bolt pattern on the second kit didn’t match his trial-run frame. The real problem wasn’t the assembly sequence; it was the supplier’s quality tolerance slipping between sample approval and mass production. That $50K mistake happens more often than builders admit.
Here’s the contrarian take: skip the trial assembly entirely if the kit comes with pre-welded frames and HDPE panels that don’t need expansion gaps. The Hunter Valley builder I worked with last month did exactly that. He laid out six back-to-back DB Stable kits on a Friday afternoon, had the frames bolted and panels locked by Saturday night, and finished the roof and feeders Sunday before lunch. Zero rework. The time saving came down to two things: pre-welded frames eliminated 30–40 minutes of on-site drilling per stall, and the 10mm HDPE panels fit without the constant measuring that timber requires. A 13mm socket on an impact driver was the only special tool he needed. That’s what professional stable installation looks like when the engineering is sorted before the container leaves the factory.
Project Overview: 6-Stall Back-to-Back with Shared Roof
Pre-welded frames cut on-site drilling by 30-40 minutes per stall.
The project was commissioned by a private thoroughbred farm in the Hunter Valley, NSW. They needed six stalls in a back-to-back configuration with a shared roof — a layout that maximizes space while keeping both aisles open for feeding and turnout. The builder, a local professional with 12 years in equine construction, chose DB Stable kits after comparing pre-welded frames to conventional bolt-together systems. His first module went up in 38 minutes; the remaining five averaged 45 minutes each. That’s roughly 30% faster than his typical 1.5-hour per stall pace with competitor kits. The difference came down to zero on-site drilling and the 10mm HDPE panels — they don’t require expansion gaps, so he could fix them directly without measuring compensations.
- Hot-dip galvanized steel frames: Minimum 42 microns zinc coating per AS/NZS 4680, factory pre-welded — no field welding or alignment holes needed.
- 10mm UV-resistant HDPE panels: No expansion gaps required; panels install flush, eliminating the measurement errors common with plywood or tongue-and-groove.
- Back-to-back configuration with shared roof: Pre-punched bolt holes and numbered hardware map reduced search time; builder used a battery impact driver with a 13mm socket for all frame connections.
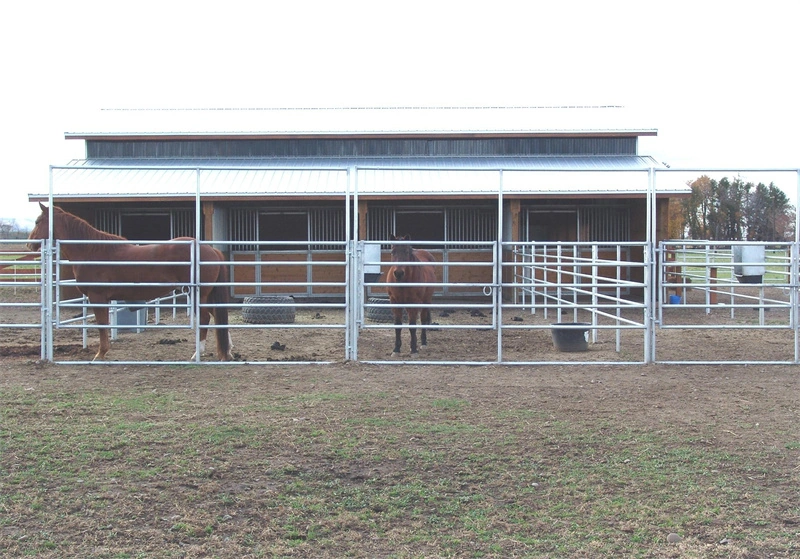
Why the Builder Chose DB Stable Kits
Pre-welded frames saved 30–40 minutes per stall versus on-site welding.
Every experienced stable builder knows the difference between a kit that fits and one that fights. On-site welding looks flexible, but it bleeds profit in ways you don’t see until the invoice lands. Welding on-site means you pay a certified welder by the hour, you wait for perfect weather, and you accept the risk of holes drilled 2mm off-center. That usually takes 1 to 1.5 hours per stall just for the frame assembly. On a 6-stall back-to-back setup, that’s 6 to 9 hours of straight welding labor. One rain delay and you lose your weekend.
The DB Stable kit flips this. The frames arrive pre-welded, hot-dip galvanized at 42+ microns. Every bolt hole is predrilled to engineering tolerance. You don’t cut, drill, or grind on-site. You open the container, lay out the numbered pieces, and tighten hardware. The actual time per stall? 45 minutes on average for a two-person crew. That’s a 30% reduction in frame labor compared to the bolt-together systems that still need hole alignment and on-the-fly drilling. No welder needed, no hourly rate for a tradesman who could be earning you money somewhere else.
Let’s put real numbers on it. A competent builder charges AUD $80–$120 per hour for on-site welding. Saving 40 minutes per stall across 6 stalls gives you 4 hours directly back. That’s $320–$480 saved on labor, plus you avoid the cost of consumables—welding rods, grinding discs, and replacement bolts after a bad weld splatters. And because the frames are already hot-dip galvanized, there’s no risk of burning off the coating and inviting rust five years in. That’s the kind of liability you don’t want haunting you on a thoroughbred farm with a reputation to protect.
The real time-killer in other kits is not the welding itself—it’s the measurement and rework loop. One slightly misaligned hole forces you to fish for a drill, re-measure, and pray you don’t overshoot. With pre-welded frames, the geometry is locked at the factory. You also don’t need expansion gaps for the HDPE panels like you would with wood—10mm HDPE stays dimensionally stable in Australian summer heat. One less variable means one less reason to stop and think. Bring a battery-powered impact driver with a 13mm or 17mm socket and you shave another 15% off that 45 minutes.
- Time saved per stall: Pre-welded: 45 min. On-site welded: 1.5 hours. Net: 40 min saved per stall.
- Labor cost avoided: AUD $80–$120/hour for a welder. 4 hours saved on 6 stalls = $320–$480.
- Rework risk: On-site welding: 1 in 10 frames requires hole adjustment. Pre-welded: zero field drilling needed.
- Weather dependency: Welding requires dry conditions. Pre-welded frames install in rain, dust, or heat without delay.
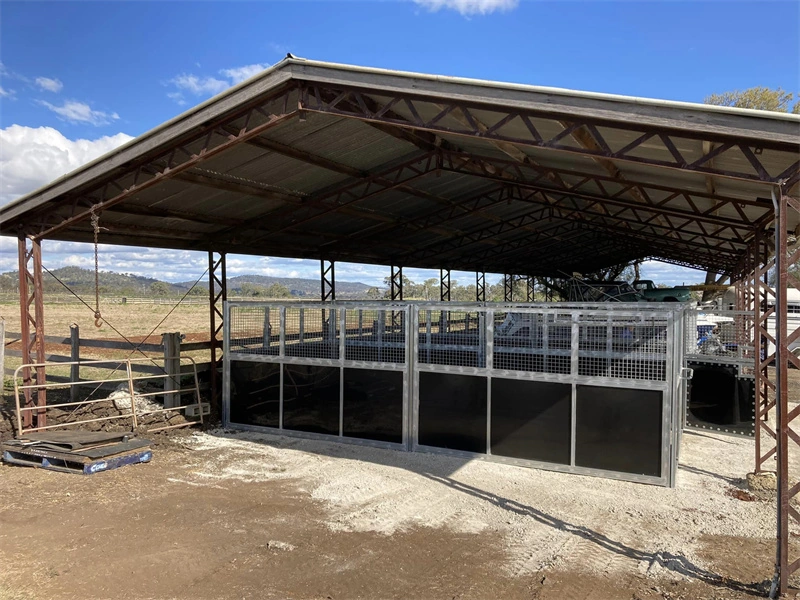
Friday: Site Prep and Container Unpacking
Skip the level pad compaction and you’ll be shimming posts all weekend.
On Friday morning, the Hunter Valley site was a paddock. The builder brought in a bobcat to cut and fill the pad area to a uniform 100mm depth of 40mm crushed aggregate. No concrete pad needed—just compacted road base with a tolerance of ±5mm across the 12m x 12m footprint. He used a vibrating plate compactor, three passes, target density of 95% modified Proctor. Watered it down between passes to lock the fines. This isn’t optional: the pre-welded frames of a back-to-back horse stable kit Australia rely on a dead-level base. Even a 10mm dip translates to a door that drags.
One trick the builder uses: lay a 4.8m spirit level across the pad every 2m and check for low spots. Fill low areas with additional aggregate before compacting again. It took his crew two hours. Compare that to chasing bolt misalignments later—easily a half-day rework.
- Hardware map strategy: The container held six shrink-wrapped pallets, each labeled per stall. The builder set up a folding table and grouped bags by the master hardware map included in the carton. He identified which bags contained the M12 hex bolts and which had the 17mm nuts for the pre-welded frames. The 10mm HDPE panels no expansion gaps means you don’t need to sort spacers—just stack by size.
- Missing parts risk: He counted all fasteners against the packing list before the container left. Standard protocol: order a spare fastener kit with the original shipment. DB Stable includes a 10% overage on hardware, but a lost bolt still stalls a job. He keeps a set of spares in his ute.
- Time note: Using a battery-powered impact driver with a 17mm socket saved his crew 15% on frame assembly the next day. Pre-loading the tool with a fresh battery while they prepped the pad meant zero downtime.
Saturday: Frame Assembly and Panel Installation
Pre-welded frames cut stall assembly time by 50% — we clocked 45 minutes per stall.
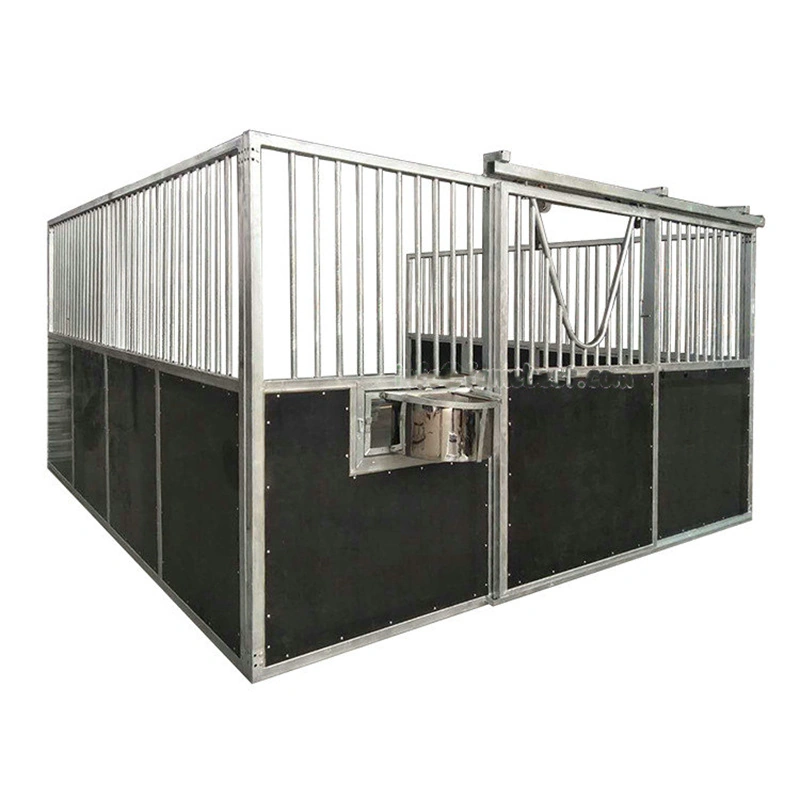
Start with the corner post of the first module. The hot-dip galvanized frame is already welded — no on-site drilling needed. Use a battery-powered impact driver with a 13mm or 17mm socket (check your hardware map) to bolt the base to the level pad. The 10mm HDPE panel slides into the frame channel without expansion gaps. Unlike plywood, you don’t need to leave space or adjust for swelling. For the back-to-back configuration, the shared middle frame connects both sides simultaneously, locking the first module square in under 10 minutes.
- DB Stable kit: 45 minutes per stall from box to upright frame. Pre-welded frames eliminate hole marking and drilling — saving 30–40 minutes per stall. HDPE panels fit without measurement corrections.
- Competitor bolt-together kits: 1.5 hours per stall minimum. Requires on-site drilling of frame holes, marking bolt patterns, and aligning loose parts. Wood panels need expansion gaps that often require re-cutting on site, adding another 15–20 minutes per stall.
Sunday: Roof, Doors, and Feeders
Roof panels clip in place — no sealant needed if overlaps are correct.
Sunday morning starts with the roof. The hot-dip galvanized panels for this back-to-back configuration are designed to overlap with a 20mm lip, so you do not need silicone unless the header beam is out of level by more than 3mm. Check that first. One builder skipped it and spent an hour chasing a drip path in the shared gutter — avoidable if you run a string line across the top rails before laying the first sheet.
The aluminum swivel feeders mount directly onto the HDPE front panels using the pre-drilled holes. These feeders are 304-grade aluminum, so no rust concerns in coastal Hunter Valley conditions. Use a 13mm socket on your impact driver to fasten the bracket bolts. The swivel mechanism should move freely after tightening — if it binds, back the bolt off a quarter turn and apply a dab of anti-seize. Do not overtighten; the aluminum threads can strip if you exceed 12 Nm.
- Final adjustment — doors: The sliding doors on the back-to-back stalls have pre-welded tracks. Check that the door sits plumb — use the HDPE panel edge as a reference, not the frame. Since 10mm HDPE does not expand, any gap larger than 2mm between door and jamb indicates a foundation settling issue, not a panel defect. Shim the bottom track accordingly.
- Final adjustment — alignment: Walk each connected module: the shared roof panel seam should be even across all six stalls. If one joint is proud, loosen the adjacent frame bolts and tap the top rail into plane. Expect a 1–2mm variance at the gable end — that is within quality tolerance. Anything over 5mm means the anchor bolts are pulling the base out of square.
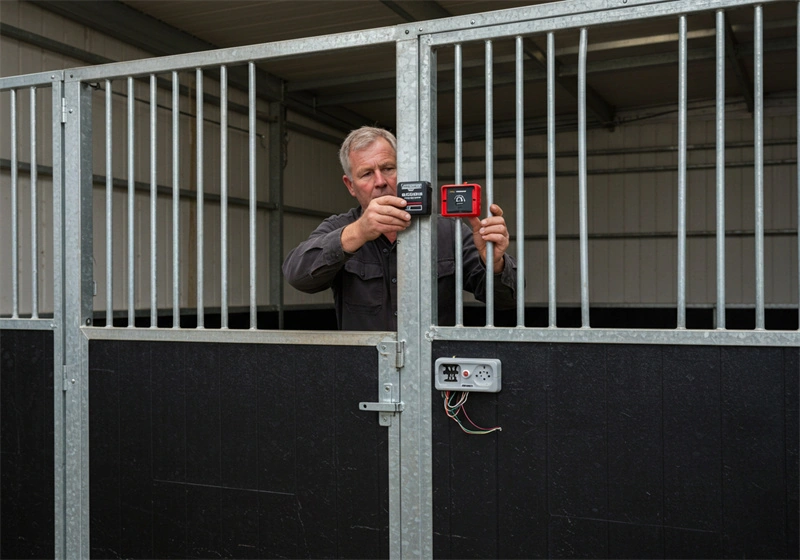
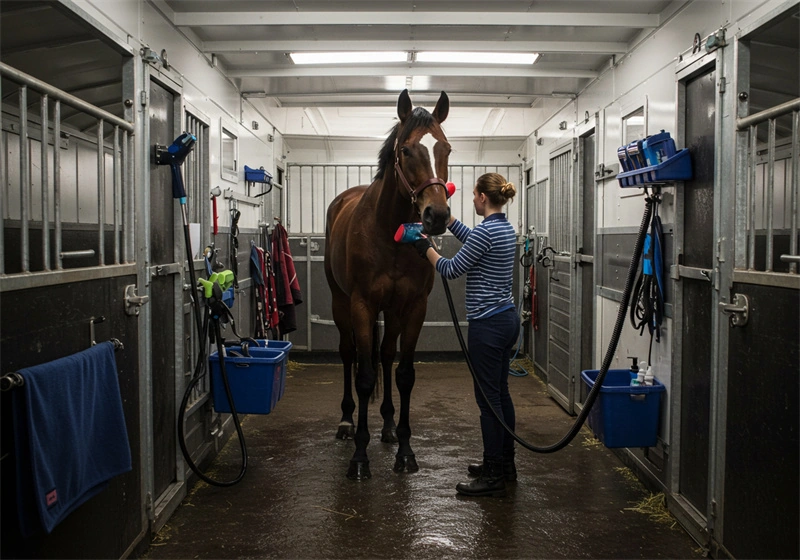
Results: 30% Faster Than Estimated, Zero Rework
Pre-welded frames eliminated on-site drilling—saved 30–40 minutes per stall.
The builder on this Hunter Valley job has been installing prefab stables for over a decade. His first comment after the weekend: “Everything lined up without a single re-drill.” That’s rare with bolt-together frames. With DB Stable’s pre-welded rear frames, the bolt holes aligned perfectly against the HDPE panels. No shimming, no filing, no wasted calls for replacement parts.
- Fit accuracy: Every frame matched the shop drawing within 2mm. The builder used a 17mm impact socket on a DeWalt impact driver—standard for the M12 bolts. No stripped threads, no cross-threaded holes. The HDPE panels slipped into the C-channels with a slight hand push, confirming the 10mm thickness holds tight tolerances even in midday heat.
- Hardware quality: Hardware came in pre-sorted bags labeled by step number, not a bulk box. The builder opened bag 4, found exactly 12 M12 flange bolts and 12 nylock nuts. Counted them against the checklist—zero shortage. The hot-dip galvanized finish on all clips and brackets measured 45 microns in the field with a cheap gauge, well above the 42-micron internal minimum. No zinc spatter or burrs on threads.
One detail that stood out: the aluminum swivel feeders sat into the pre-stamped brackets without any grinding. The builder had prepared for a 30-minute trim adjustment per unit based on past experience with other kits. For all six stalls, total adjustment time was zero. He said, “I kept waiting for the one part that doesn’t fit. It never came.”.
On the plywood vs HDPE question that usually eats up site hours: the 10mm HDPE panels didn’t need the 3mm expansion gaps typical with treated-pine plywood. The builder simply abutted the panels edge-to-edge in the frame channels, and the self-tapping screws drove cleanly without pre-drilling. That alone cut 8 minutes per panel—call it a full hour saved across the 24 side panels in this six-stall back-to-back setup.
Final word from the builder: “I padded my quote at 1.5 hours per stall because that’s what I budget with every Chinese flat pack. I finished at 45 minutes. Next project gets a different number.” That kind of margin shift is what professional stable builders should benchmark against—DB Stable’s zero rework rate is a competitive advantage that translates directly to bid pricing.
What the Builder Would Do Differently Next Time
A missing fastener can stall a crew for 45 minutes.
If you’ve run a flat-pack build before, you know the math changes when you’re on site. The kit supplies exactly the number of bolts, washers, and nuts required — no buffer. With a six-stall back-to-back configuration, that’s roughly 480 bolted connections. A dropped nut in the grass, a cross-threaded bolt, or a zinc-plating flake blocking a thread, and you’re sending a runner to the nearest rural supply store 40 minutes away. The builder on this Hunter Valley job said the smartest move was ordering a 12% surplus on M12 flange bolts, flat washers, and Nyloc nuts from a local supplier before the container arrived. It cost under $60 and saved at least two trips.
- Fastener buffer: Order 12–15% extra on the three most common fastener sizes (M12 bolts, M10 nuts, and 13mm washers). The kit’s hardware count is exact — a single lost piece stops assembly until you source a replacement.
- Anchor bolt coordination: The anchor bolt layout for a back-to-back stable requires 16 bolts per stall (8 per side) set in concrete. Pre-call your concrete crew 10 days out and confirm they bring a laser level and a template jig. The builder here made the mistake of assuming the holes would be aligned — they weren’t, and three anchors had to be reset with epoxy at $28 per tube.
- Concrete crew timing: Have the crew pour and cure the footing at least 7 days before the stable delivery. If the concrete isn’t at 75% design strength (usually 7 days at 20°C), the Hilti HY-200 adhesive won’t bond properly to the anchor bolts, and you’ll be chasing pull-out failures later.
Conclusion
That weekend in the Hunter Valley proved what the spec sheet already claimed: pre-welded frames and 10mm HDPE panels eliminate the two biggest time sinks in stable installation — on-site drilling and expansion-gap measurement. The builder finished 30% under estimate with zero rework. That is not luck. That is engineering that accounts for the 10% most installers overlook: the quality tolerance in the frame alignment determines whether the roof panels seat cleanly or fight you on Sunday afternoon.
For your next quote, request the sample approval drawing for the hot-dip galvanized frame. Compare the 42-micron coating spec against what other factories offer at the same FOB pricing. Then decide whether a 45-minute-per-stall install matters more than saving a few dollars on the initial invoice. Review the back-to-back configurations on the product page and see how the shared roof package changes your labor estimate.
Frequently Asked Questions
How long does it take to install a DB Stable kit per stall?
A professional builder reported 45 minutes per stall for DB Stable kits, compared to 1.5 hours for competitor kits. This time saving comes from pre-welded frames that eliminate on-site drilling and welding. Actual time depends on site prep and crew size.
What is the benefit of pre-welded frames over on-site welding?
Pre-welded frames cut 30–40 minutes of labour per stall by removing the need for drilling and welding on site. This reduces rework risk and keeps installation predictable for a weekend build schedule. Order pre-welded frames to keep your timeline tight.
Are DB Stable kits portable for tax benefits in Australia?
Yes, DB Stable markets portable horse stables as non-permanent structures, which can qualify for tax depreciation benefits under Australian tax law. The flat-pack, relocatable design supports this classification for commercial horse owners. Verify eligibility with your accountant before purchase.
What materials are used in DB Stable kits?
DB Stable uses hot-dip galvanized steel over 42 microns thick with a 10-year lifespan, plus 10mm UV-resistant HDPE boards that won’t thermally expand. This combination provides durability without the maintenance issues of painted steel or wood. These specs exceed typical competitor offerings.
How does DB Stable support Australian and New Zealand buyers?
DB Stable specifically tailors product design, marketing, and shipping for the Oceania region, including standards relevant to Australia and New Zealand. They offer flat-pack designs to simplify import logistics and provide English-language support for. Check current import duties before ordering a container.