assemble custom stable kit is the first checkpoint buyers should lock before they approve a supplier, budget, or production slot. When you assemble a custom stable kit on site, the real test isn’t the paperwork or the pre-production sample approval — it’s the moment you lay the first HDPE panel into the frame channel and realize it’s 2mm too wide. A professional stable builder lost half a day on a four-bay job because the panels had been sitting in direct sunlight before installation. The batch tolerance had shifted just enough to cause binding, and by the time he trimmed the edges, the roofline schedule was blown. That $50K order started looking a lot thinner once the site trailer logged the extra labor.
The root cause is almost always thermal expansion — HDPE panels respond to ambient temperature in ways that steel frames don’t. DB Stable specifies a 15-25°C window for panel insertion, with a 3mm expansion gap built into every channel. Skip that, and you’re fighting the material all afternoon. The same principle applies to the galvanized frame: the 42-micron hot-dip coating eliminates on-site rust-proofing even in coastal environments, but only if the connectors are aligned within ±2mm during assembly. A misaligned beam at the front-back junction cascades into door latch misalignment later.
Having audited flat-pack stables across a dozen projects, I can tell you the difference between a two-man crew finishing in six hours versus eight hours comes down to two things: foundation leveling within ±10mm and torquing M12 bolts to the spec sheet — not guessing. DB Stable includes exploded-view manuals per kit, but the builder who reads them before the shipment lands avoids the expensive loop of calling for missing parts or re-drilling holes. Next time you price a custom stable job, write down the ambient temperature at installation time and the torque spec for every bolted connection. That sheet of paper will save you more than any FOB discount.
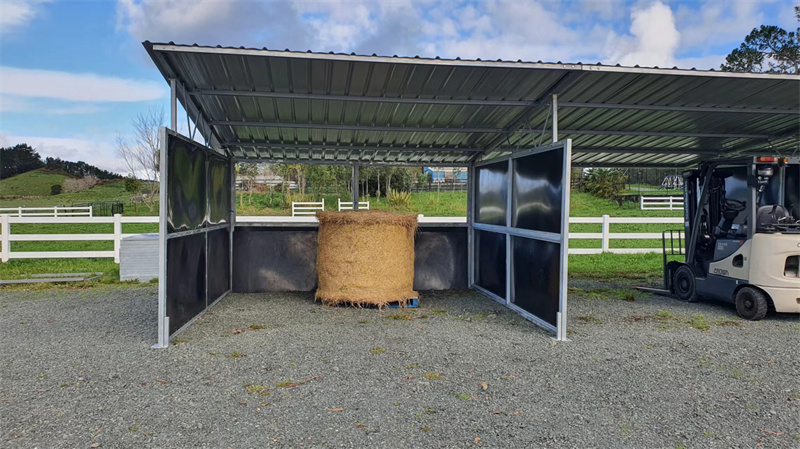
Pre-Installation: Site Preparation and Foundation
A 10mm leveling error at the pad means a 40mm gap at the roof ridge.
I’ve seen too many builders treat a portable stable foundation like a garden shed slab. It’s not. The hot-dip galvanized frame (42 microns) is rigid — it doesn’t flex to hide a bad pour. For a custom stable kit, the foundation is the only part that can’t be replaced without a crane. Get it right or the whole assembly fight starts here.
- Concrete slab: Minimum 100mm thick, 20MPa mix, with a single layer of SL72 mesh. That’s the baseline for a standard 3.6m x 3.6m stall. If you’re on reactive clay (common in Victoria and parts of NZ), you need 150mm and F82 mesh. No shortcuts. The slab must extend at least 150mm beyond the stable footprint on all sides — that keeps the HDPE panels dry and prevents mud splatter.
- Gravel pad: Only viable if the stable is truly temporary (moved every 6–12 months) and you’re on free-draining soil. Use 20mm clean crushed rock, compacted to 95% Standard Proctor density, minimum depth 150mm. Surface must be crowned or sloped 1:80 for drainage. Do not use sand or road base — they hold moisture and will rot the frame’s bottom rail over time.
- Leveling tolerance:±10mm across the entire pad is the hard limit. That’s not aspirational — it’s the maximum the frame connectors can adjust for with the M12 bolted joints. Measure diagonally: if the difference between corner-to-corner measurements exceeds 10mm, you get a twisted frame. A 15mm high corner can cause a door that won’t latch and a roof panel gap wide enough for a possum to squeeze through. Use a laser level. Check every 600mm in both directions.
- Drainage: The pad must be at least 150mm above the surrounding ground level. If you’re in a flood-prone area (e.g., Waikato river flats), add a 100mm gravel base under the slab and a perimeter agricultural drain. Water pooling under the stable will rust the galvanized connectors over 5–7 years, even with 42 microns. That’s a warranty claim waiting to happen.
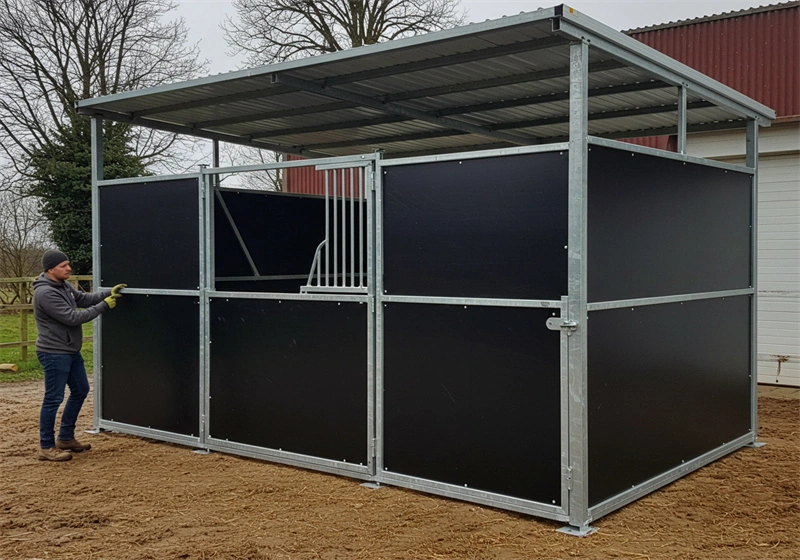
Step 1: Unpack and Inventory Kit Components
Don’t just count panels — verify the batch numbers match the packing list.
The first mistake builders make on a custom stable kit assembly is skipping the full inventory check. A flat-pack horse stable from DB Stable arrives with multiple pallets: hot-dip galvanized frame sections (42µm coating), 10mm HDPE panels, hardware bags, and accessories like aluminum swivel feeders. The packing list is your bible. Cross-check every item against it before the delivery truck leaves. If you find a missing bolt or a warped panel, document it immediately. Waiting until you’re mid-assembly means downtime and frustrated clients.
- Frame pieces: Verify all beams, connectors, and brackets. Check for bent corners or damaged galvanizing — a ding in the coating can lead to rust in coastal environments.
- HDPE panels: Count each panel and confirm the 10mm thickness. Stack them flat in a shaded area. Direct sunlight can cause thermal expansion beyond the 3mm gap allowance, making panel insertion impossible.
- Hardware bag: Open and count M12 bolts, washers, and nuts. DB Stable includes a torque spec card (120 N·m for M12). If hardware is missing, call the supplier before you start — not during.
- Accessories: Aluminum swivel feeder, door hinges, grills. Check for rust-free aluminum stamping. Any steel parts should be hot-dip galvanized, not just painted.
On storing panels: Teams have been observed leaving HDPE boards in direct sunlight for an hour before assembly. At 35°C, those panels can expand 2–3mm across a 2.4m length. That’s enough to jam them into the frame channels. The approved procedure is ambient temperature storage (15–25°C) in shade, and letting the panels acclimate for at least 30 minutes before installation. This is not a suggestion — it’s the difference between a smooth build and an afternoon of shaving edges.

Step 2: Assemble the Galvanized Steel Frame
Frame alignment error is the #1 cause of panel gaps in the field.
Start by connecting the front-to-back beams to the upright posts. The beams are pre-drilled at the factory with a 0.5mm tolerance, so if the holes don’t line up easily, your foundation is out of square. Do not force the bolts — re-level the base instead. A 5mm diagonal discrepancy at this stage multiplies into a 20mm gap at the roof line.
The hot-dip galvanized connectors are coated to 42 microns minimum on all contact surfaces. That coating is your corrosion budget for the next decade. If you grind it off during alignment, you’ve just invited rust into a joint that will be inaccessible after the panels go on. Use a rubber mallet for final positioning, not a grinder.
- M12 bolt torque: 85 N·m for structural connections. Anything below 75 N·m risks loosening under wind load; above 100 N·m can strip the galvanized threads or deform the beam flange. Use a calibrated torque wrench — hand-tight is not a spec.
- Bolt pattern sequence: Tighten all bolts in a cross pattern to 50% torque first, then final pass to 85 N·m. This prevents the frame from racking into a parallelogram.
- Connector alignment tip: The beam ends have a 15mm locating tab that fits into the post bracket. If the tab doesn’t seat fully, check for debris inside the bracket — not uncommon after shipping. A 1mm gap here will cause the wall panels to bow outward.
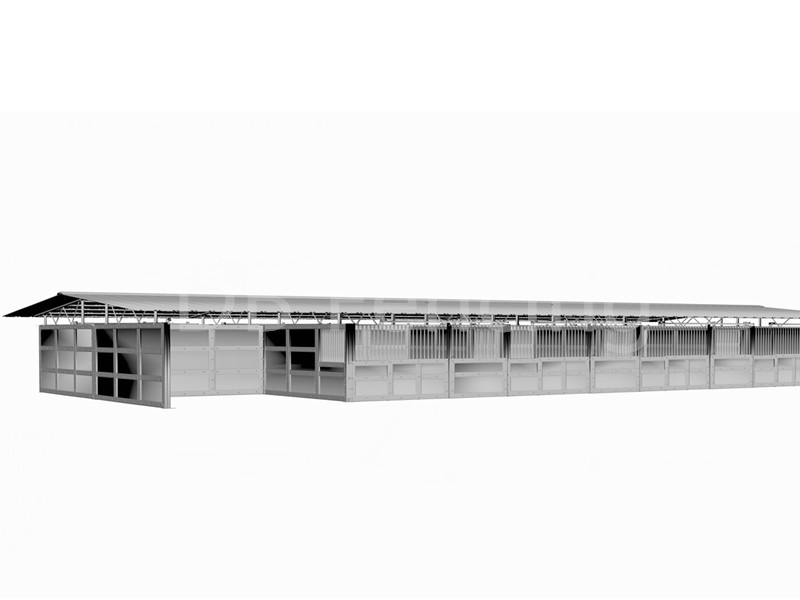
Step 3: Install HDPE Stall Panels
Install HDPE panels at 15-25°C to prevent post-installation buckling.
Slide each 10mm UV-stabilized HDPE panel into the galvanized steel frame channels. The panels fit snugly but not tight — if you have to force them in, check the frame alignment first. DB Stable pre-cuts panels to within 1mm tolerance, so any resistance usually means a frame bolt is off by more than 3mm.
Leave a 3mm gap between every panel and the frame edge. That gap is not a sloppy fit — it’s thethermal expansionbuffer. HDPE expands about 1.8mm per metre over a 30°C temperature swing. Without that 3mm allowance, panels will buckle inward during summer or bow outward when humidity drops. In some stables, the installer skipped the gap and the panels cracked the hinge mounts within six months.
- Hinge type: Use the supplied rust-free aluminum hinges only. Steel hinges will corrode where they contact galvanized steel and HDPE — the electro-chemical reaction speeds rust. Aluminum is non-reactive and lasts the life of the stable.
- Fastener torque: Drive the stainless steel self-tapping screws until the hinge flange just contacts the panel surface. Over-tightening compresses the HDPE locally and creates a stress point. Hand-tight plus one quarter turn is enough.
- Panel-to-panel connection: Where two panels meet at a corner, insert the pre-cut aluminium corner cap before securing the outer hinge. The cap prevents edge flaking and stiffens the joint.
One more thing the manual sometimes skips: if you’re assembling in direct sunlight on a black asphalt pad, the panels can heat-soak to 40°C+ before installation. Let them cool in the shade for at least two hours, otherwise they’ll expand during install and contract later, pulling the hinges loose. That’s a call-back you don’t want.
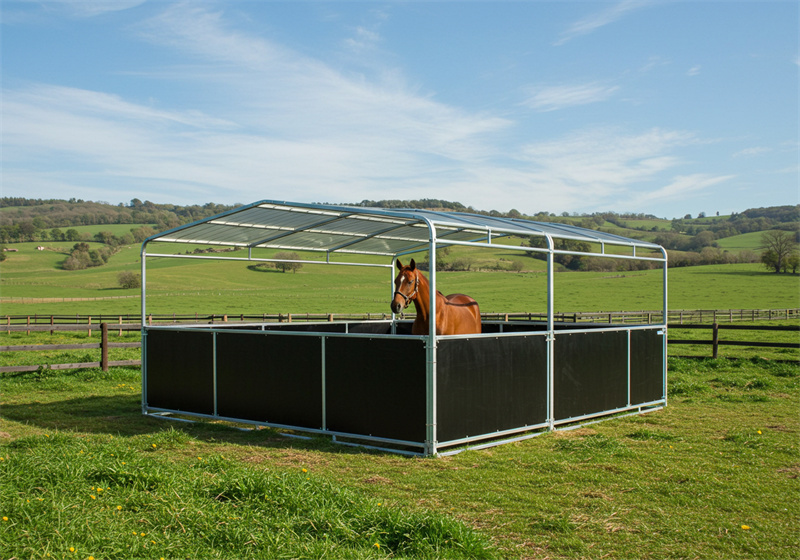
Step 4: Install Roof, Feeders, and Accessories
Roof overlap under 75mm will leak within 12 months on coastal sites.
Roof panels must overlap by a minimum of 75mm along the ribs. Use the provided EPDM foam sealant tape between overlaps — do not substitute silicone. Ensure the roof pitch is at least 10 degrees for adequate water runoff. Fasten panels at every rib with self-drilling screws, spaced no more than 300mm apart. A common failure is overtightening screws, which dimples the sheet and creates pooling.
- Feeder Mounting: Position the aluminum swivel feeder inside the stall against the designated frame bracket. Pre-drill through the bracket using the feeder’s mounting holes as a template. Use only the stainless steel bolts and lock washers supplied — galvanized fasteners will corrode against aluminum.
- Swing Check: After bolting, test the feeder’s full rotation range. It must clear the door frame and HDPE wall by at least 20mm on all sides. If it binds, loosen the top bolt, reposition the feeder, and retighten to 25 Nm. Do not force the swivel — binding indicates misalignment that will wear the hinge prematurely.
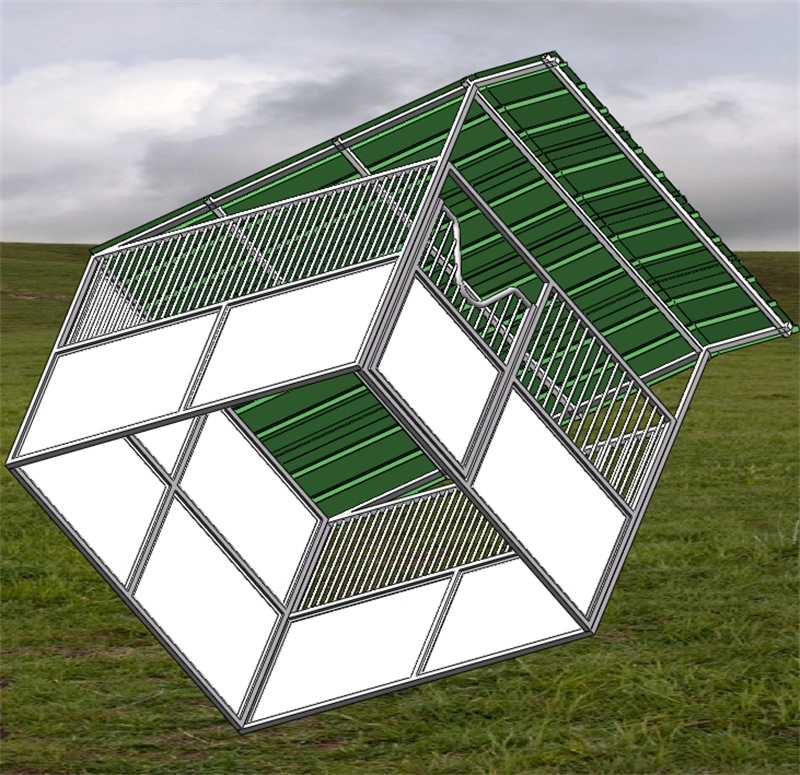
Step 5: Final Inspection and Safety Check
A missed burr or loose latch can cost you a client’s trust faster than a crooked beam.
This is your last chance to catch defects that could lead to injury or an escape. A horse that gets out because a latch failed is a liability you don’t want to explain to the owner. Run through this checklist methodically before calling the job complete.
- Door latches and grills: Close each door and apply a 30kg lateral force to the latch side. The latch must hold without slipping or clicking open. For grills, measure bar spacing: no gap should exceed 100mm to prevent a hoof from getting trapped. Test the swivel feeder’s locking mechanism by filling it with feed and shaking it vigorously.
- Sharp edges: Run a dry cloth along every cut edge of the HDPE panels and steel frame joints. Any snag means a burr that must be filed smooth. Pay special attention to the bottom door edge and the feeder opening. A horse’s mouth is sensitive; a sharp edge there can cause a cut that leads to infection and vet bills.
Common Mistakes NZ Builders Make (and How to Avoid)
Over-tightening HDPE panels is the #1 call-back for NZ builders — it voids the panel warranty.
It has been observed too many times on South Island builds: a crew cranks every bolt to 60 N·m because that’s what they do on steel frames. But HDPE isn’t steel. It expands and contracts with temperature swings. Tighten the panel fixings beyond the recommended spec and you’ll get rippling, bowing, or even cracking within the first summer. DB Stable’s 10mm HDPE panels require a 3mm expansion gap per panel and the fasteners must be snug — not torqued. The assembly manual specifies a max of 20 N·m on the aluminium hinge bolts. Exceed that and you’re compressing the panel, not securing it.
- Torque limit: M12 frame bolts: 85 N·m. HDPE panel hinge bolts: 20 N·m max. Use a torque wrench, not an impact driver on high.
- Expansion gap: Leave 3 mm between adjacent HDPE panels. Install at 15–25°C ambient. Below 10°C the panels contract and gaps will open up in summer.
- Wind load risk: In NZ wind zones (NZS 3604 up to 2.5 kPa), a 3.6 m x 3.6 m stable panel can see 800 kg of lateral force. Without bolting the frame to a concrete slab or using ground anchors, the whole structure can shift. DB Stable’s kit includes 4 anchor brackets per bay — use them.
The second mistake is treating a portable stable like a garden shed. NZ’s Building Code (AS/NZS 1170.2) requires site-specific wind load calculations for any structure over 10 m². Most builders grab a generic kit, plonk it on gravel, and skip the hold-downs. Three months later the roof has lifted or the frame has racked. The fix is simple: either pour a 100 mm concrete slab with cast-in anchors, or use screw-in earth anchors rated for 1.5 times the calculated uplift. DB Stable’s hot-dip galvanized frame (42 microns) is structurally rated for these loads — but only if you actually secure it to the ground.
Conclusion
Before you commit to a batch of custom stable kits, run this three-point checklist with your supplier. One: Does the quoted FOB price include full torque specs and weld inspection reports for the galvanized frame? Two: Can you witness a sample approval run of the HDPE panels at ambient temperature (15–25°C) to verify the thermal expansion gap? Three: Is the quality tolerance on the roof overlap documented in the contract, not just assumed from a pre-production sample? If the answer to any of these is no, the assembly timeline and final fit will cost you more than the kit itself.
For a full breakdown of the DB Stable kit specifications—including the 42-micron hot-dip galvanized frame, 10mm UV-resistant HDPE boards, and dedicated assembly manual with exploded views—browse the product range and compare configurations directly.
Frequently Asked Questions
What foundation prep is needed for a stable kit?
A concrete or compacted gravel pad is required, with a leveling tolerance of ±10mm across the entire footprint. A 10mm error at the pad can cause a 40mm gap at the roof ridge, so. Check your pad level before unpacking any panels.
How do I handle HDPE panel thermal expansion?
Leave a 3mm gap per panel when inserting them into the frame channels to allow for thermal movement. DB Stable’s 10mm UV-resistant HDPE does not suffer from thermal expansion issues, but the. Always leave that 3mm gap – don’t force panels tight.
What torque is required for frame bolts?
Use the specified torque for M12 bolts when connecting the hot-dip galvanized frame components. Over- or under-torquing can cause alignment issues or strip threads, so follow the assembly manual’s torque table. Use a torque wrench and check the manual for exact values.
What is the biggest mistake in assembly?
Over-tightening HDPE panels causes warping and stress cracks, especially in NZ’s variable climate. Builders also often ignore wind load in exposed areas, leading to structural shifting later. Tighten panels only enough to hold them, and brace for wind.