Veteran distributors in the Oceania equine market know that the real liability isn’t the quality of the hot-dip galvanized steel or the 10mm HDPE panels—it’s the operational failure of the end-client during setup. When you sell flat-pack portable stables to builders and farm managers, your reputation hinges on their ability to install temporary horse stables without concrete, within the 45–75 minute window, and without triggering warranty claims for wobbling frames or racked panels.
Most generic installation guides skip the critical engineering details that actually cause failures on event sites, such as the specific 80 Nm torque requirement for M12 bolts or the necessity of self-square assembly sequences. This guide cuts through the noise with the exact protocols used by professional stable builders in Australia and New Zealand, focusing on reactive clay soil prep, high-wind anchoring specs, and the precise assembly order that prevents the 20-minute delays that kill event timelines.

Ground Preparation for Portable Stables
Improper ground prep causes structural racking, doubling rework costs and voiding warranties.
Most installation failures in Australia and New Zealand stem from skipping site preparation. Distributors and builders face significant liability if a stable racks or sinks during an event. The 12×12 ft hot-dip galvanized steel frame requires a precise foundation to maintain structural integrity under horse pressure.
- Debris Clearance: Remove all rocks, roots, and organic matter. Any obstruction under the frame prevents proper leveling and causes uneven stress on the 42-micron galvanized coating.
- Leveling Tolerance: The ground must be level within ±20mm over the full 12ft span. Use a long spirit level or laser level. Exceeding this tolerance forces the frame to twist, leading to immediate panel misalignment.
- Soft Ground Compaction: For reactive clay soils common in NSW and VIC, or soft turf in NZ, use a plate compactor. Alternatively, lay a 20mm road base layer to create a stable, non-shifting foundation.
- Geotextile Membrane: For temporary events on grass, lay a heavy-duty geotextile membrane before compacting. This prevents the stable legs from sinking into the turf and eliminates mud accumulation under the structure.
Skipping these steps is the primary cause of ‘wobble’ complaints. A stable that racks within 3 event cycles will damage the HDPE panels and compromise safety. Proper preparation ensures the M12 bolts hold their 80 Nm torque spec without shifting.
Panel Assembly: Frames First, Then Walls
Assemble the galvanized frame and roof first; attaching HDPE panels prematurely adds 20 minutes and causes structural racking.
The most common failure in flat pack horse stable assembly is attaching the 10mm HDPE wall panels before the structural frame is fully squared. Competitor guides often skip this critical sequence, leading to misaligned bolt holes and a wobbly stall that fails under horse pressure. To avoid this, you must treat the frame assembly as the primary structural phase.
Begin by laying out the hot-dip galvanized steel base rectangle. Use the provided corner brackets and M12 bolts to connect the sections. Do not tighten the bolts to full torque yet. This allows you to use the ‘self-squaring’ technique: measure the diagonals of the rectangle and adjust the frame until they are equal. Once square, tighten all base bolts to the required 80 Nm torque spec.
Next, install the roof rafters. This step locks the frame’s vertical integrity before you add the heavy HDPE panels. Our production data confirms that this sequence reduces the ‘galvanized steel stable frame assembly time’ to a predictable 45–75 minutes per stall for two workers. Skipping the roof-first step can add 20 minutes of rework per stall.
Only after the roof is secured should you attach the HDPE horse stall panels. The pre-drilled holes in the 42-micron galvanized frame will align perfectly with the panels. This method ensures a rigid, square stall that meets the strict ground level tolerance of ±20mm over 12ft. This sequence is essential for the ‘flat pack horse stable assembly guide Australia’ standards to prevent liability issues.
- Sequence: Base Frame -> Roof Rafters -> Wall Panels. Never attach walls first.
- Self-Squaring: Measure diagonals of the base rectangle. Adjust until equal before final tightening.
- Torque Spec: M12 bolts must reach 80 Nm. Under-torquing causes wobble within 3 event cycles.
- Material: 42-micron hot-dip galvanized steel frame with 10mm UV-resistant HDPE panels.

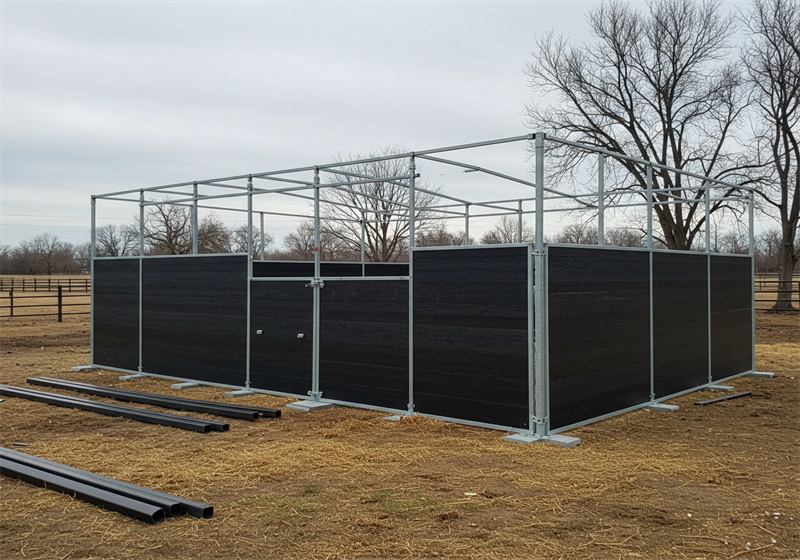
Anchoring Systems: No Concrete Required
Skip concrete.
Most generic installation guides fail to specify the engineering requirements for anchoring portable horse stables, leaving distributors and builders to guess. This lack of precision leads to structural failure when horses lean against walls or when high winds hit. For a standard 12×12 ft stable, you do not need a concrete foundation, but you do need a calculated anchoring strategy that matches the specific wind loads of your region.
- Standard Anchoring Protocol: For standard conditions, install 3 screw-in or spike ground anchors per stable at 45° angles. This configuration provides sufficient lateral stability for typical event setups and ensures the frame remains square under normal horse pressure.
- High-Wind Area Requirements: In coastal regions or high-wind zones (e.g., coastal WA), double your anchor count to 6 per stable. Additionally, implement a ratchet strap system across the roof to prevent uplift. This is a critical safety step for portable stable anchoring for high wind areas, protecting your liability and your client’s investment.
- Safety Risks of Tent Pegs: Never substitute professional ground anchors with standard tent pegs. Tent pegs lack the necessary pull-out resistance and will fail under the dynamic weight of a horse. Our engineering standards require a minimum 50kg pull-out resistance per anchor point to ensure the structure remains secure and does not rack.
Installing Doors, Feeders, and Dividers
Install doors and feeders last.
Do not install doors or feeders until the main frame, roof, and HDPE panels are fully secured. Premature installation of these components restricts the final alignment of the stall and often results in binding tracks or misaligned feeder mounts. For a standard 12×12 ft flat pack horse stable assembly guide Australia or New Zealand, this is the final phase of the step by step horse stall installation kit process.
- Sliding or Hinged Doors: Mount the track to the top horizontal rail. Use a spirit level to ensure the track is perfectly flat; even a 2mm deviation will cause the door to drift or bind. For hinged doors, use heavy-duty galvanized hinges rated for the weight of the HDPE panel. Ensure the latch engages securely into the frame channel to prevent accidental opening by livestock.
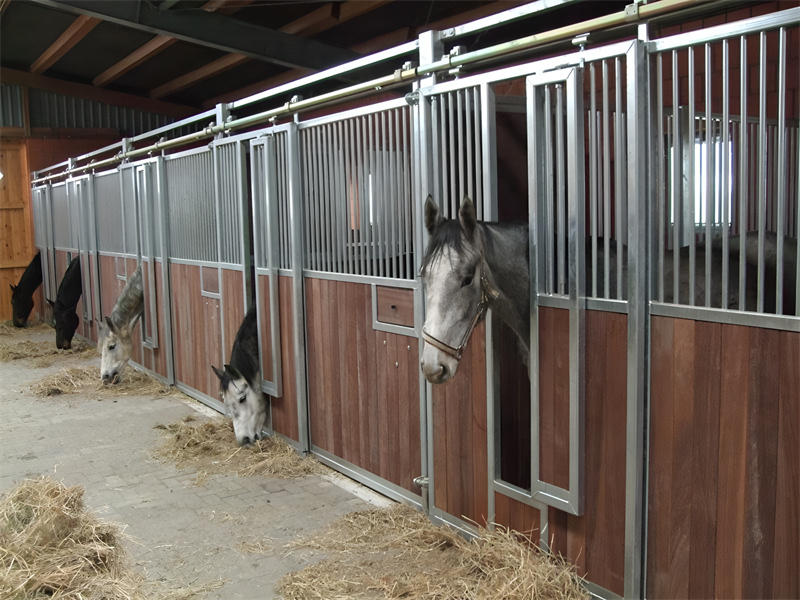
- Aluminum Swivel Feeders: Mount the rust-free aluminum swivel feeder at exactly 1.5 meters from the ground. This height is critical for standard thoroughbreds and warmbloods to eat without bending excessively, which protects their back and neck. Secure the feeder brackets using the provided M12 bolts, ensuring the swivel mechanism rotates freely without hitting the HDPE wall.
- Locking Dividers: In quadruple configurations, dividers lock into a shared vertical channel at the center of the stable block. Ensure the channel is clean and free of debris before sliding the divider in. The locking pins must engage fully to prevent the divider from shifting when horses lean against it. This creates a rigid, shared structural spine for the entire row of stalls.
- Torque and Coating Protection: Torque all visible M12 bolts to a minimum of 80 Nm. Under-torquing leads to frame wobble within three event cycles, a leading cause of panel failure. After tightening, inspect the galvanized coating for scratches caused by the torque wrench or bolts. Apply a zinc-rich touch-up paint to any exposed steel to maintain the 10-year lifespan of the 42-micron coating.

Safety Checklist and Final Inspection
Final inspection protocols prevent hoof entrapment and anchor failure, protecting your liability.
The final inspection phase is where most event setups fail legally. A stable that looks solid from the outside can harbor dangerous defects if not rigorously checked. For distributors in Australia and New Zealand, this checklist is your shield against liability claims arising from equipment failure or injury.
You must verify that the galvanized steel frame is fully assembled and squared before moving to the HDPE panels. Internal bolt protrusions facing the horse must be capped with the included plastic covers. An exposed bolt end is a direct injury risk and a guaranteed complaint from your end-client.
- Bolt Protrusion Check: Inspect all M12 bolt heads and threaded ends. Any protrusion facing inward must be capped with the provided plastic safety caps. This prevents hoof injuries and scratches on the 10mm HDPE panels.
- HDPE Panel Joint Verification: Verify that all HDPE panel joints are flush. Gaps exceeding 5mm can trap a horse’s hoof, leading to severe fractures. If gaps exist, check for debris or misaligned corner brackets before tightening.
- Anchor Tension Test: Test ground anchor tension using a pull scale. The system must resist a minimum of 50kg of pull-out force. Standard setups require 3 anchors; high-wind coastal areas require 6 anchors and ratchet straps.
- Roof Tie-Down Security: Ensure all roof tie-downs are secure. For quadruple configurations, cross-bracing is essential. Loose tie-downs compromise the structure during high winds, violating safety compliance for public events.
Document this inspection. Provide the signed checklist to your event client. This simple step proves due diligence and shifts the operational risk appropriately. It reinforces your reputation as a professional supplier who prioritizes safety over speed.
Conclusion
Mastering the installation of temporary horse stables is the primary defense against liability and operational failure. By strictly adhering to the 80 Nm torque specification for M12 bolts and ensuring the ground is level within ±20mm, you eliminate the structural wobble that causes panel failure under horse pressure. This technical precision transforms a standard flat-pack kit into a secure, professional-grade asset for your end-clients.
Review the complete product specifications and pricing for hot-dip galvanized steel frames and 10mm HDPE panels on the DB Stable catalog page to finalize your sourcing strategy.
Frequently Asked Questions
How is temporary fencing installed?
Install temporary fencing by driving T-posts into the ground at specified intervals and attaching tension bars or wire mesh. Ensure posts are plumb and secure to prevent sagging under horse pressure. Verify post depth and tension before finalizing the run.
What is the best temporary fence for horses?
The best temporary fencing for horses is heavy-duty electric tape or polywire on sturdy T-posts, as it provides high visibility and safe shock absorption. Avoid rigid materials that can cause injury during impact. Prioritize visibility and flexibility for horse safety.
What is the cheapest temporary fencing?
The cheapest temporary fencing option is usually basic polywire or electric tape on standard T-posts, which requires minimal material cost and no concrete. However, ensure it meets local safety regulations for livestock containment. Balance low cost with adequate containment strength.
How far apart should T-posts be?
T-posts should typically be spaced 10 to 12 feet apart for standard electric fencing to maintain tension without excessive sag. Closer spacing may be required for heavier wire or high-wind areas. Adjust spacing based on wire gauge and wind exposure.
How to install stall saver?
Install stall savers by laying the rubber mats flat on a clean, level floor and securing them with adhesive or interlocking edges if designed for it. Ensure the surface is dry to maximize adhesion and. Check manufacturer instructions for specific adhesion requirements.