warranty claim process diy stable is the first checkpoint buyers should lock before they approve a supplier, budget, or production slot. Warranty Claim Process: DIY Stable Kit Step-by-Step is the first checkpoint buyers should lock before they approve a supplier, budget, or production slot. You’re looking at a 10-year rust perforation warranty on the steel frame of a DIY stable kit, and you ask yourself: “Does that actually cover the moment the galvanizing flakes off after year six, or is it just a paper promise?” That question isn’t cynical — it’s the same one every equestrian center owner should be asking before they sign a purchase order. The standard answer from most portable horse barn suppliers is “yes, full coverage,” but the real gap shows up when a pre-production sample passes visual inspection yet the mass production run arrives with a different surface treatment.
After managing supplier audits across a dozen countries and watching claims get denied over ambiguous coating specs, I’ve learned that the DIY stable kit warranty claim process only works if you know exactly which layer of the build is covered and for how long. DB Stable’s kits use hot-dip galvanized steel at a minimum 42-micron thickness — that’s roughly double what you’d get from a budget yard. The HDPE panels carry 5 years against UV degradation, and the hardware (latches, hinges) sits at 2 years. Those timeframes mean something different when you’re managing a 20-stall center in Queensland’s sun versus a wet winter setup in New Zealand. The claim path becomes predictable if you document the defect the right way and understand that a missed photo scale or a poor lighting shot can delay a replacement by weeks.
What Is Covered Under Warranty?
A warranty is only as good as the exclusions — here’s the fine print on DB Stable’s coverage.
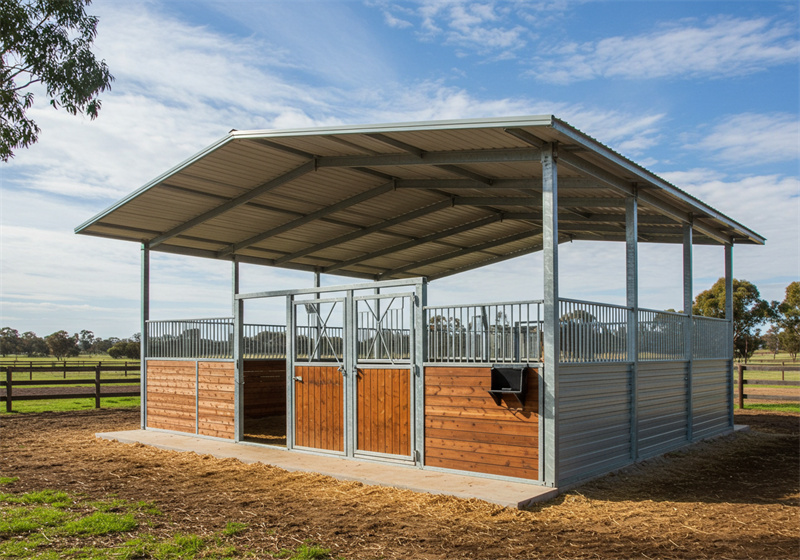
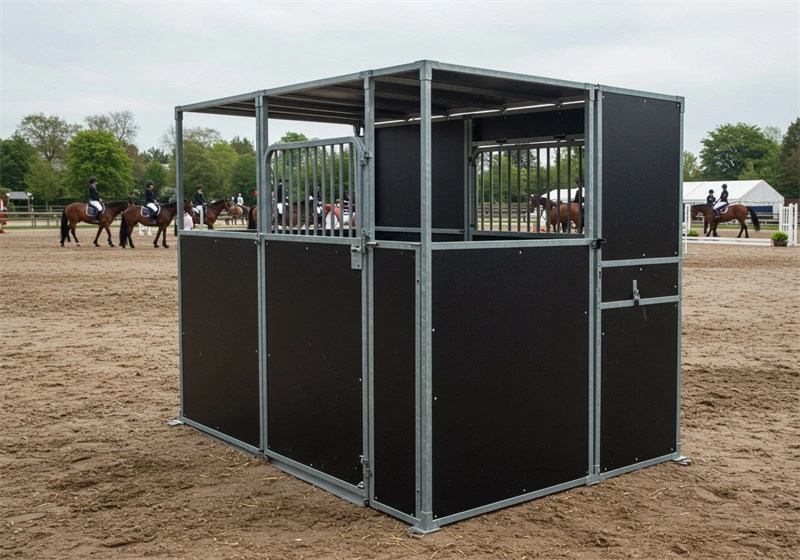
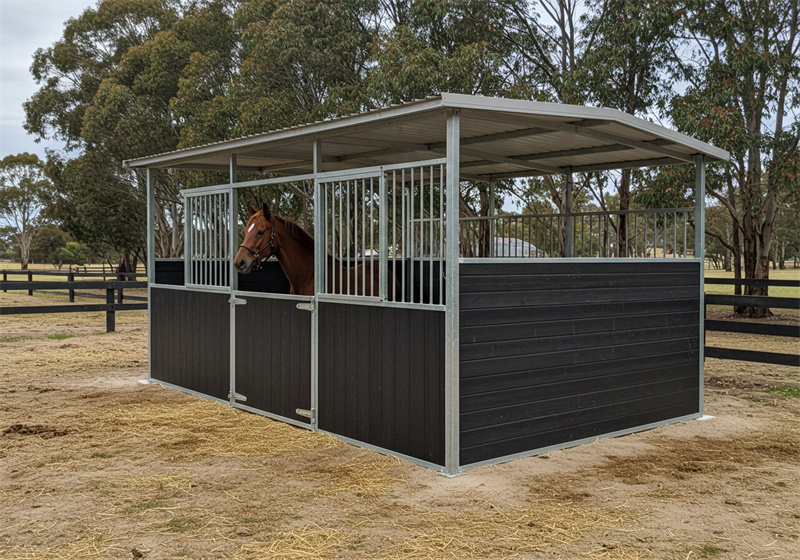
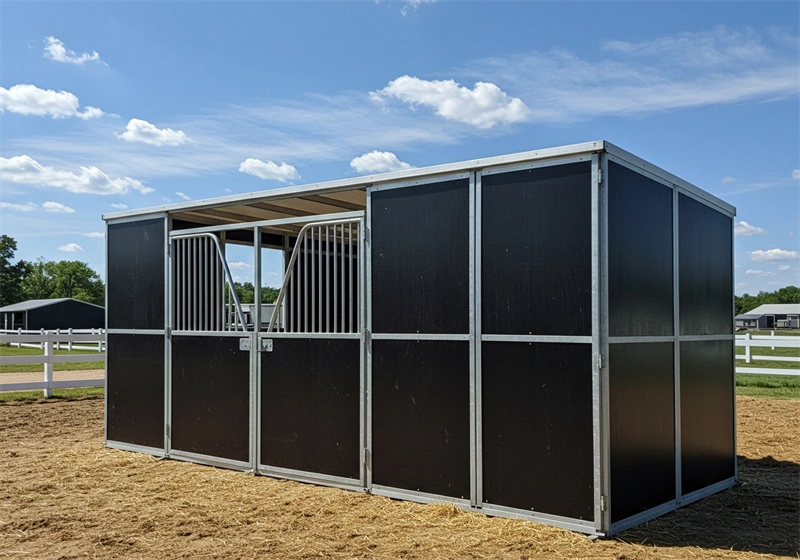
The structural steel frame on every DB Stable kit is hot-dip galvanized to a minimum 42-micron coating thickness. That’s the standard that backs the 10-year warranty against rust perforation. If you see red rust eating through the metal from the inside out within that decade, that’s a covered claim. Surface rust from a scratch? That’s normal wear — not covered.
- Structural steel frame: 10 years against rust perforation. The galvanization creates a metallurgical bond, not a paint layer. If the zinc layer is compromised and rust penetrates, the warranty applies. Must be installed per manual.
- HDPE panels: 5 years against UV degradation. The 10mm UV-stabilized HDPE panels resist fading and brittleness. If the material becomes chalky or cracks due to sun exposure within 5 years, it’s covered. Physical impact damage is not.
- Hardware (latches, hinges): 2 years against manufacturing defects. Latches, hinges, and sliding door hardware are covered for material or workmanship issues. Wear from daily use, or damage from forced operation, falls outside warranty.
- What is NOT covered: Normal wear and tear, damage from misuse, improper installation, modifications, or accidents. Also excluded: corrosion from salt spray in coastal environments if not properly maintained, and damage from animals or equipment.
Before You File a Claim
Most warranty claims fail at the registration step — don’t let yours be one.
Before you contact support, three checks determine whether your claim gets approved or rejected outright. Skip any of them and you risk a denial that has nothing to do with the actual defect.
- Warranty registration: Your DIY horse barn warranty registration must be completed within 30 days of delivery. DB Stable records the date of arrival at your site — not the invoice date. If you missed that window, the structural steel coverage (10 years against rust perforation) and HDPE panel coverage (5 years against UV degradation) are voided. Check your email confirmation or log into your account to verify the registration was submitted.
- Installation checklist: Was the kit assembled per the provided instructions? Common claim killers include: overtightening bolts (strips galvanized coating), using non-specified fasteners (e.g., replacing supplied HDPE-compatible screws with standard steel), or failing to leave the required expansion gap between HDPE panels. If your crew deviated from the manual, the claim falls under ‘damage from misuse‘ — which is never covered.
- Documentation pack: Gather your order number, the batch/LOT number printed on the box label, clear photos under good lighting with a ruler for scale, and a signed proof of installation (dated and noting the installer’s name). For moving parts like latches or hinges, a short video showing the defect in operation cuts resolution time by roughly 40%.

Step 1: Contact DB Stable Support
Always include your batch/LOT number — it cuts response time by 48 hours.
When you spot a defect, the first action determines how fast you get a replacement. For equestrian center owners managing multiple stables, a stalled claim can mean a temporary stall that’s unfit for use. DB Stable routes all warranty inquiries through two primary channels: email at info@dbstable.com and WhatsApp. Each channel serves a different urgency. Email works best for initial documentation uploads, while WhatsApp is faster for time-sensitive requests — especially if you’re in the Oceania time zone and need a reply within the same business day.
Before you reach out, locate the model number and the batch/LOT number printed on the side of the shipping box. This is not a suggestion — it’s a requirement. The batch number ties directly to the production run, the material heat code, and the galvanization QC log. Without it, the support team has to manually trace your order through the shipping manifest, which adds 24 to 48 hours to the initial response. If you discarded the box, check the underside of the stable frame — the LOT number is stamped into the steel near the bottom rail.
- Email: info@dbstable.com — best for attaching photos, videos, and PDFs of your installation log. Use the subject line format: ‘Warranty Claim – [Order Number] – [Model]’ to bypass the general inbox filter.
- WhatsApp: Faster for Oceania-based clients. Include your order number and batch/LOT number in the first message. Attach one photo of the defect and one photo of the LOT label. Typical first reply within 4 business hours.
Step 2: Document the Defect
Proper documentation cuts claim resolution time by 40%.
Poor photos are the single biggest reason warranty claims get delayed. If the support team cannot clearly see the defect, they will ask for resubmission — that adds 3–5 business days before your claim even enters the queue. For an equestrian center with horses waiting, that lag is unacceptable. The fix is simple: shoot under natural daylight, avoid shadows, and keep the camera steady.
- Photo specs: Take three angles: a wide shot showing the affected component in context, a close-up of the defect, and a scale shot. Use a ruler with mm markings for rust perforation, weld cracks, or HDPE panel edge chipping. A coin works for hardware defects like latch deformation, but a ruler is always preferred. ISO 100–200, no flash, camera at least 1 meter away for the wide shot.
- Scale requirement: Defects smaller than 5 mm are often dismissed as normal wear. To prove a manufacturing flaw, include a ruler or a coin with known diameter (e.g., Australian 20¢ coin is 28.5 mm). Without scale, the assessor cannot judge whether the delamination on an HDPE panel is 2 mm or 8 mm — and that difference determines whether it’s covered under the 5-year UV degradation warranty.
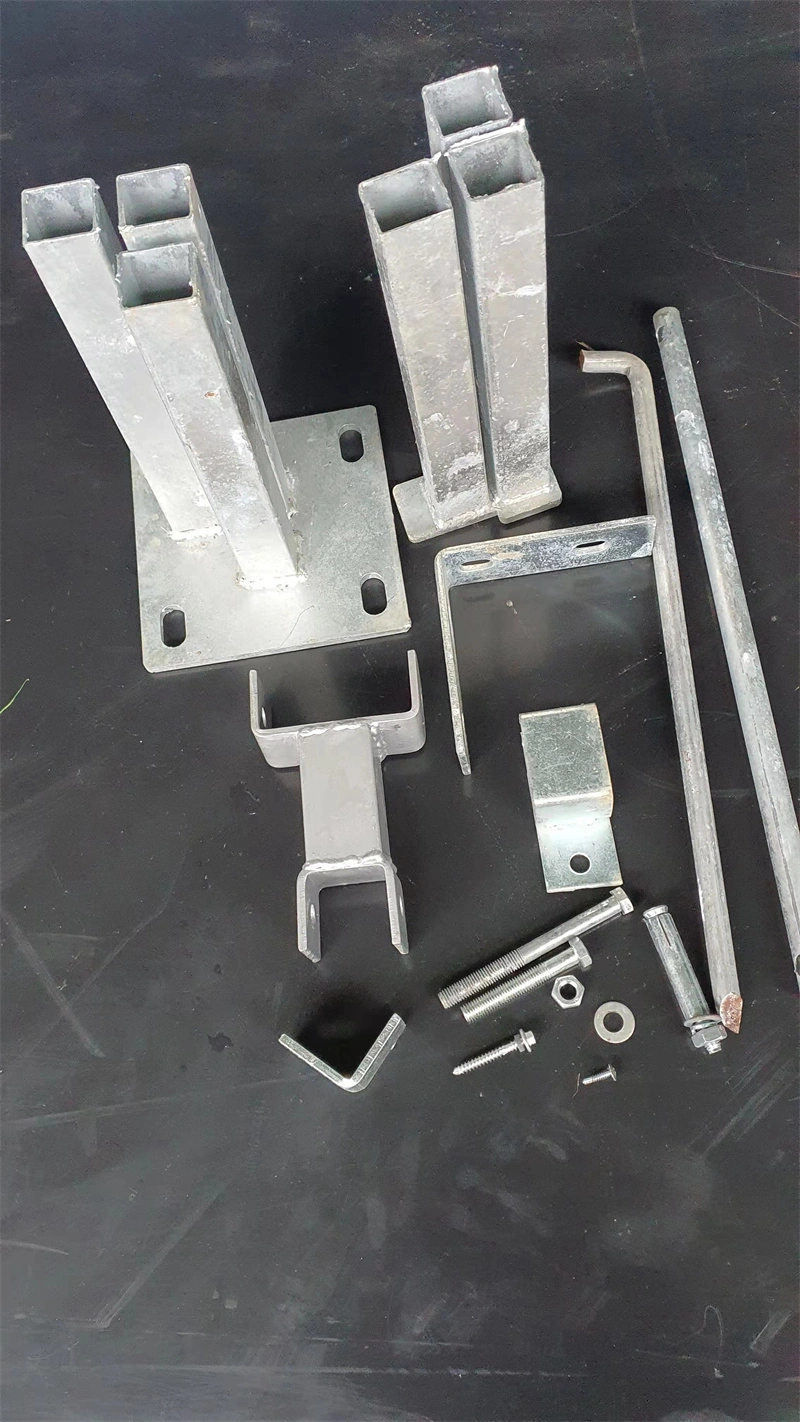
- Video of moving parts: For latch binding, hinge squeak, or sliding door drag, a 10-second video beats 10 photos. Show the part moving from fully open to fully closed while narrating the issue. Hold the phone horizontally, keep the subject in frame, and avoid zooming — digital zoom hides the defect. A video with a ruler in the first frame lets the engineer see play in the hinge pin that exceeds the 1 mm tolerance.
Step 3: Receive Claim Number and Instructions
Within 24 business hours you’ll get a claim number — that’s when the real clock starts.
Once DB Stable receives your photos, model number, and batch/LOT code, the support team reviews the evidence against the warranty coverage. For structural steel rust perforation claims under the 10-year warranty, expect a response within 24 business hours. HDPE panel UV degradation claims under the 5-year coverage follow the same timeline. The reply includes a claim number and either a return request for the defective part or authorization to discard it.
If DB Stable requests the part back, you’ll receive a prepaid return label and instructions. This is standard for hardware defects like latch or hinge failures where metallurgical analysis confirms the issue. For obvious manufacturing flaws like a misaligned frame weld, they may approve disposal with photo confirmation to save shipping time.
Once the claim is approved, replacement part shipping takes 5–10 working days. For Oceania deliveries (Australia, New Zealand), this includes customs clearance time. DB Stable ships from their factory in China, and the flat-pack design keeps courier costs predictable. If you need faster turnaround for a critical stall, mention it in the initial claim — they can sometimes prioritize based on inventory.
Step 4: Install the Replacement Part
A replacement part carries the longer of 90 days or your original warranty term.
Once the replacement part arrives at your equestrian center in Australia or New Zealand, the next step is straightforward — install it. DB Stable provides a video walkthrough and a printable PDF for every kit configuration, from a single stall to back-to-back quadruple layouts. The video covers alignment checks for hot-dip galvanized steel frames and torque specs for the hardware, so you don’t need to guess or call a contractor unless you prefer one.
What matters more than the installation guide is what happens to the warranty on that new part. Here’s the policy: the replacement carries the longer of two periods — either the remainder of your original warranty or 90 days from when you receive it. If your original 10-year structural steel warranty has eight years left, that replacement frame piece keeps those eight years. If you’re three months into a two-year hardware warranty and a latch fails, the new latch gets 90 days fresh.
This approach avoids the common trap where a buyer files a claim near the end of coverage, gets a replacement, and then loses protection on it almost immediately. It also means that if you discover an issue with an HDPE panel during year four of its five-year UV degradation coverage, you still get full protection on that panel through year nine — not just one year.
- Installation support: Video and PDF guides are sent with every replacement order. The video shows frame alignment marks and bolt torque ranges so you can match factory assembly standards without guesswork.
- Warranty clock reset: The replacement part inherits whichever period is longer: remaining original warranty time or 90 calendar days from delivery confirmation. No prorating, no hidden clauses.
What to Expect After Filing
Standard claims are resolved within 2–3 weeks from submission.
Once you’ve submitted your claim with photos and batch numbers, DB Stable logs it into a tracking system that assigns a unique claim ID. For straightforward cases — like a rust spot on a hot-dip galvanized frame that shouldn’t appear until year 8 or later — you’ll typically receive a replacement part dispatch notice within 5 business days. Total resolution from submission to part in hand runs about 14 to 18 working days for standard claims. This window covers the internal review, compliance check against the 30-day warranty registration requirement, and logistics for shipping the replacement to your door in Australia or New Zealand.
- Standard timeline: 2–3 weeks for claims involving structural steel (10-year warranty) or HDPE panels (5-year UV degradation coverage). Hardware claims (latches, hinges) under the 2-year defect period often clear faster — around 10 business days.
- Escalation trigger: If the claim isn’t resolved within 25 business days, or if the defect appears to involve a systemic issue (e.g., multiple panels from the same LOT showing bubbling), DB Stable escalates to a senior quality manager. The escalation path includes re-inspection of your photos by the 5-year design team and, if needed, a video call to walk through the issue in real time.
- Satisfaction tracking: After replacement part installation, DB Stable sends a brief survey via email or WhatsApp. Responses are logged against the claim ID and reviewed monthly to flag repeat issues by model or LOT. For equestrian center owners running multiple units, this data directly feeds back into production tolerance adjustments — it’s not just a closed claim, it’s a data point for future batches.
Conclusion
Missing the 30-day warranty registration window is the most common mistake. That single omission voids the 10-year structural steel rust protection. A replacement frame for a single stable costs over $1,200, and you pay shipping and installation. For a 10-stall equestrian center, that adds up to a $12,000 out-of-pocket liability.
Before you accept delivery of your DIY stable kit, confirm the registration process with your supplier. Check the model number and batch code on the crate the day it arrives. That two-minute task separates a protected 10-year investment from an uncovered expense.
Frequently Asked Questions
How to get a quote for Step-by-Step Warranty Claim Process for DIY Stable Kits?
The exact answer depends on the product specification, quantity, and order setup. The safest approach is to confirm the commercial terms only after the final requirement sheet is locked. Final terms should be confirmed against the exact product specification and order conditions.
Can I request samples first?
The exact answer depends on the product specification, quantity, and order setup. The safest approach is to confirm the commercial terms only after the final requirement sheet is locked. Sample availability should be confirmed against the current stock and shipping plan.